基于 Next.js App Router 与 React、TypeScript 构建
Next.jsReact作品集SaaS启动器
saas-forge-kit — Next.js 作品集模板
作者 Antonio-Tamburello
基于 Next.js 与 React 的 SaaS 启动器模板,内置 Clerk 认证、Neon PostgreSQL + Prisma 数据库与可选的 Stripe 计费,适合快速搭建 SaaS 产品、作品集或实验项目。
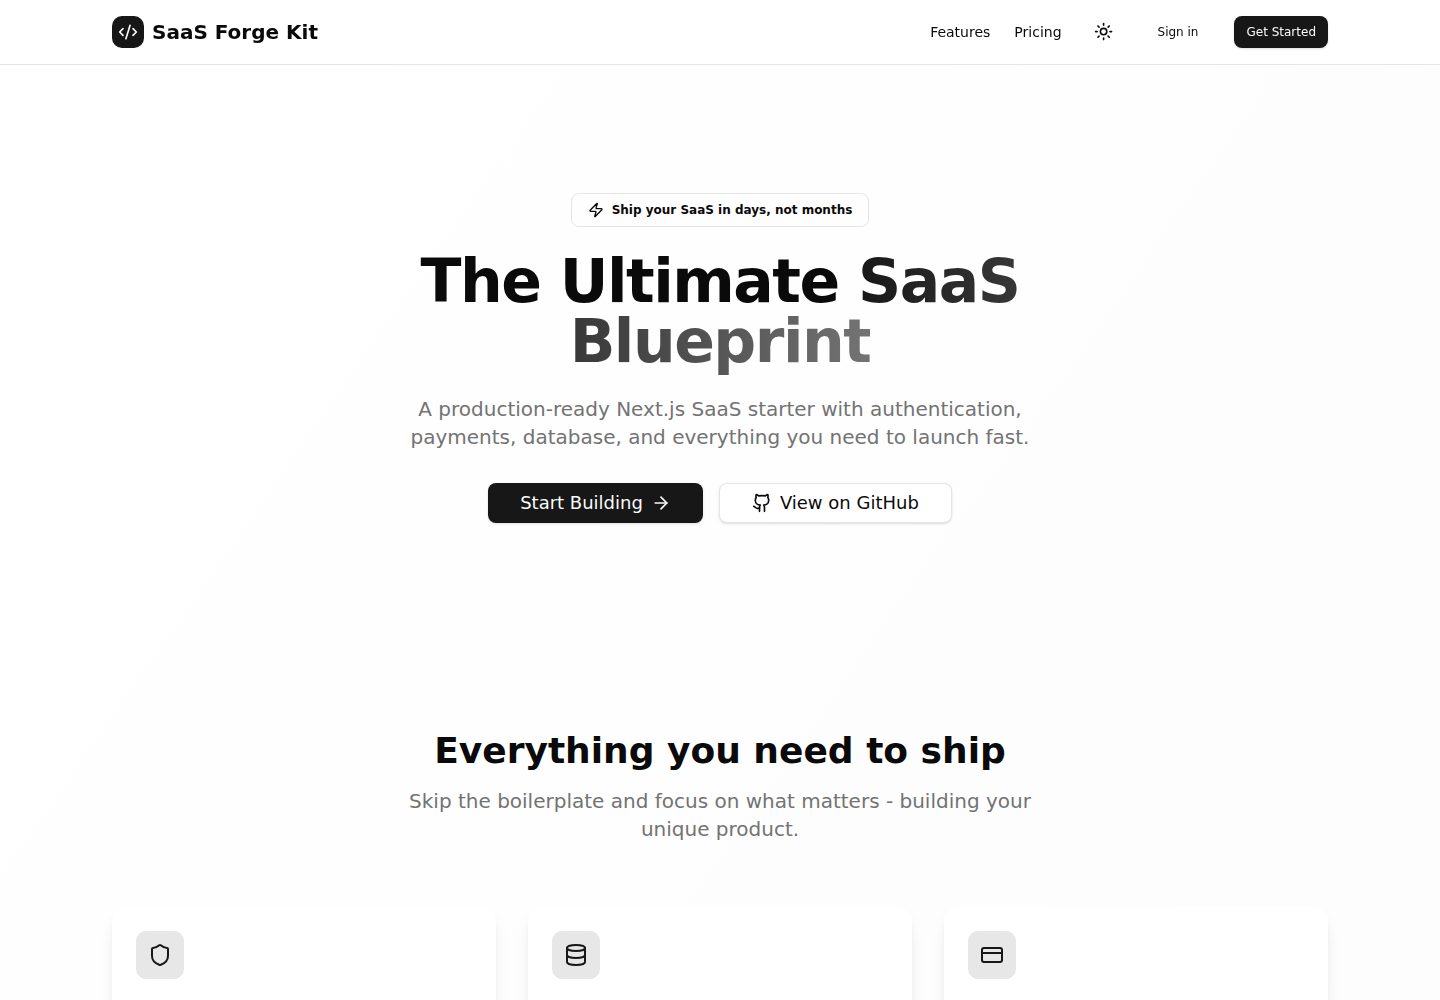
看看你的网站会是什么样
浏览真实页面截图,比较内容排版与手机效果。点击下方缩略图切换,放大查看整页细节。
全部页面与视图 2
截图用于了解视觉与布局,交互效果请以实际项目为准。
采集于 2026-10-02查看来源
值得关注的模板亮点
从已有项目资料中,快速了解它的特点。
集成 Clerk 认证,支持邮箱/密码、社交登录与 MFA
使用 Neon PostgreSQL 与 Prisma ORM 管理数据
可选 Stripe 计费,支持一次性付款与订阅两种模式
采用 Tailwind CSS 与 shadcn/ui 组件,含深色/浅色主题
提供 pnpm 脚本覆盖开发、构建、数据库迁移与 Stripe 本地监听
模板详细介绍
SaaS Forge Kit 是一个面向 SaaS 产品、作品集与实验项目的启动器模板,作者将其定位为「克隆后即可开始写功能」的基础工程,避免重复搭建相同的架构。项目基于 Next.js 与 React,使用 TypeScript 编写,样式采用 Tailwind CSS 与 shadcn/ui 组件,动画依赖 Motion(Framer Motion)。
在功能层面,模板集成了 Clerk 认证(邮箱/密码、社交登录、MFA),数据库使用 Neon PostgreSQL 配合 Prisma ORM,并提供 Stripe 计费集成(默认关闭,可通过环境变量启用,支持一次性付款与订阅两种模式)。项目结构按 App Router 组织,包含 api、auth、dashboard、pricing 等目录,以及 prisma 与 public 资源目录。
使用前需要自行准备外部服务:Clerk 的密钥、Neon 数据库连接串,以及启用计费时的 Stripe 密钥、Webhook 密钥与 Price ID。README 中给出的部署路径为 Vercel,其他平台需 Node.js 18+ 与 Neon PostgreSQL。模板采用 MIT 许可,可免费使用、修改、商用与分发,但演示图片、字体、图标等第三方素材需单独核对许可,域名、托管、数据库、支付等外部服务可能另行收费。
Next.jsReact作品集SaaS启动器
适合你的项目吗?
适用场景
- 快速启动一个带认证与计费能力的 SaaS 产品原型
- 搭建个人作品集或开发者主页
- 作为实验性 Web 项目的工程起点
- 验证 Clerk、Neon、Stripe 与 Next.js 的集成方式
适合人群
- 熟悉 Next.js 与 React 的开发者
- 希望跳过重复架构搭建、直接写业务功能的团队
- 需要认证与可选订阅计费基础的项目
- 接受自行配置 Clerk、Neon 与 Stripe 外部服务的用户
上手与定制指南
结合仓库当前版本的说明,按下面的资料检查内容、配置与运行要求。
- 1
使用 pnpm i 安装依赖,并复制 .env.example 为 .env
- 2
在 Clerk 控制台创建项目并填入 NEXT_PUBLIC_CLERK_PUBLISHABLE_KEY 与 CLERK_SECRET_KEY
- 3
在 Neon 控制台获取数据库连接串并填入 DATABASE_URL
- 4
运行 pnpm db:generate 与 pnpm db:migrate 生成 Prisma 客户端并应用迁移
- 5
计费默认关闭,需设置 ENABLE_BILLING=true 并配置 Stripe 密钥、Webhook 密钥与 Price ID
授权与来源资料
使用条件与限制
免费使用 · 保留许可声明本次收录的是公开仓库中采用 MIT 许可的免费版本;免费范围为该版本代码,不代表外部服务或第三方素材免费。
使用时需要遵守
- 允许免费使用、修改、商用和分发该版本代码。
- 分发代码副本或实质性部分时,保留原作者版权声明和完整 MIT 许可声明。
- 代码按现状提供;担保与责任限制以原许可证及适用法律为准。
额外费用与待核对事项
- 使用认证功能需自行注册 Clerk 账号并获取密钥,属于外部服务依赖,可能产生费用。
- 数据库依赖 Neon PostgreSQL 外部服务,需自行注册并配置连接串,可能产生费用。
- 启用计费功能需自行配置 Stripe 密钥、Webhook 密钥与 Price ID,属于外部付费服务。
- 部署路径以 Vercel 为主,其他平台需 Node.js 18+ 与 Neon PostgreSQL,托管可能另行收费。
- 演示图片、字体、图标及其他第三方素材需按各自许可核对,不能仅凭代码的 MIT 许可判断。
- 域名、托管、数据库、支付或 AI 等外部服务可能另外收费。
查看原文依据
Permission is hereby granted, free of charge
许可证原文
Add your Clerk keys from https://dashboard.clerk.com
README 原文
Add your Neon database URL from https://console.neon.tech
README 原文
Configure Stripe variables:
README 原文
https://github.com/Antonio-Tamburello/saas-forge-kit/blob/main/LICENSEhttps://github.com/Antonio-Tamburello/saas-forge-kit/blob/main/README.mdThis project is optimized for deployment on Vercel:
README 原文
DeepSeek 根据仓库许可证和 README 整理 ·2026-10-02。结果仅覆盖已读取资料,依赖、图片、字体及后续条款变更以各自原文为准。
项目核对记录与介绍依据
模板资料
- 来源平台
- GitHub
- 资料与维护参考分
- 资料较完整 · 88 / 100
- 技术栈
- Next.js · React
- 网站类型
- 作品集 · SaaS · 启动器
这个分数如何计算
本站按许可资料(最高30分)、演示链接(12分)、预览图(10分)、Star数(15分)、记录的维护时间(15分)、描述完整度(8分)、功能记录(5分)和分类资料(5分)计算。它不是代码、安全或性能测试,也不是 Google 评分;有链接不代表已实测可用。
这个项目需要核对什么
- 记录的仓库更新时间
- 2026-03-26
- 截图检查日期
- 2026-10-02
已收录演示链接。请用你的内容与屏幕尺寸检查;有演示不代表表单、认证或支付已经可用。
目录记录的主要技术栈是 Next.js。请通过依赖清单和锁文件核对实际版本与托管要求。这些说明基于收录资料,不代表代码审计或部署实测。
查看具体选型方法 →介绍的制作与核对状态
介绍由 AI 辅助整理目录与仓库资料。仓库作者不等于这篇介绍的审核者。
已完成服务器许可规则与 AI 来源核对;未经过人工编辑审核。
查看当时使用的来源资料
SHA-256: 3bdb80f26610c41997a0f4dbabd8f11135bb26a7d81e707e9377fa854529602b
2026-10-02T22:12:33.073Z
来源文件 / 仓库# 🚀 SaaS Forge Kit A modern, production-ready SaaS boilerplate with authentication, billing, and deployment-ready features. ## ✨ Features - **🏗️ Framework**: Next.js 16 with App Router - **🗃️ Database**: Neon PostgreSQL with Prisma ORM - **🎨 Styling**: Tailwind CSS with shadcn/ui components - **🔐 Authentication**: Clerk (Email/Password, Social Login, MFA) - **💳 Billing**: Stripe integration with subscription & one-time payments (optional) - **📱 UI/UX**: Responsive design with dark/light theme - **🎬 Animations**: Motion (Framer Motion) ready - **⚡ Performance**: Neon serverless driver optimized for Vercel Edge - **🛡️ Type Safety**: Full TypeScript support with Zod validation - **📦 Package Manager**: pnpm for fast, efficient installs ## 🚀 Quick Start ```bash # Clone and install dependencies pnpm i # Setup environment cp .env.example .env # Add your Clerk keys from https://dashboard.clerk.com # Add your Neon database URL from https://console.neon.tech # Generate Prisma client and apply migrations pnpm db:generate pnpm db:migrate # Start development server pnpm dev ``` Open: http://localhost:3000 ## 🔧 Configuration ### 🔐 Authentication (Clerk) 1. Create a project at [dashboard.clerk.com](https://dashboard.clerk.com) 2. Copy your keys to `.env`: ```env NEXT_PUBLIC_CLERK_PUBLISHABLE_KEY=pk_test_... CLERK_SECRET_KEY=sk_test_... ``` 3. Configure social providers (Google, GitHub, etc.) directly in the Clerk dashboard — no code changes needed. ### 💳 Stripe Billing (Optional) By default, billing is disabled: ```env ENABLE_BILLING=false ``` To enable billing: 1. Set `ENABLE_BILLING=true` 2. Configure Stripe variables: ```env STRIPE_SECRET_KEY=sk_... STRIPE_WEBHOOK_SECRET=whsec_... ``` 3. Choose billing mode: ```env BILLING_MODE=payment # One-time payments BILLING_MODE=subscription # Recurring subscriptions ``` 4. Add your Stripe Price IDs: ```env # For subscription mode STRIPE_PRICE_ID_SUBSCRIPTION=price_... # For payment mode STRIPE_PRICE_ID_STARTER=price_... STRIPE_PRICE_ID_PRO=price_... STRIPE_PRICE_ID_ENTERPRISE=price_... ``` Listen to webhooks locally: ```bash pnpm stripe:listen ``` ## 📁 Project Structure ``` ├── src/ │ ├── app/ # Next.js App Router pages │ │ ├── api/ # API routes │ │ ├── auth/ # Authentication pages (Clerk) │ │ ├── dashboard/ # Protected dashboard │ │ └── pricing/ # Pricing page │ ├── components/ # Reusable UI components │ ├── lib/ # Utility functions and configs │ └── server/ # Server-side utilities ├── prisma/ # Database schema and migrations └── public/ # Static assets ``` ## 🛠️ Available Scripts ```bash pnpm dev # Start development server pnpm build # Build for production pnpm start # Start production server pnpm db:generate # Generate Prisma client pnpm db:migrate # Run database migrations pnpm db:studio # Open Prisma Studio pnpm stripe:listen # Listen to Stripe webhooks locally ``` ## 🏗️ Tech Stack Details - **Frontend**: Next.js 16, React, TypeScript - **Styling**: Tailwind CSS, shadcn/ui, Radix UI - **Animations**: Motion (Framer Motion) - **Database**: Neon PostgreSQL, Prisma ORM - **Authentication**: Clerk - **Payments**: Stripe - **Deployment**: Vercel-ready - **Development**: pnpm ## 📝 Environment Variables Copy `.env.example` to `.env` and configure: ```env # App Configuration NEXT_PUBLIC_APP_URL=http://localhost:3000 DATABASE_URL=postgresql://[email protected]/dbname # Clerk Authentication NEXT_PUBLIC_CLERK_PUBLISHABLE_KEY=pk_test_... CLERK_SECRET_KEY=sk_test_... # Stripe Billing (Optional) ENABLE_BILLING=false BILLING_MODE=payment STRIPE_SECRET_KEY=sk_test_... STRIPE_WEBHOOK_SECRET=whsec_... ``` ## 🚀 Deployment This project is optimized for deployment on Vercel: 1. Push your code to GitHub 2. Import project in Vercel 3. Configure environment variables 4. Deploy! For other platforms, ensure you have Node.js 18+ and a Neon PostgreSQL database. ## 💡 Key Features Explained ### Dynamic Pricing - Prices are fetched directly from Stripe in real-time - Supports both one-time payments and subscriptions - Prevents duplicate subscriptions with smart UI states ### Smart Billing Logic - **Free Tier**: Users see all available plans - **Paid Tier**: Users see upgrade/downgrade options (excluding current plan) - **Real-time Updates**: Billing history with cancellation tracking ### Production Ready - TypeScript for type safety - Zod for runtime validation - Error boundaries and loading states - SEO optimized with metadata API ## 🤝 Contributing 1. Fork the repository 2. Create your feature branch (`git checkout -b feature/amazing-feature`) 3. Commit your changes (`git commit -m 'Add some amazing feature'`) 4. Push to the branch (`git push origin feature/amazing-feature`) 5. Open a Pull Request ## 📄 License This project is open source and available under the [MIT License](LICENSE). ## 👨💻 Author **Antonio Tamburello** - 🔗 LinkedIn: [https://www.linkedin.com/in/antonio-tamburello/](https://www.linkedin.com/in/antonio-tamburello/) - 🐙 GitHub: [https://github.com/Antonio-Tamburello](https://github.com/Antonio-Tamburello) --- *Built with ❤️ for developers who want to ship fast* 🚀
看看同类模板
对比同技术栈与用途的模板,找到更适合的视觉与内容结构。
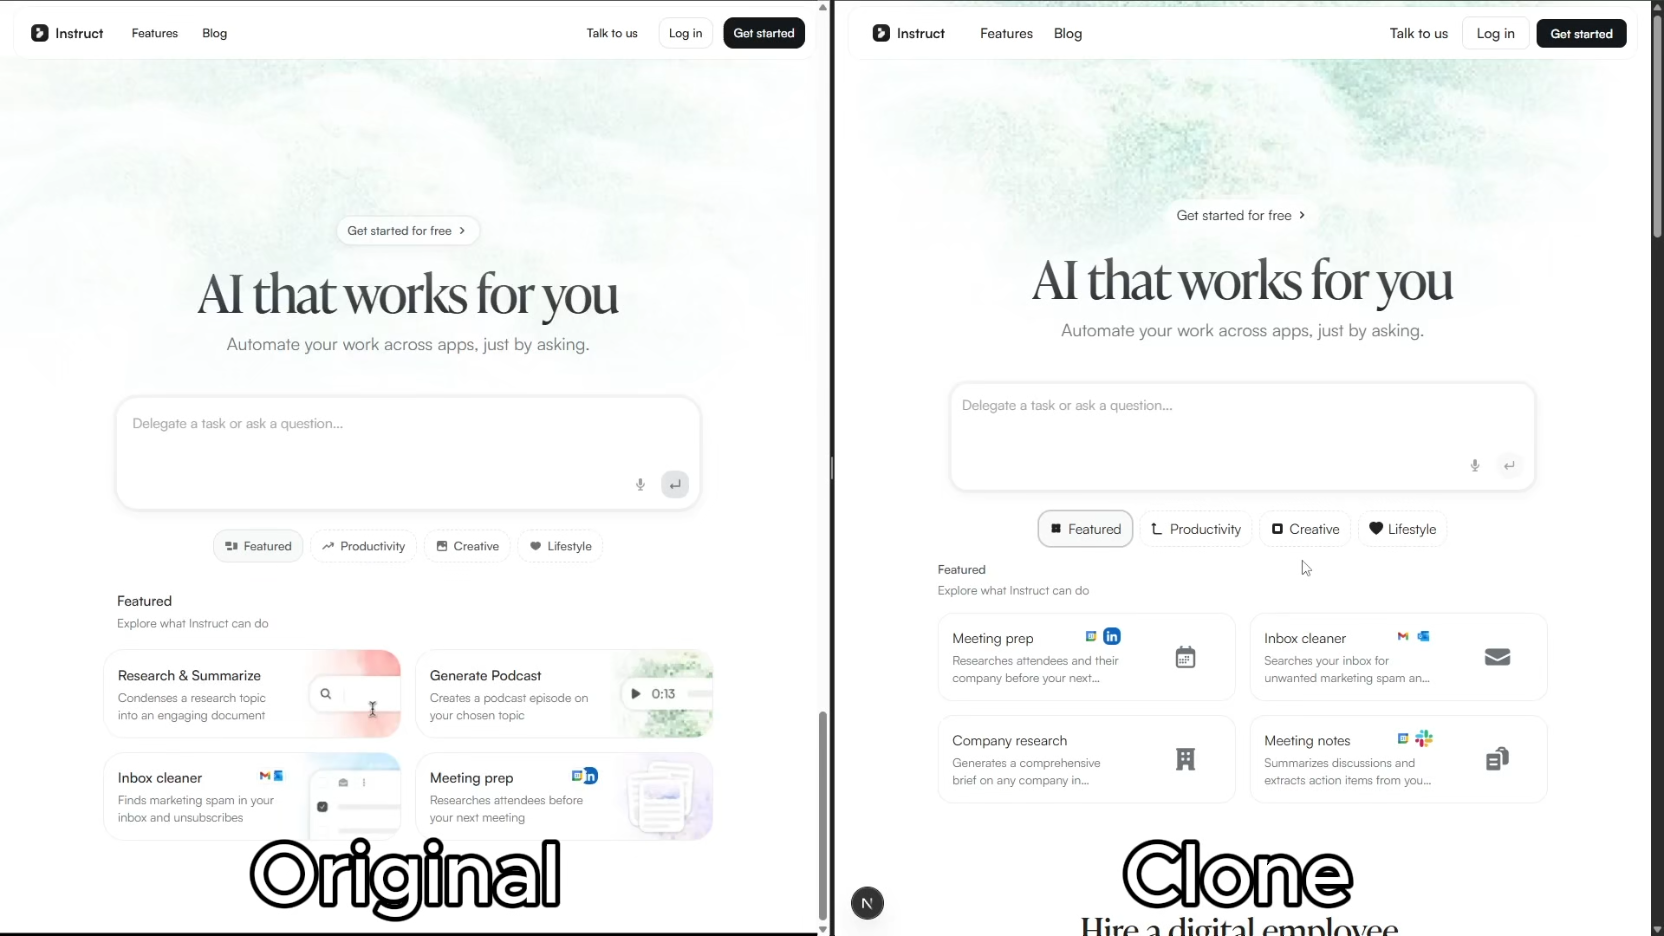
ai-website-cloner-template
Clone any website with one command using AI coding agents
Next.js · 启动器

Next.js SaaS Starter
Next.js SaaS Starter 是 Next.js 官方维护的 SaaS 起点模板,定位介于学习资源和可直接部署的脚手架之间。
Next.js · SaaS

Next.js Commerce
Next.js Commerce 是 Vercel 团队维护的电商启动模板,基于 Next.js App Router 构建,采用服务端渲染、React Server Components、Server Actions …
Next.js · 电商

Next-js-Boilerplate
Next-js-Boilerplate 是一个面向 Next.js 16、Tailwind CSS 4 和 TypeScript 的启动器,核心定位是开发者体验优先。
Next.js · 启动器

tailwind-nextjs-starter-blog
tailwind-nextjs-starter-blog 是一个面向个人技术博客的 Next.js 与 Tailwind CSS 启动模板,其 v2 版本基于 App Router 与 React Server Comp…
Next.js · 博客

next-forge
Production-grade Turborepo template for Next.js apps.
Next.js · 启动器