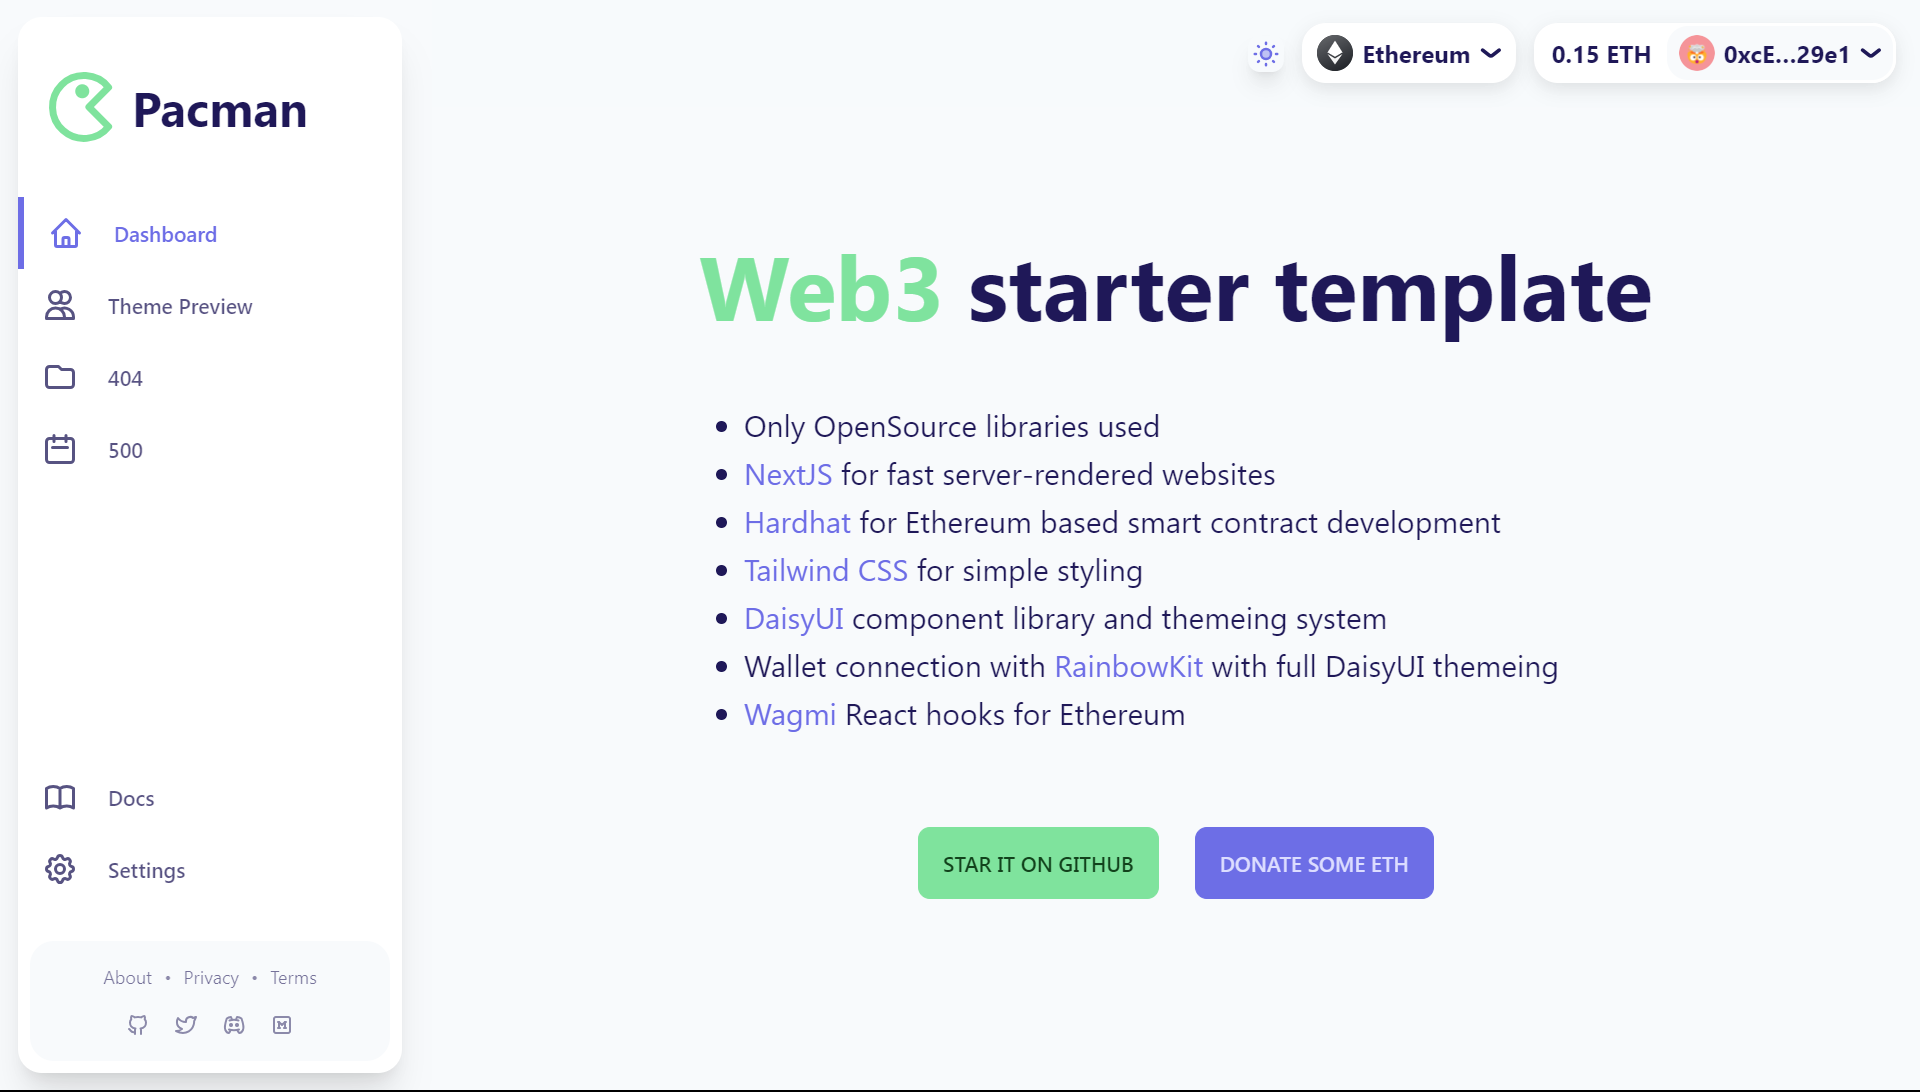
集成 Hardhat,用于以太坊智能合约开发与链上交互
Next.jsReact后台启动器
hardhat-nextjs-starter-dashboard — Next.js 后台模板
作者 JonnysCode
基于 Next.js、Hardhat 与 Tailwind CSS 的 Web3 DApp 后台启动模板,内置 RainbowKit 钱包连接与 Wagmi React Hooks,提供浅色、深色及多套备选主题界面。
看看你的网站会是什么样
浏览真实页面截图,比较内容排版与手机效果。点击下方缩略图切换,放大查看整页细节。
目前有 1 张原始预览,可打开完整图片查看设计细节。
截图用于了解视觉与布局,交互效果请以实际项目为准。
采集于 2026-10-03查看来源
值得关注的模板亮点
从已有项目资料中,快速了解它的特点。
内置 RainbowKit 钱包连接与 Wagmi React Hooks
使用 Tailwind CSS 与 DaisyUI 构建界面和主题系统
提供浅色、深色及 lofi、cyber 等多套主题截图示例
以 .env.example 说明所需环境变量,便于本地启动
模板详细介绍
这是一个面向 Web3 去中心化应用的后台仪表盘启动模板,将 Next.js 前端、Hardhat 智能合约开发框架与 Tailwind CSS 样式方案组合在一起,并引入 DaisyUI 作为组件与主题系统。模板已集成 RainbowKit 用于钱包连接,以及 Wagmi 的 React Hooks 用于与以太坊智能合约交互,因此适合作为 DApp 后台界面的起点,而非从零搭建钱包连接与合约调用层。
界面方面,仓库截图展示了浅色、深色以及 lofi、cyber 等备选主题,说明模板在视觉层提供了可切换的主题样式。使用流程为克隆仓库、安装依赖、参照 .env.example 配置环境变量,然后运行开发服务器在本地预览。
限制方面,该模板定位为启动器,仓库未提供生产部署、性能或安全审计方面的说明;外部服务与第三方素材的授权需单独核对,代码本身采用 MIT 许可。
Next.js后台启动器
适合你的项目吗?
适用场景
- 搭建需要连接以太坊钱包的 DApp 后台界面
- 在 Next.js 项目中快速引入 Hardhat 合约开发流程
- 需要多套主题切换的 Web3 数据仪表盘原型
- 作为学习 RainbowKit 与 Wagmi 集成的起步项目
适合人群
- 开发 Web3 DApp 后台界面的前端开发者
- 需要现成钱包连接与合约交互层起点的团队
- 希望以 Next.js 与 Tailwind CSS 快速搭建原型的个人开发者
上手与定制指南
结合仓库当前版本的说明,按下面的资料检查内容、配置与运行要求。
- 1
克隆仓库后在本地运行 npm install 安装依赖
- 2
参照 .env.example 配置所需环境变量
- 3
运行 npm run dev 启动开发服务器,并访问 http://localhost:3000 预览
- 4
代码采用 MIT 许可,分发时需保留版权与许可声明
- 5
演示图片、字体、图标等第三方素材需按各自许可单独核对
授权与来源资料
使用条件与限制
免费使用 · 保留许可声明本次收录的是公开仓库中采用 MIT 许可的免费版本;免费范围为该版本代码,不代表外部服务或第三方素材免费。
使用时需要遵守
- 允许免费使用、修改、商用和分发该版本代码。
- 分发代码副本或实质性部分时,保留原作者版权声明和完整 MIT 许可声明。
- 代码按现状提供;担保与责任限制以原许可证及适用法律为准。
额外费用与待核对事项
- 演示图片、字体、图标及其他第三方素材需按各自许可核对,不能仅凭代码的 MIT 许可判断。
- 域名、托管、数据库、支付或 AI 等外部服务可能另外收费。
查看原文依据
https://github.com/JonnysCode/hardhat-nextjs-starter-dashboard/blob/main/LICENSE.mdhttps://github.com/JonnysCode/hardhat-nextjs-starter-dashboard/blob/main/README.mdPermission is hereby granted, free of charge
许可证原文
DeepSeek 根据仓库许可证和 README 整理 ·2026-10-03。结果仅覆盖已读取资料,依赖、图片、字体及后续条款变更以各自原文为准。
项目核对记录与介绍依据
模板资料
- 来源平台
- GitHub
- 资料与维护参考分
- 资料一般 · 65 / 100
- 技术栈
- Next.js · React
- 网站类型
- 后台 · 启动器
这个分数如何计算
本站按许可资料(最高30分)、演示链接(12分)、预览图(10分)、Star数(15分)、记录的维护时间(15分)、描述完整度(8分)、功能记录(5分)和分类资料(5分)计算。它不是代码、安全或性能测试,也不是 Google 评分;有链接不代表已实测可用。
这个项目需要核对什么
- 记录的仓库更新时间
- 2023-07-02
- 截图检查日期
- 2026-10-03
目前没有记录演示链接。请依据仓库说明在本地评估;仅凭截图无法确认交互行为。
目录记录的主要技术栈是 Next.js。请通过依赖清单和锁文件核对实际版本与托管要求。这些说明基于收录资料,不代表代码审计或部署实测。
查看具体选型方法 →介绍的制作与核对状态
介绍由 AI 辅助整理目录与仓库资料。仓库作者不等于这篇介绍的审核者。
审核声明: [email protected] · 2026-10-04
查看当时使用的来源资料
SHA-256: 646815f1649bea525e91c2fe32c6809d598a609579be840bd389766ff3e9edc5
2026-10-03T15:53:47.710Z
来源文件 / 仓库# 🚀 Web3 Starter Dashboard Template Welcome to the Web3 Starter Dashboard Template! This template provides a powerful starting point for building your own web3 applications. It combines open-source libraries and frameworks to create a seamless development experience for building fast, secure, and stylish decentralized applications. ## Features - 💻 NextJS: Fast server-rendered websites for optimal performance and SEO. - 🏗️ Hardhat: Ethereum-based smart contract development framework for seamless integration with the Ethereum blockchain. - 🎨 Tailwind CSS: Simple and intuitive styling framework for beautiful user interfaces. - 🌼 DaisyUI: Component library and themeing system for creating stunning UI designs effortlessly. - 💼 Wallet Connection: Seamless integration with RainbowKit for easy wallet connection, enabling users to interact with Ethereum securely. - ⚡️ Wagmi React Hooks: Powerful React hooks for Ethereum, making it easier to interact with Ethereum smart contracts. ## Screenshots ### Light Theme    ### Dark Theme   ### Alternative Themes   ## Getting Started To get started with the Web3 Starter Dashboard Template, follow these steps: 1. Clone this repository to your local machine. 2. Install the necessary dependencies by running the command: ``` npm install ``` 3. Configure the required environment variables. Refer to the `.env.example` file for the necessary variables. 4. Customize and build your application according to your project requirements. 5. Start the development server using the command: ``` npm run dev ``` 6. Open your web browser and visit `http://localhost:3000` to see your web3 dashboard in action! ## Contributing We welcome contributions to enhance and improve the Web3 Starter Dashboard Template. Feel free to open pull requests for bug fixes, new features, or improvements. Please refer to the [Contribution Guidelines](CONTRIBUTING.md) for more details. ## License This project is licensed under the [MIT License](LICENSE). --- We hope this Web3 Starter Dashboard Template empowers you to create amazing decentralized applications! Feel free to customize and modify it to suit your specific needs. If you encounter any issues or have any questions, don't hesitate to reach out. Happy building! 🎉
看看同类模板
对比同技术栈与用途的模板,找到更适合的视觉与内容结构。
ai-website-cloner-template
Clone any website with one command using AI coding agents
Next.js · 启动器

Next.js SaaS Starter
Next.js SaaS Starter 是 Next.js 官方维护的 SaaS 起点模板,定位介于学习资源和可直接部署的脚手架之间。
Next.js · SaaS

Next.js Commerce
Next.js Commerce 是 Vercel 团队维护的电商启动模板,基于 Next.js App Router 构建,采用服务端渲染、React Server Components、Server Actions …
Next.js · 电商

Next-js-Boilerplate
Next-js-Boilerplate 是一个面向 Next.js 16、Tailwind CSS 4 和 TypeScript 的启动器,核心定位是开发者体验优先。
Next.js · 启动器

tailwind-nextjs-starter-blog
tailwind-nextjs-starter-blog 是一个面向个人技术博客的 Next.js 与 Tailwind CSS 启动模板,其 v2 版本基于 App Router 与 React Server Comp…
Next.js · 博客

next-forge
Production-grade Turborepo template for Next.js apps.
Next.js · 启动器