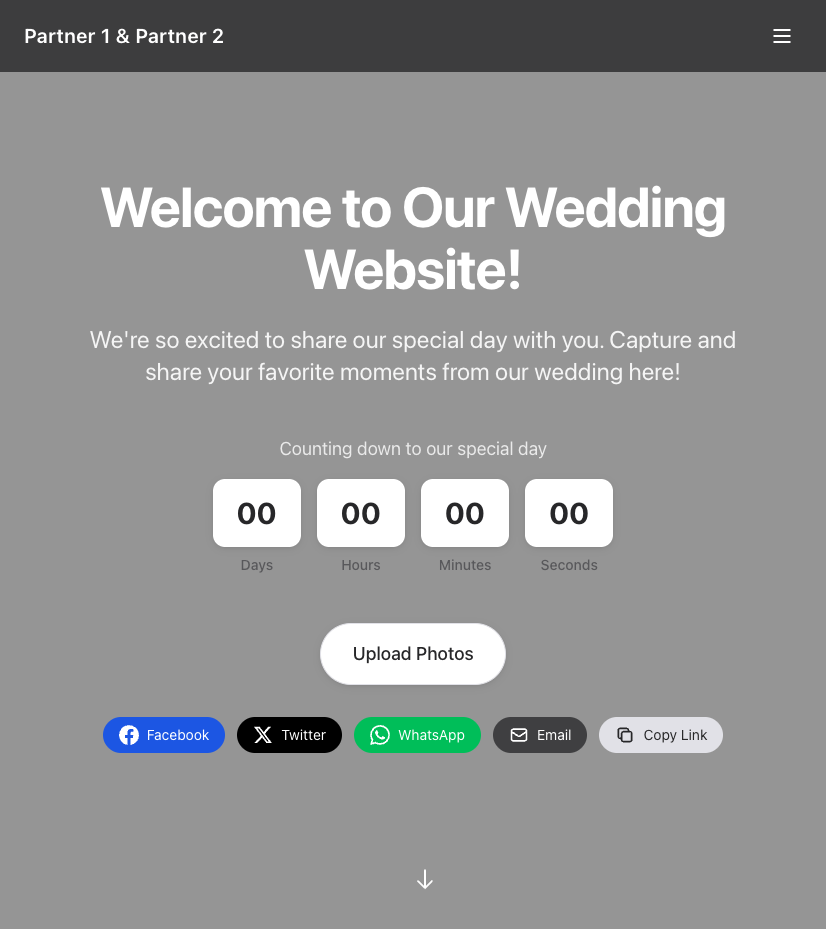
Built with React and Tailwind CSS, with page modules enabled or disabled via toggles in siteConfig.js
ReactStarter
wedding-invite — React Starter Template
By kbichave
A React and Tailwind CSS wedding invitation website template that stores blessings and photos via Google Sheets and Google Drive, with support for RSVP, event display, and multicultural wedding configuration.
Explore the design
Compare the page layouts and mobile experience. Open any screenshot for a closer look.
Author preview
Author-provided previewTop of page
Preview provided in the project README.
One original preview is available. Open the full image to inspect the design.
Screenshots show visual appearance; interactive behavior may differ.
Recorded 2026-10-02View source
What stands out
A quick read of the recorded project description.
Blessing messages are written to Google Sheets, and guest-uploaded photos are stored in Google Drive and displayed in the gallery
Provides pages for RSVP, event list, wedding team, gift registry, travel and accommodation, FAQ, and timeline
Preset event and terminology configurations for Hindu and Christian weddings, with support for custom wedding types
Includes env.example.txt and step-by-step Google Cloud, Sheets, and Drive configuration instructions
Template Details
This is a wedding invitation website template built with React and Tailwind CSS, released under the ISC license and self-deployable. The template stores blessing messages in Google Sheets and guest-uploaded photos in Google Drive, and provides page modules for RSVP, event display, photo gallery, wedding team, gift registry, travel and accommodation, FAQ, and relationship timeline. All feature modules are controlled by toggles in src/siteConfig.js and are enabled by default. The template includes preset event and terminology configurations for Hindu and Christian wedding types, and also supports custom wedding types. Content and image paths are modified centrally in siteConfig.js, and styling is adjusted via Tailwind CSS. Before use, you need to prepare a Google Cloud service account and configure the Drive and Sheets APIs; Netlify can be used for deployment. The template itself does not include a backend service; data storage relies on the aforementioned Google services, and licenses for third-party assets must be verified separately.
ReactStarter
Is it right for your project?
Use Cases
- Couples who want to self-host a wedding invitation website and collect guest RSVPs and blessing messages
- Scenarios where guests need to upload wedding photos and have them displayed centrally in a gallery
- Users who want to quickly build event pages starting from a Hindu or Christian wedding流程
- Customization needs where page modules are trimmed via toggles to keep only some features
Suitable For
- Developers with basic React and npm experience who can configure environment variables according to the documentation
- Deployment approaches that accept using Google Sheets and Google Drive as data storage
- Personal projects needing a free, self-deployable wedding invitation website template
Getting started & customization
Use these recorded setup notes alongside the repository instructions for your chosen version.
- 1
Requires a Node.js environment; after cloning the repository, run npm install and start the local development server with npm start
- 2
Need to create a project in Google Cloud Console, enable the Drive and Sheets APIs, and create a service account and JSON key
- 3
Share the Google Drive folder and Google Sheets spreadsheet with the service account email and grant edit permissions
- 4
Copy env.example.txt to .env and fill in variables such as GOOGLE_SERVICE_ACCOUNT_JSON, GOOGLE_DRIVE_FOLDER_ID, and GOOGLE_SPREADSHEET_ID; do not commit .env
- 5
When deploying to Netlify, add the same environment variables in the site settings; the build command is npm run build and the publish directory is build
License & source material
Usage conditions & limitations
Free to use · keep license noticeThis entry covers the free version under the ISC license in the public repository; the free scope applies to that version's code and does not mean external services or third-party assets are free.
Must comply with when using
- Permits free use, copying, modification, and distribution for any purpose, including commercial use.
- All copies must retain the original copyright notice and license notice.
- The code is provided as is; warranties and limitations of liability are governed by the original license and applicable law.
Additional costs & items to verify
- Using this template requires a Google account for storing data in Google Drive and Google Sheets.
- Deployment hosting requires a Netlify account; the template itself does not provide backend hosting services.
- You need to create a project in Google Cloud Console and enable the Google Drive API and Google Sheets API; otherwise, photo upload and blessing message features will not work.
- You must create a Google Cloud service account and generate a JSON key for accessing Drive and Sheets.
- You need to share the Google Drive folder and Google Sheets spreadsheet with the service account email and grant edit permissions; otherwise, reads and writes will fail.
- You must configure environment variables such as GOOGLE_SERVICE_ACCOUNT_JSON in .env; the template depends on these external credentials to run.
- The photo gallery requires the Google Drive folder to be set to "anyone with the link" can view for proper display, involving public sharing settings.
- A custom domain requires paying on your own (about $10-15 per year); it is not required but is an additional cost.
- Demo images, fonts, icons, and other third-party assets must be checked against their respective licenses and cannot be judged solely by the code's ISC license.
- External services such as domains, hosting, databases, payments, or AI may incur separate charges.
View Original Text Basis
for any purpose with or without fee is hereby granted
Original License Text
A Google account (FREE) - for Drive and Sheets
Original README
A Netlify account (FREE) - for hosting
Original README
Enable API access for Drive and Sheets
Original README
Create Service Account:
Original README
Share Folders/Sheets with Service Account
Original README
GOOGLE_SERVICE_ACCOUNT_JSON={"type":"service_account","project_id":"your-project",...}
Original README
Make sure your Google Drive folder is shared with "Anyone with the link" (Viewer permission) for photos to display properly
Original README
https://github.com/kbichave/wedding-invite/blob/main/LICENSEhttps://github.com/kbichave/wedding-invite/blob/main/README.mdCustom Domain (optional) - ~$10-15/year (not required)
Original README
Compiled by DeepSeek based on repository license and README ·2026-10-02. Results only cover the materials read; dependencies, images, fonts, and subsequent term changes are subject to their respective original texts.
Project checks & description sources
Template Information
- Source platforms
- GitHub
- Documentation and maintenance reference score
- Partly documented · 71 / 100
- Technologies
- React
- Website type
- Starter
How this score is calculated
Our heuristic uses license records (up to 30), a demo link (12), a preview (10), stars (15), recorded maintenance (15), description completeness (8), feature records (5) and classification data (5). It is not a code, security or performance test, or a Google score. A link does not establish tested functionality.
What to verify for this project
- Repository update recorded
- 2025-12-12
- Screenshot last checked
- 2026-10-02
No demo link is recorded. Use the repository instructions to evaluate the project locally; the screenshot alone cannot establish interactive behavior.
The catalog identifies React as the primary stack. Check the actual dependency manifest and lockfile for versions and hosting requirements. These notes use recorded metadata, not a code audit or a deployment test.
Use a selection guide →How this description was prepared
AI-assisted description based on catalog records and repository material. Repository authors are not automatically the reviewers of this description.
Automatically checked against source and license rules; no manual editorial review.
Inspect the recorded source material
SHA-256: 58636cb0d769e8420dfa28d79f6e9d60611e90da0b4eeb20913b419607b4fe9e
2026-10-02T08:53:39.542Z
Source file / repository# Wedding Invite Website - Free & Open Source Template
A beautiful, fully customizable wedding website template built with React and Tailwind CSS. **100% FREE** - no credit card required! Perfect for couples who want to share their special day with guests through a modern, self-hostable web application.
## ✨ Features
- 🎨 **Beautiful, Modern UI** - Apple-inspired design that looks great on all devices
- 📸 **Photo Upload & Gallery** - Guests can upload photos and view them in the gallery (stored in Google Drive - FREE, automatically displayed)
- 💌 **Blessings & Messages** - Collect heartfelt messages (stored in Google Sheets - FREE)
- 📅 **Event Management & RSVP** - Display multiple events with RSVP functionality
- 📖 **Our Story** - Share your love story with customizable sections
- 👥 **Wedding Party** - Showcase bridesmaids and groomsmen
- 🎁 **Registry** - Link to gift registries and cash funds
- ✈️ **Travel & Accommodation** - Share hotel info and travel details
- ❓ **FAQ** - Answer common questions
- ⏱️ **Timeline** - Show relationship milestones
- 🌍 **Multi-Cultural Support** - Pre-configured for Hindu and Christian weddings
- ⚙️ **Fully Configurable** - Enable/disable features, customize everything
- 🚀 **Free Deployment** - Deploy to Netlify (FREE tier)
## 📸 Screenshots
### Homepage

### Our Story

### Events & RSVP

### Photo Gallery

### Upload Photos

### Blessings

### Wedding Party

### Registry

### Travel & Accommodation

### FAQ

### Timeline

## 🎯 Quick Start
### Prerequisites
- Node.js (v14 or higher) - [Download here](https://nodejs.org/)
- A Google account (FREE) - for Drive and Sheets
- A Netlify account (FREE) - for hosting
**That's it! No credit card needed for any service.**
### Installation
1. **Clone the repository**
```bash
git clone <your-repo-url>
cd wedding-invite
```
2. **Install dependencies**
```bash
npm install
```
3. **Configure your site**
- Edit `src/siteConfig.js` to customize all content
- Copy `env.example.txt` to `.env` and add your secrets (see setup guide below)
4. **Start the development server**
```bash
npm start
```
The app will open at `http://localhost:3000`
## 📋 Feature Toggle Guide
All features are **enabled by default**. To disable any feature, edit `src/siteConfig.js`:
```javascript
features: {
homepage: { enabled: true, label: "Home" },
ourStory: { enabled: true, label: "Our Story" },
events: { enabled: true, label: "Events & RSVP" },
photoGallery: { enabled: true, label: "Photo Gallery" },
uploadPhotos: { enabled: true, label: "Upload Photos" },
blessings: { enabled: true, label: "Blessings" },
weddingParty: { enabled: true, label: "Wedding Party" },
registry: { enabled: true, label: "Registry" },
travel: { enabled: true, label: "Travel & Accommodation" },
faq: { enabled: true, label: "FAQ" },
timeline: { enabled: true, label: "Timeline" },
}
```
**To disable a feature:** Change `enabled: true` to `enabled: false`
## 🎭 Wedding Type Configuration
The template supports multiple wedding traditions. Set your wedding type in `src/siteConfig.js`:
```javascript
weddingType: "hindu", // Options: "hindu", "christian", "custom"
```
### Hindu Wedding
- Pre-configured events: Engagement, Haldi, Mehndi, Sangeet, Baraat, Vidhi, Reception
- Traditional terminology and dress codes
- See `src/examples/hindu-wedding-config.js` for example
### Christian Wedding
- Pre-configured events: Rehearsal Dinner, Ceremony, Cocktail Hour, Reception, After Party
- Church-friendly content
- See `src/examples/christian-wedding-config.js` for example
### Custom Wedding
- Create your own event list
- Fully customizable for any tradition or style
## 🔐 FREE Setup Guide - Step by Step
### Step 1: Google Sheets Setup (FREE)
**Purpose:** Store blessings/messages and RSVP data
1. Go to [Google Sheets](https://sheets.google.com/)
2. Create a new spreadsheet
3. Name it "Wedding Blessings" (or any name you prefer)
4. Add headers in row 1 (optional but recommended):
- Column A: `Name`
- Column B: `Email`
- Column C: `Message`
- Column D: `Timestamp`
5. Copy the Spreadsheet ID from the URL:
```
https://docs.google.com/spreadsheets/d/SPREADSHEET_ID_HERE/edit
```
The part after `/d/` and before `/edit` is your Spreadsheet ID
6. Save this ID - you'll need it later
**Cost:** FREE (unlimited spreadsheets)
### Step 2: Google Drive Setup (FREE)
**Purpose:** Store uploaded photos
1. Go to [Google Drive](https://drive.google.com/)
2. Create a new folder (name it "Wedding Photos" or similar)
3. Open the folder
4. Copy the Folder ID from the URL:
```
https://drive.google.com/drive/folders/FOLDER_ID_HERE
```
The part after `/folders/` is your Folder ID
5. Save this ID - you'll need it later
**Cost:** FREE (15GB free storage - more than enough for wedding photos)
### Step 3: Google Cloud Setup (FREE - No Billing Required)
**Purpose:** Enable API access for Drive and Sheets
1. Go to [Google Cloud Console](https://console.cloud.google.com/)
2. Sign in with your Google account
3. **Create a new project:**
- Click the project dropdown at the top
- Click "New Project"
- Name it "Wedding Website" (or any name)
- Click "Create"
- **Important:** No billing account needed - click "Skip" if asked
4. **Enable APIs:**
- Go to "APIs & Services" > "Library"
- Search for "Google Drive API" and click "Enable"
- Search for "Google Sheets API" and click "Enable"
5. **Create Service Account:**
- Go to "IAM & Admin" > "Service Accounts"
- Click "Create Service Account"
- Name: "wedding-website" (or any name)
- Click "Create and Continue"
- Skip role assignment (click "Continue")
- Click "Done"
6. **Create Key:**
- Click on your newly created service account
- Go to "Keys" tab
- Click "Add Key" > "Create new key"
- Choose "JSON" format
- Click "Create"
- The JSON file will download automatically
7. **Get Service Account Email:**
- In the service account details, copy the email address (looks like `[email protected]`)
- You'll need this to share folders/sheets
**Cost:** FREE (free tier includes more than enough API calls for a wedding website)
### Step 4: Share Folders/Sheets with Service Account
1. **Share Google Drive Folder:**
- Open your Google Drive folder
- Click "Share"
- Paste your service account email
- Give it "Editor" permissions
- Click "Send"
2. **Share Google Sheet:**
- Open your Google Sheet
- Click "Share"
- Paste your service account email
- Give it "Editor" permissions
- Click "Send"
### Step 5: Configure Environment Variables
1. Copy `env.example.txt` to `.env`:
```bash
cp env.example.txt .env
```
2. Open `.env` and fill in your values:
**GOOGLE_SERVICE_ACCOUNT_JSON:**
- Open the JSON file you downloaded from Google Cloud
- Copy the ENTIRE contents (it's one long line)
- Paste it in `.env` after the `=` sign
- Example:
```
GOOGLE_SERVICE_ACCOUNT_JSON={"type":"service_account","project_id":"your-project",...}
```
**GOOGLE_DRIVE_FOLDER_ID:**
- Paste the folder ID you saved from Step 2
- Example:
```
GOOGLE_DRIVE_FOLDER_ID=ABC123XYZ789
```
**GOOGLE_SPREADSHEET_ID:**
- Paste the spreadsheet ID you saved from Step 1
- Example:
```
GOOGLE_SPREADSHEET_ID=XYZ789ABC123
```
**REACT_APP_RSVP_API_URL:**
- Leave empty if not using Google Apps Script
- Or add your Google Apps Script URL if you have one
3. Save the `.env` file
**Important:** Never commit your `.env` file to git! It's already in `.gitignore`.
### Step 6: Test Locally
1. Start the development server:
```bash
npm start
```
2. Test the features:
- Upload a photo (should appear in your Google Drive folder)
- Check Photo Gallery page - uploaded photos should appear there
- Submit a blessing (should appear in your Google Sheet)
- Check RSVP functionality
**Important for Photo Gallery:**
- Uploaded photos will automatically appear in the Photo Gallery
- Make sure your Google Drive folder is shared with "Anyone with the link" (Viewer permission) for photos to display properly
- Or share each uploaded file individually with "Anyone with the link"
- You can disable showing uploaded photos by setting `showUploadedPhotos: false` in `siteConfig.js`
## 🚀 FREE Deployment to Netlify
### Option 1: Deploy via Netlify Dashboard (Easiest)
1. **Push your code to GitHub:**
- Create a GitHub repository
- Push your code (make sure `.env` is NOT committed)
2. **Connect to Netlify:**
- Go to [Netlify](https://www.netlify.com/)
- Sign up/login (FREE)
- Click "Add new site" > "Import an existing project"
- Connect to GitHub
- Select your repository
3. **Configure Build Settings:**
- Build command: `npm run build`
- Publish directory: `build`
- Click "Deploy site"
4. **Add Environment Variables:**
- Go to Site Settings > Environment Variables
- Add each variable from your `.env` file:
- `GOOGLE_SERVICE_ACCOUNT_JSON` (paste the entire JSON)
- `GOOGLE_DRIVE_FOLDER_ID`
- `GOOGLE_SPREADSHEET_ID`
- `REACT_APP_RSVP_API_URL` (if using)
5. **Redeploy:**
- Go to Deploys tab
- Click "Trigger deploy" > "Clear cache and deploy site"
6. **Your site is live!**
- Netlify will give you a URL like `your-site.netlify.app`
- You can add a custom domain (FREE) in Site Settings > Domain Management
**Cost:** FREE (Netlify free tier includes 100GB bandwidth/month - more than enough)
### Option 2: Deploy via Netlify CLI
```bash
# Install Netlify CLI
npm install -g netlify-cli
# Login to Netlify
netlify login
# Deploy
netlify deploy --prod
```
## 📝 Configuration Guide
### Site Content (`src/siteConfig.js`)
All customizable content is in `src/siteConfig.js`. Edit this file to personalize:
- **Couple Information:** Names, display name, photos
- **Wedding Date:** For countdown timer
- **Homepage:** Title, subtitle, call-to-action
- **Our Story:** Partner stories, how we met, proposal, milestones
- **Events:** Event details, dates, venues, maps, dress codes
- **Wedding Party:** Bridesmaids and groomsmen
- **Registry:** Gift registries and cash funds
- **Travel:** Hotels, transportation, local attractions
- **FAQ:** Common questions and answers
- **Timeline:** Relationship milestones
### Example Configurations
See `src/examples/` folder for:
- `hindu-wedding-config.js` - Hindu wedding template
- `christian-wedding-config.js` - Christian wedding template
- `minimal-config.js` - Minimal setup template
## 🎨 Customization
### Adding Your Photos
1. Replace placeholder images in `public/images/`:
- `partner1.svg` → Your photo
- `partner2.svg` → Your photo
- `photo1.svg` through `photo4.svg` → Your memory photos
- `homage_page_background.png` → Your background image
2. Update image paths in `src/siteConfig.js` if using different filenames
### Styling
The project uses Tailwind CSS. Customize styles by:
- Editing component files directly
- Modifying `tailwind.config.js` for theme customization
- Adding custom CSS in `src/index.css`
## 📊 Understanding Your Data
### Google Sheets Structure
Your blessings will be stored with columns:
- **Name:** Guest's name
- **Email:** Guest's email
- **Message:** Their blessing/message
- **Timestamp:** When it was submitted
### Google Drive Structure
Uploaded photos will be stored in your specified folder with:
- Original filename
- Upload timestamp
- Any captions (if enabled)
## 🔧 Troubleshooting
### Google API Errors
- **"Permission denied":** Ensure service account has Editor access to Drive folder and Sheet
- **"Invalid credentials":** Check that `GOOGLE_SERVICE_ACCOUNT_JSON` is valid JSON (one line, no breaks)
- **"Folder not found":** Verify `GOOGLE_DRIVE_FOLDER_ID` is correct (from URL after `/folders/`)
- **"Spreadsheet not found":** Verify `GOOGLE_SPREADSHEET_ID` is correct (from URL after `/d/`)
### Build Errors
- **Module not found:** Run `npm install`
- **Environment variables not loading:**
- Ensure `.env` file exists in root directory
- For Netlify: Add variables in dashboard, not `.env` file
- Variable names must match exactly (case-sensitive)
### Deployment Issues
- **Netlify functions not working:** Check environment variables are set in Netlify dashboard
- **Photos not uploading:** Verify `GOOGLE_DRIVE_FOLDER_ID` and service account permissions
- **Blessings not saving:** Verify `GOOGLE_SPREADSHEET_ID` and service account permissions
## 💰 Cost Breakdown
**Everything is FREE:**
- ✅ Google Account - FREE
- ✅ Google Drive (15GB) - FREE
- ✅ Google Sheets (unlimited) - FREE
- ✅ Google Cloud APIs (free tier) - FREE
- ✅ Netlify Hosting (100GB bandwidth/month) - FREE
- ✅ Custom Domain (optional) - ~$10-15/year (not required)
**Total Cost: $0** (or ~$10-15/year if you want a custom domain)
## 📚 Additional Resources
- [Google Cloud Console](https://console.cloud.google.com/)
- [Google Drive](https://drive.google.com/)
- [Google Sheets](https://sheets.google.com/)
- [Netlify Documentation](https://docs.netlify.com/)
- [React Documentation](https://react.dev/)
- [Tailwind CSS Documentation](https://tailwindcss.com/)
## 🤝 Contributing
Contributions are welcome! Please see [CONTRIBUTING.md](CONTRIBUTING.md) for guidelines on how to contribute.
## 📄 License
ISC License - feel free to use this template for your wedding website!
## 💬 Support
For issues and questions, please open an issue on GitHub.
---
Made with ❤️ for couples celebrating their special day
**Remember:** This entire setup is FREE. No credit card required. No hidden costs. Just follow the steps above and you'll have a beautiful wedding website in no time!
Explore similar templates
Compare previews and descriptions within the same stack and category.
ant-design-pro
Ant Design Pro is an enterprise-grade React admin scaffold built on React 19, Umi Max 4, and antd 6 with TypeScript.
React · Admin dashboard

react-boilerplate
A production-grade React + Redux starter for experienced developers, integrating Redux, redux-saga, styled-components, and react-router, with offline-first and PWA support, CLI code generation, and built-in testing and CI configuration. Requires Node.js v8.15.1 and npm v5 or higher; not suitable for beginners.
React · Starter
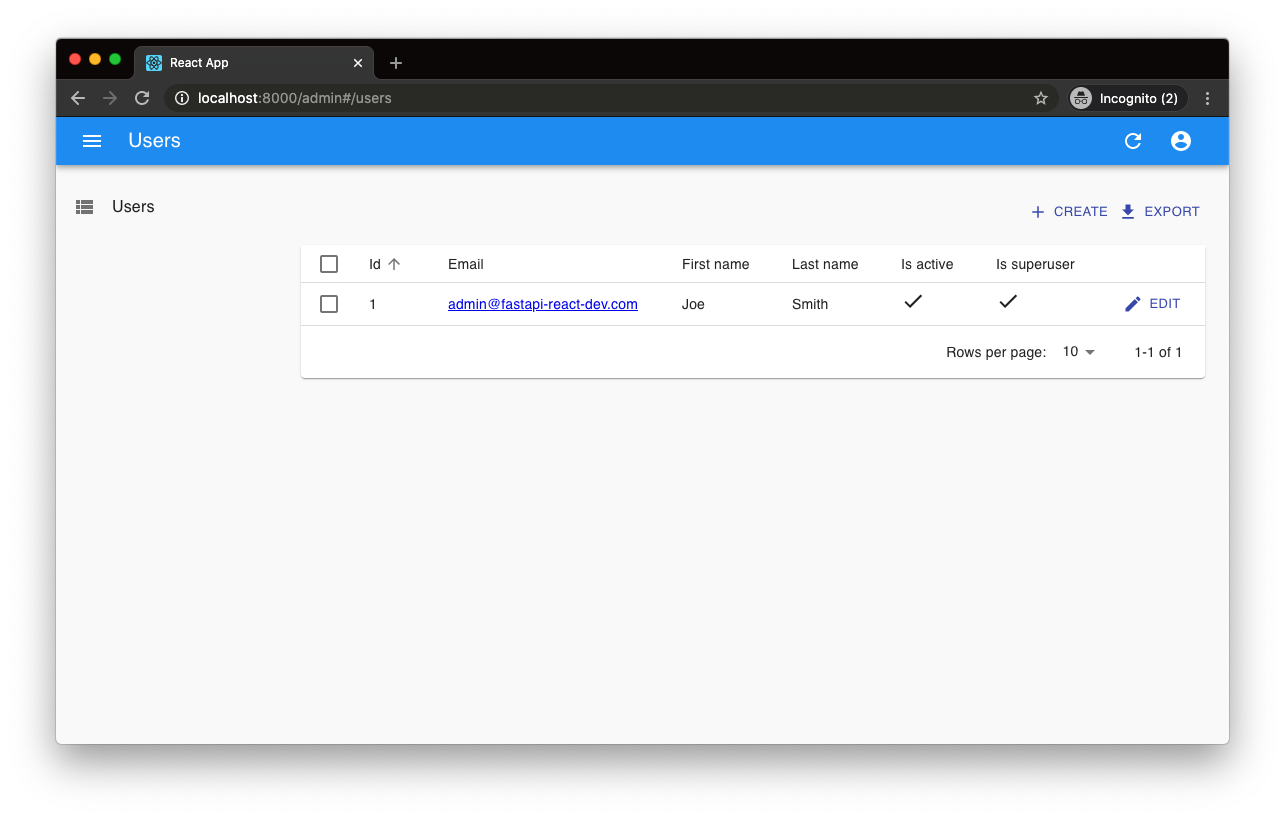
fastapi-react
A Cookiecutter template for FastAPI + React (TypeScript) full-stack projects, integrating PostgreSQL, SQLAlchemy, Alembic, Celery, Redis, JWT authentication, a react-admin admin panel, and a Docker Compose development environment with Nginx reverse proxy.
React · Admin dashboard
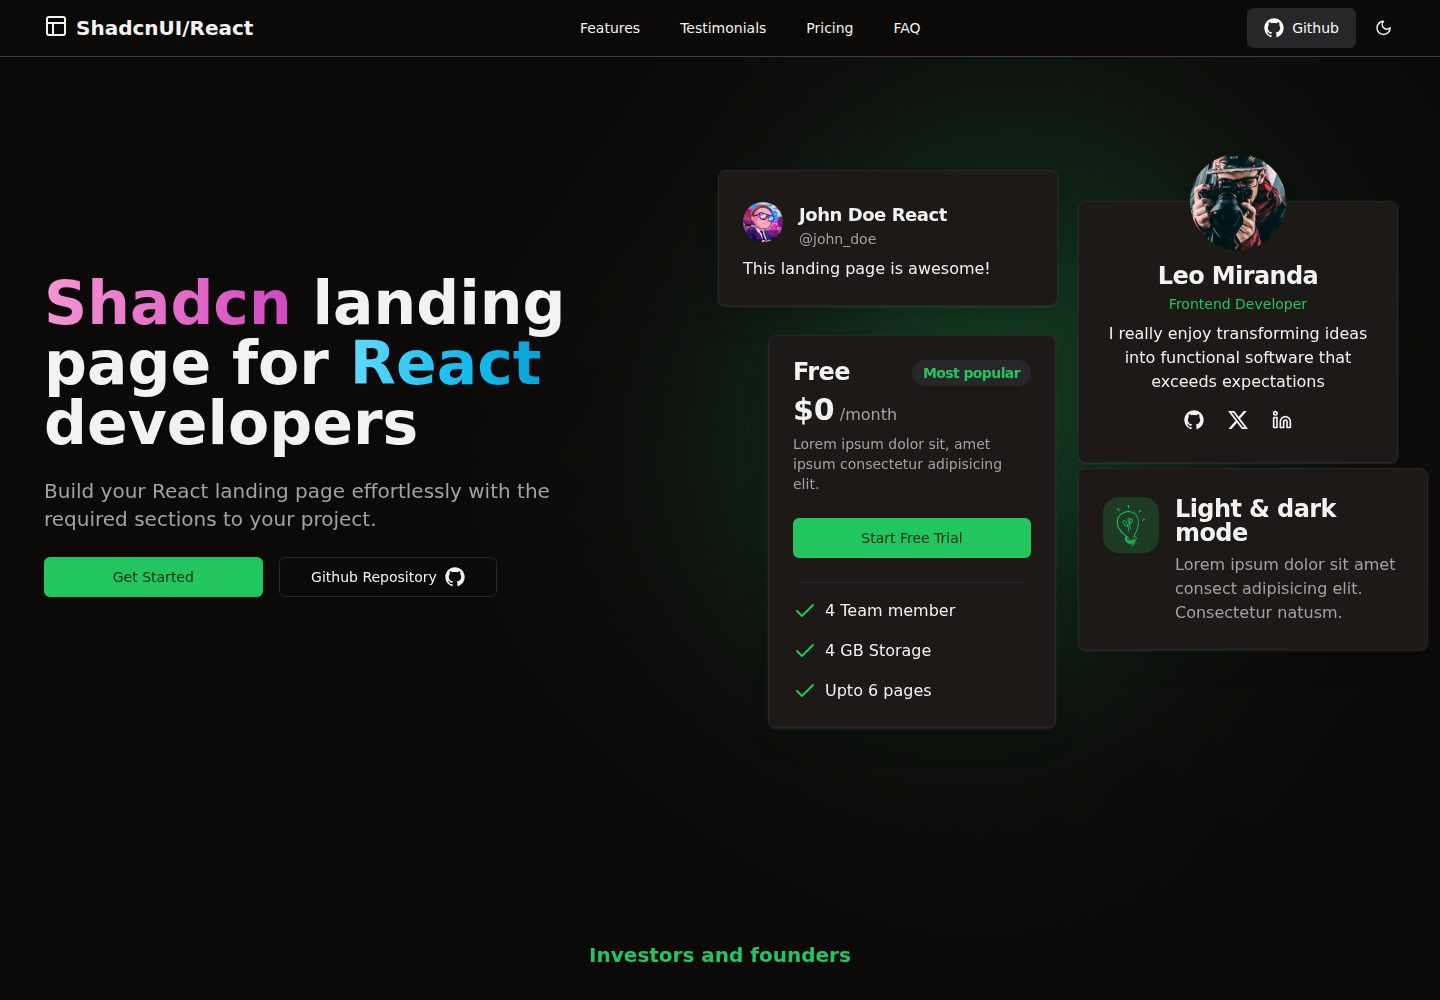
shadcn-landing-page
A free React landing page template built with TypeScript, Tailwind and Shadcn/UI, offering 16 ready-to-use sections such as Navbar, Hero, Pricing, FAQ and Footer, with responsive layout, dark mode and meta tags.
React · Corporate Website

start-ui-web
Start UI [web] is an opinionated full-stack starter from the BearStudio team, built on Node.js, TypeScript, React, and TanStack Start, with Tailwind CSS, shadcn/ui, React Hook Form, oRPC, Prisma, and Better Auth.
React · Starter
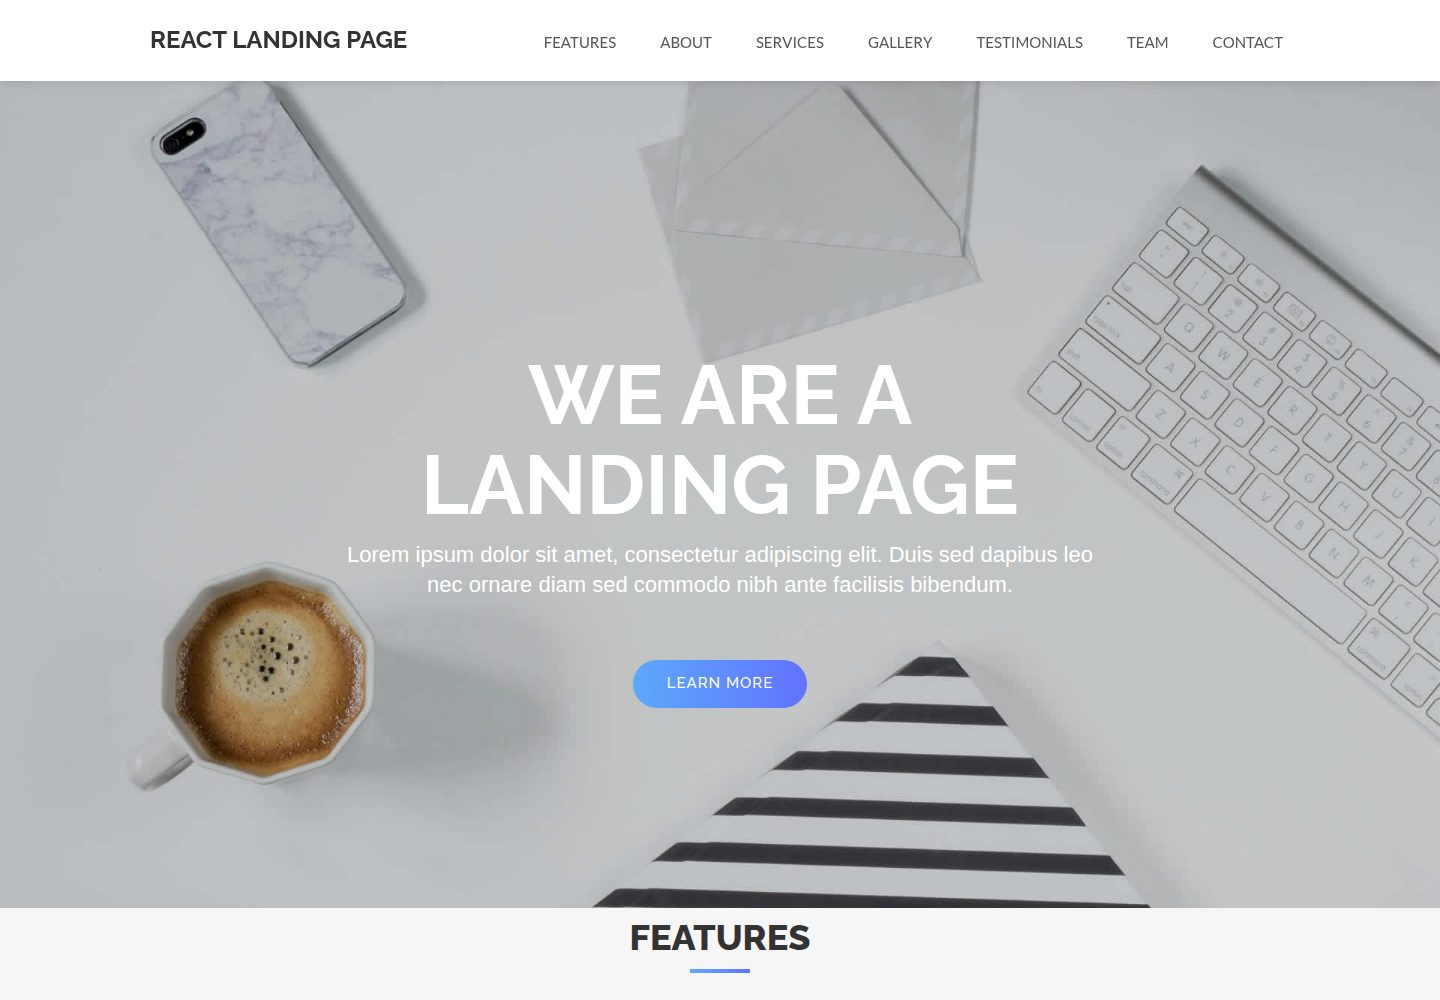
React-Landing-Page-Template
A React single-page landing page template for startups and service businesses, with copy and image references centralized in data.json, assets in public/img/, styles in public/css/, and a contact form that requires your own EmailJS service ID, template ID, and Public Key.
React · Corporate Website