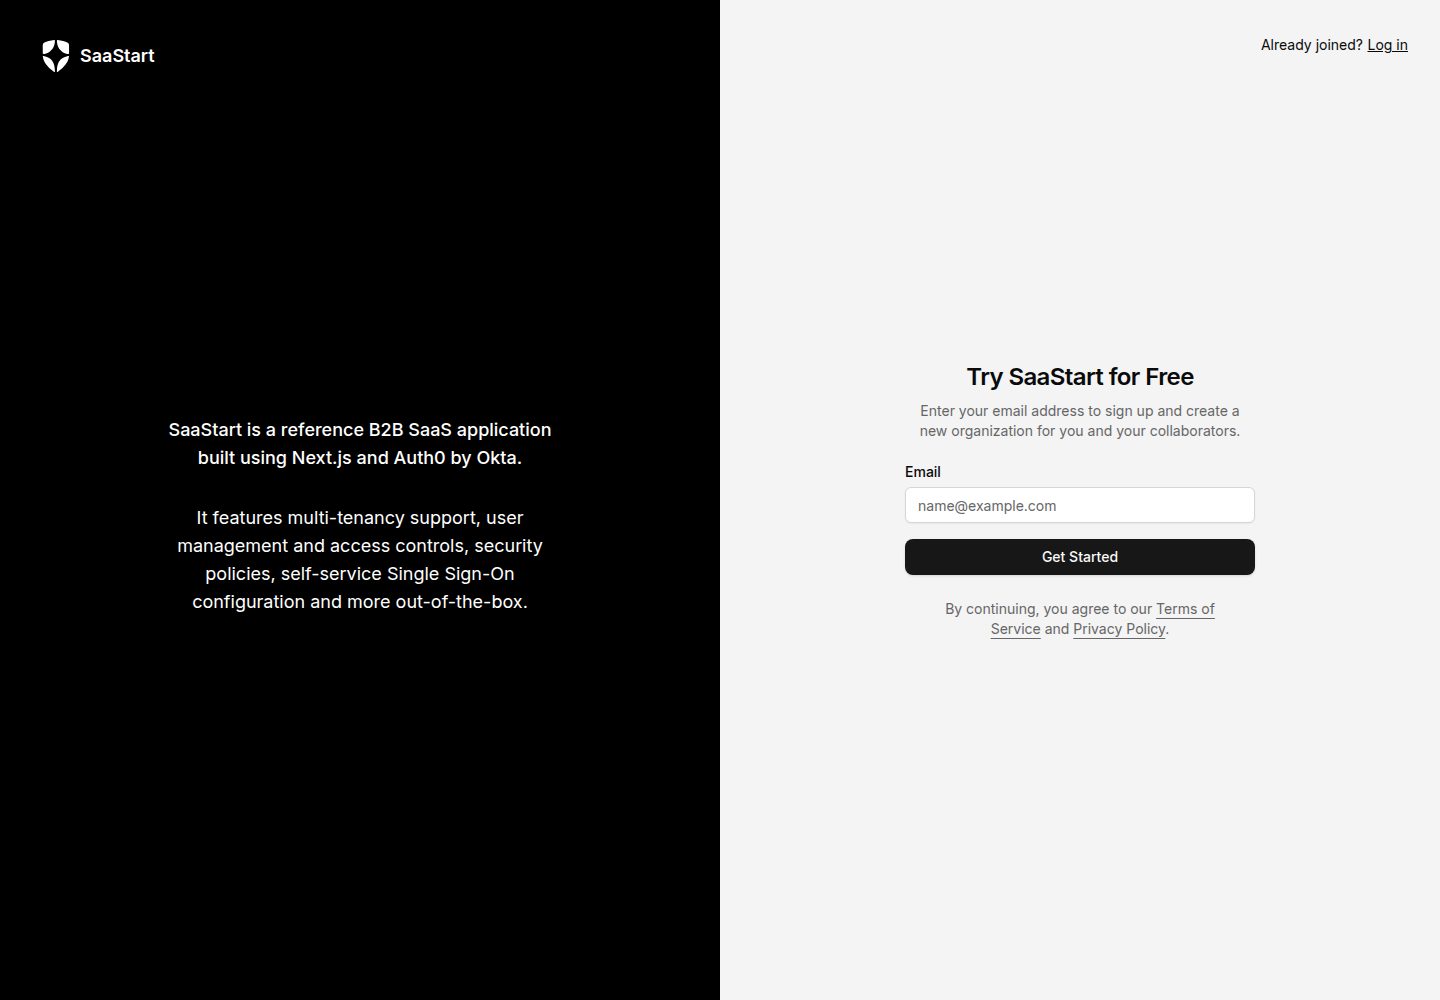
基于 Next.js 与 Radix UI 的全栈示例应用,代码可直接作为 B2B SaaS 起点
Next.jsReactSaaS启动器
auth0-b2b-saas-starter — Next.js SaaS模板
作者 auth0-developer-hub
Auth0 官方示例项目,用 Next.js 与 Radix UI 搭建 B2B SaaS 起步应用,内置多租户、组织成员管理与 SSO 配置等身份能力。
看看你的网站会是什么样
浏览真实页面截图,比较内容排版与手机效果。点击下方缩略图切换,放大查看整页细节。
全部页面与视图 2
截图用于了解视觉与布局,交互效果请以实际项目为准。
采集于 2026-10-01查看来源
值得关注的模板亮点
从已有项目资料中,快速了解它的特点。
支持多租户:用户共享同一用户库,注册时可创建组织
组织成员管理:邀请用户、分配角色、删除用户
自助式企业 SSO 配置,支持 OIDC 与 SAML,并可选用 SCIM 目录同步
可配置 MFA 安全策略,包括 MFA 因子选择与邮件域豁免
提供 Auth0 CLI 引导脚本,自动配置 Auth0 租户并生成本地环境变量
模板详细介绍
SaaStart 是 Auth0 提供的 B2B SaaS 起步示例,基于 Next.js 与 Radix UI 构建,用于演示如何把 Auth0 的身份能力接入到面向企业客户的产品中。它提供注册时创建组织、邀请成员、角色与权限管理、自助式 SSO 配置、MFA 安全策略以及组织切换等界面与流程,帮助开发者跳过 SaaS 身份管理的初始搭建工作。
项目通过 Auth0 CLI 引导脚本在新建的 Auth0 租户中自动创建应用、角色、Action、邮件与登录模板并启用 MFA 因子,随后生成本地环境变量文件。README 明确要求使用全新的 Auth0 租户,避免与已有配置冲突。
需要注意,部分能力在 README 中标注为“即将推出”,例如 API 客户端自助管理、会话生命周期与管理员破窗访问;这些功能在当前版本中尚未提供。
Next.jsSaaS启动器
适合你的项目吗?
适用场景
- 为 B2B SaaS 产品搭建带组织与成员管理的身份基础
- 演示或验证 Auth0 多租户、SSO 与 MFA 策略的集成方式
- 在本地运行并修改示例代码,作为自建 SaaS 应用的起点
- 通过 Vercel 一键部署示例,快速查看实际运行效果
适合人群
- 正在构建 B2B SaaS 并需要多租户身份能力的开发者
- 希望参考 Auth0 官方示例来集成组织、SSO 与 MFA 的团队
- 需要可运行、可修改的 Next.js 身份管理起步项目的工程师
上手与定制指南
结合仓库当前版本的说明,按下面的资料检查内容、配置与运行要求。
- 1
需要 Node.js v20 或更高版本,以及 npm 等包管理器
- 2
必须新建一个 Auth0 租户,引导脚本会写入配置,使用已有租户可能产生冲突
- 3
需安装并登录 Auth0 CLI,登录时授予更新租户设置、创建连接与客户端授权等权限
- 4
运行 npm run auth0:bootstrap 自动配置租户并生成 .env.local,再执行 npm run dev 启动本地服务
- 5
代码采用 MIT 许可,但演示图片、字体、图标等第三方素材及外部服务需另行核对许可与费用
授权与来源资料
使用条件与限制
免费使用 · 保留许可声明本次收录的是公开仓库中采用 MIT 许可的免费版本;免费范围为该版本代码,不代表外部服务或第三方素材免费。
使用时需要遵守
- 允许免费使用、修改、商用和分发该版本代码。
- 分发代码副本或实质性部分时,保留原作者版权声明和完整 MIT 许可声明。
- 代码按现状提供;担保与责任限制以原许可证及适用法律为准。
额外费用与待核对事项
- 使用前必须新建一个 Auth0 租户,引导脚本会写入配置;在已有租户上运行可能造成配置冲突或改动现有设置。
- 本地运行需自行安装 Node.js v20 以上及 npm 等包管理器。
- 必须额外安装并登录 Auth0 CLI,引导脚本依赖它来创建租户资源。
- 登录 Auth0 CLI 时需授予更新租户设置、创建连接与客户端授权、创建邮件模板、更新 MFA 因子等管理权限。
- 引导命令仅可在新建租户上执行,否则会修改或污染已有 Auth0 租户的配置。
- API 客户端自助创建/删除功能标注为即将推出,当前版本尚未提供。
- 会话生命周期配置标注为即将推出,当前版本尚未提供。
- 管理员破窗访问标注为即将推出,当前版本尚未提供。
- 测试事务性邮件或邮件验证流程时,需自行接入外部邮件平台,可能产生额外服务与费用。
- 演示图片、字体、图标及其他第三方素材需按各自许可核对,不能仅凭代码的 MIT 许可判断。
- 域名、托管、数据库、支付或 AI 等外部服务可能另外收费。
查看原文依据
Permission is hereby granted, free of charge
许可证原文
Create a new Auth0 tenant. **This is important!** Using a new Auth0 tenant for this sample application ensures you don't encounter any conflicts due to existing configuration in an existing tenant.
README 原文
You must have [`npm`](https://docs.npmjs.com/downloading-and-installing-node-js-and-npm) or a comparable package manager installed in your development environment.
README 原文
You will need to install the Auth0 CLI. It will be used by the bootstrap script to create the resources needed for this sample in your Auth0 tenant.
README 原文
auth0 login --scopes "update:tenant_settings,create:connections,create:client_grants,create:email_templates,update:guardian_factors"
README 原文
Only run the following command on a newly created tenant to avoid changing existing configuration or introducing conflicting elements to your existing Auth0 tenants!
README 原文
API client management with self-service create/delete capabilities _(coming soon)_
README 原文
Session lifetime _(coming soon)_
README 原文
Break-glass access for admin roles _(coming soon)_
README 原文
https://github.com/auth0-developer-hub/auth0-b2b-saas-starter/blob/main/LICENSEhttps://github.com/auth0-developer-hub/auth0-b2b-saas-starter/blob/main/README.mdUsing an email platform for testing transactional emails (or different workflows that require email verification)
README 原文
DeepSeek 根据仓库许可证和 README 整理 ·2026-10-01。结果仅覆盖已读取资料,依赖、图片、字体及后续条款变更以各自原文为准。
项目核对记录与介绍依据
模板资料
- 来源平台
- GitHub
- 资料与维护参考分
- 资料较完整 · 96 / 100
- 技术栈
- Next.js · React
- 网站类型
- SaaS · 启动器
这个分数如何计算
本站按许可资料(最高30分)、演示链接(12分)、预览图(10分)、Star数(15分)、记录的维护时间(15分)、描述完整度(8分)、功能记录(5分)和分类资料(5分)计算。它不是代码、安全或性能测试,也不是 Google 评分;有链接不代表已实测可用。
这个项目需要核对什么
- 记录的仓库更新时间
- 2026-08-11
- 截图检查日期
- 2026-10-01
已收录演示链接。请用你的内容与屏幕尺寸检查;有演示不代表表单、认证或支付已经可用。
目录记录的主要技术栈是 Next.js。请通过依赖清单和锁文件核对实际版本与托管要求。这些说明基于收录资料,不代表代码审计或部署实测。
查看具体选型方法 →介绍的制作与核对状态
介绍由 AI 辅助整理目录与仓库资料。仓库作者不等于这篇介绍的审核者。
已完成服务器许可规则与 AI 来源核对;未经过人工编辑审核。
查看当时使用的来源资料
SHA-256: 051761f79b67d9f7122c93b3af472e747ccf5e9a6b5df65a6114d36c233349bb
2026-10-01T01:14:45.506Z
来源文件 / 仓库# **SaaStart** from Auth0 A secure and high-performance starting point for building modern B2B SaaS web applications. ## Jump to a section * [Target Use Case](#target-use-case) * [Deploy to Vercel](#deploy-to-vercel-in-one-click) * [Installation for Local Development](#installation-for-local-development) * [B2B Identity Features to Explore](#b2b-identity-features-to-explore) * [Advanced Topics](#advanced-topics) * [Learn More](#advanced-topics) * [Contributing](#contributing) ## Overview  > [!TIP] > Ready to begin? Jump ahead to the [Getting Started](#getting-started) section. This sample application provides developers with a solid foundation to kickstart their journey into building a business-to-business software-as-a-service (B2B SaaS) application. With a carefully selected stack of well-documented and widely adopted technologies, along with seamless integration with Auth0 for identity and login management, this starter kit aims to streamline the development process and enable developers to focus on building out their core product instead of worrying about the complexities of SaaS identity management and secure customer onboarding. It incorporates best practices and industry-standard technologies to provide a robust and scalable solution for building secure software, with all the capabilities needed to be competitive, resilient, and scalable. The project includes the architecture and components you need to get started, authentication and authorization powered by Auth0, and deployment instructions that make it easy to move to staging or production when you're ready. ## Target Use Case Use this to bootstrap a SaaS application with the following commonly needed capabilities: - Multi-tenancy with a single pool of users in a shared user database (see: [Multiple Organization Architecture](https://auth0.com/docs/get-started/architecture-scenarios/multiple-organization-architecture#users-shared-between-organizations)) - Sign up with tenant ([Organization](https://auth0.com/docs/manage-users/organizations)) creation - Logged in / Logged out product landing page experience - User management with invitation workflows, create/delete user capabilities, and RBAC roles - Self-service user profile management, password reset, and MFA configuration - Self-service Enterprise Single Sign-On (SSO) configuration using - OIDC - SAML - Ability for end-users to verify domain ownership before associating their email domains with [home realm discovery](https://auth0.com/docs/authenticate/login/auth0-universal-login/identifier-first#define-home-realm-discovery-identity-providers) - Just-in-time user provisioning OR automatic directory sync with SCIM - API client management with self-service create/delete capabilities _(coming soon)_ - Configurable security policies: - Enforce MFA - Session lifetime _(coming soon)_ - Break-glass access for admin roles _(coming soon)_ ## Deploy to Vercel [](https://vercel.com/new/clone?repository-url=https://github.com/auth0-developer-hub/auth0-b2b-saas-starter&repository-name=auth0-saas-starter&external-id=b2b-saas-starter-template&integration-ids=oac_7V7TGP5JUHCpSncpiy3XWwL0) ## Installation for Local Development ### Prerequisites 1. Node.js v20 or later is required to run the bootstrapping process. We recommend using [`nvm`](https://github.com/nvm-sh/nvm) to manage node versions in your development environment. Click these links to [learn how to install nvm](https://github.com/nvm-sh/nvm?tab=readme-ov-file#install--update-script) or [how to use nvm](https://github.com/nvm-sh/nvm?tab=readme-ov-file#usage) to make sure you're using Node 20+ in your development environment. 2. You must have [`npm`](https://docs.npmjs.com/downloading-and-installing-node-js-and-npm) or a comparable package manager installed in your development environment. These instructions assume that you're using `npm`, which is automatically included as part of the Node.js installation from prerequisite 1. 3. Create a new Auth0 tenant. **This is important!** Using a new Auth0 tenant for this sample application ensures you don't encounter any conflicts due to existing configuration in an existing tenant. The tenant you create will be configured automatically by our bootstrapping command during the installation process. You can sign up for a free Auth0 account at [https://auth0.com/signup](https://auth0.com/signup?utm_source=github&utm_medium=thirdpartyutm_campaign=saastart). See [Create Tenants](https://auth0.com/docs/get-started/auth0-overview/create-tenants) in the Auth0 docs if you need help. Once you've created a tenant, nothing else needs to be done inside Auth0 - you can return to this README.md and begin completing the steps below. ### Step One: Clone and install dependencies 1. Clone this repo to your development environment. To do this, navigate to a directory where you want to work in a terminal program, and run the following command: ```shell git clone https://github.com/auth0-developer-hub/auth0-b2b-saas-starter.git ``` 2. Navigate into the directory by typing the following command: ```shell cd auth0-b2b-saas-starter ``` 3. Install dependencies for the project using your favorite package manager. For example, if you're using npm, check that you're on the correct version of node: ```shell node -v ``` This should return a version number higher than v20. If you have an earlier version installed, return to the prerequisites and follow step 1. Otherwise, continue: ```shell npm install ``` ### Step Two: Install and log in with the Auth0 CLI This project uses the [Auth0 CLI](https://github.com/auth0/auth0-cli) to make setting up your tenant a lot easier, by scripting away as much manual work as possible. If you want to familiarize yourself with the Auth0 CLI, read [Auth0 CLI Basics](https://developer.auth0.com/resources/labs/tools/auth0-cli-basics). 1. You will need to install the Auth0 CLI. It will be used by the bootstrap script to create the resources needed for this sample in your Auth0 tenant. Instructions for installation are available at the [Auth0 CLI github repo](https://github.com/auth0/auth0-cli). **For example**, users on **Linux or OSX** using [Homebrew](https://brew.sh/) can run the following command to install the CLI: ```shell brew tap auth0/auth0-cli && brew install auth0 ``` **For example**, users on **Windows** using [Scoop](https://scoop.sh/) can run the following commands to install the CLI: ```powershell scoop bucket add auth0 https://github.com/auth0/scoop-auth0-cli.git ``` ```powershell scoop install auth0 ``` You can confirm whether or not the CLI is correctly installed by running the following command: ```shell auth0 --version ``` A successful installation will result in a response with the CLI version number printed out, like this: ```shell auth0 version 1.4.0 54e9a30eeb58a4a7e40e04dc19af6869036bfb32 ``` 2. Log in by entering the following command and following the instructions to choose a specific tenant to authenticate with: ```shell auth0 login --scopes "update:tenant_settings,create:connections,create:client_grants,create:email_templates,update:guardian_factors" ``` This will take you through a flow that will securely retrieve a Management API token for your Auth0 tenant. > [!WARNING] > At the **Authorize App** step, be sure to select the same NEW tenant that you created in the prerequisites. Whatever you choose during this step will be the tenant that will be bootstrapped in the next steps, so it's important to make sure it's a newly created tenant without existing configuration. ### Step Three: Bootstrap the Auth0 tenant This step will create and update entities in your Auth0 tenant. The provided script will use the Auth0 CLI to provision the resources required for this sample application: - Creating the appropriate clients (called Applications in Auth0) - Creating admin and member roles, - Creating actions for setting roles and security policies - Creating email and login templates - Enabling MFA factors Finally, it will save environment variables for your tenant in the application directory. > [!WARNING] > Only run the following command on a newly created tenant to avoid changing existing configuration or introducing conflicting elements to your existing Auth0 tenants! > If you are creating a new Auth0 tenant at this point in the process, go back to step 2 in order to ensure you're logged into the correct Auth0 tenant. Run the following command: ```shell npm run auth0:bootstrap ``` Once the script has successfully completed, a `.env.local` file containing the environment variables will be written to the root of your project directory. ### Step Four: Run the sample application 1. Run the development server: `npm run dev` 2. Open [http://localhost:3000](http://localhost:3000) with your browser to see the result. > Note: If you're running the application on a different port, adjust the provided localhost URL accordingly. You can proceed to interact with the app as if you were a user: create an account, navigate to the settings, explore the identity capabilities. Now you're ready to start editing to build your own SaaS application! To see this in action, modify `app/page.tsx` in some way and save the file. The browser will hot-reload to show any changes you've made each time you save. --- ## B2B Identity Features to Explore By clicking through the application's front-end, you can explore the management experience that your customers would have. This sample application comes preconfigured with key identity workflows that are crucial for anyone that wants their application to be adopted by business customers, so that you can focus on coding your own functionality instead. ### Sign up with Organziations Each user that creates an account from scratch will be prompted to enter an organization name as part of their sign-up flow. Once an organization is created, users with admin roles can invite additional users who will automatically be added to the organization. ### User Management Invite additional users, change users' roles (and thus what they have permission to do in the application), and delete users. You'll notice as you perform these operations in SaaStart, you're changing the user database and organizations in your Auth0 tenant. ### Connections Use the SSO tab in the settings section to connect an external IDP (eg, Okta WIC, Google Workforce, Azure AD, etc) via SAML or OIDC. This allows your business customers to set up their own Single Sign On connections right in your application. You can also optionally enable SCIM provisioning using the same connections. ### Security Policies Configure multi-factor authentication (MFA) policies for your organization, including a selection of which MFA providers (eg, One-time Password, or Security Keys) your users are allowed to use. Optionally, you can configure email domains for which users be exempted from having to MFA in your app. This is useful when using SSO, and users are already completing MFA when they sign in to their workforce identity provider, so that they won't be prompted for a second MFA when they log in to your application. ### Organization Switching Users can be invited to a company organization, but can also create their own hobby or personal organizations. This allows your app to handle scenarios like when contractors or external collaborators need to belong to multiple organizations, or when employees want to have their own personal accounts for experimentation or side projects. Switching contexts is easy. ### User Profile and Security Your users can set their own user profile settings, set and reset their own passwords, and manage their own multi-factor authentication (MFA) enrollments. They can also manage and delete their own account data. --- ## Advanced Topics Reference the [README-ADVANCED.md](README-ADVANCED.md) instructions to learn about: * Enabling https:// and production-like URLs while you iterate from within your personal development environment * Using an email platform for testing transactional emails (or different workflows that require email verification) --- ## Learn More To learn more about Auth0, take a look at the following resources: - [Understand how Auth0 Organizations Work](https://auth0.com/docs/manage-users/organizations/organizations-overview) - learn about how this project achieves multi-tenancy - [Customize](https://auth0.com/docs/customize) - learn how to brand and internationalize all Auth0 interactions with your end-users ## Contributing See [CONTRIBUTING](./CONTRIBUTING.md) for information. Questions? Feedback? Drop us a line in the [Auth0 Community](https://community.auth0.com/t/saastart-b2b-saas-reference-app/136654)
看看同类模板
对比同技术栈与用途的模板,找到更适合的视觉与内容结构。
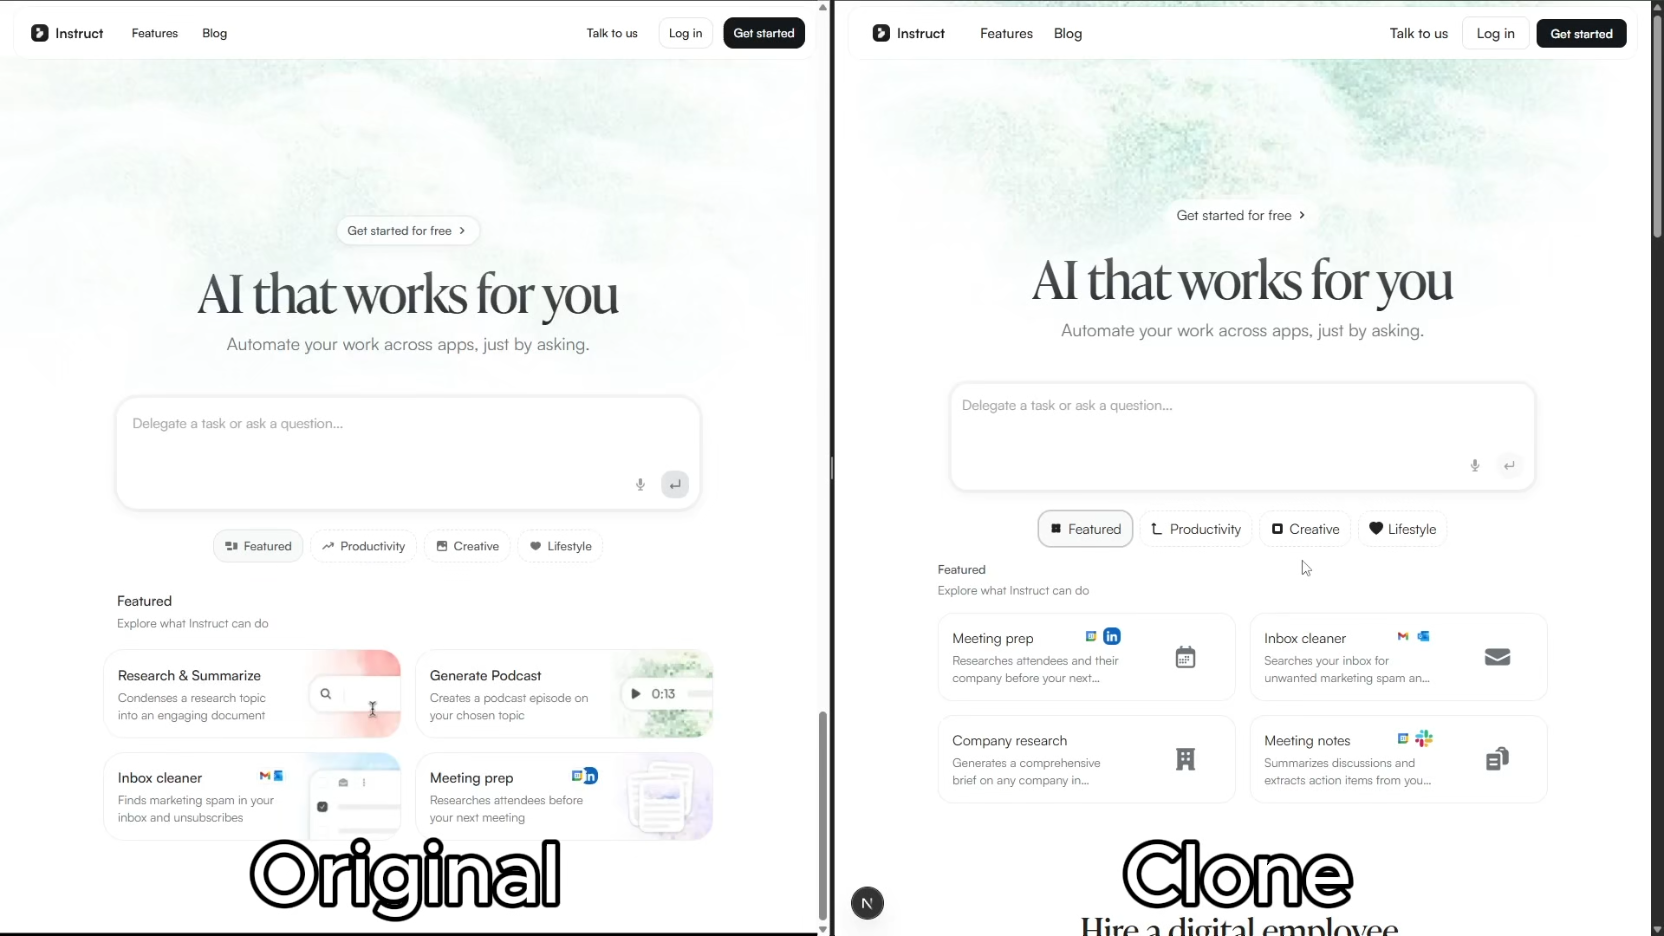
ai-website-cloner-template
Clone any website with one command using AI coding agents
Next.js · 启动器

Next.js SaaS Starter
Next.js SaaS Starter 是 Next.js 官方维护的 SaaS 起点模板,定位介于学习资源和可直接部署的脚手架之间。
Next.js · SaaS

Next.js Commerce
Next.js Commerce 是 Vercel 团队维护的电商启动模板,基于 Next.js App Router 构建,采用服务端渲染、React Server Components、Server Actions …
Next.js · 电商

Next-js-Boilerplate
Next-js-Boilerplate 是一个面向 Next.js 16、Tailwind CSS 4 和 TypeScript 的启动器,核心定位是开发者体验优先。
Next.js · 启动器

tailwind-nextjs-starter-blog
tailwind-nextjs-starter-blog 是一个面向个人技术博客的 Next.js 与 Tailwind CSS 启动模板,其 v2 版本基于 App Router 与 React Server Comp…
Next.js · 博客

next-forge
Production-grade Turborepo template for Next.js apps.
Next.js · 启动器