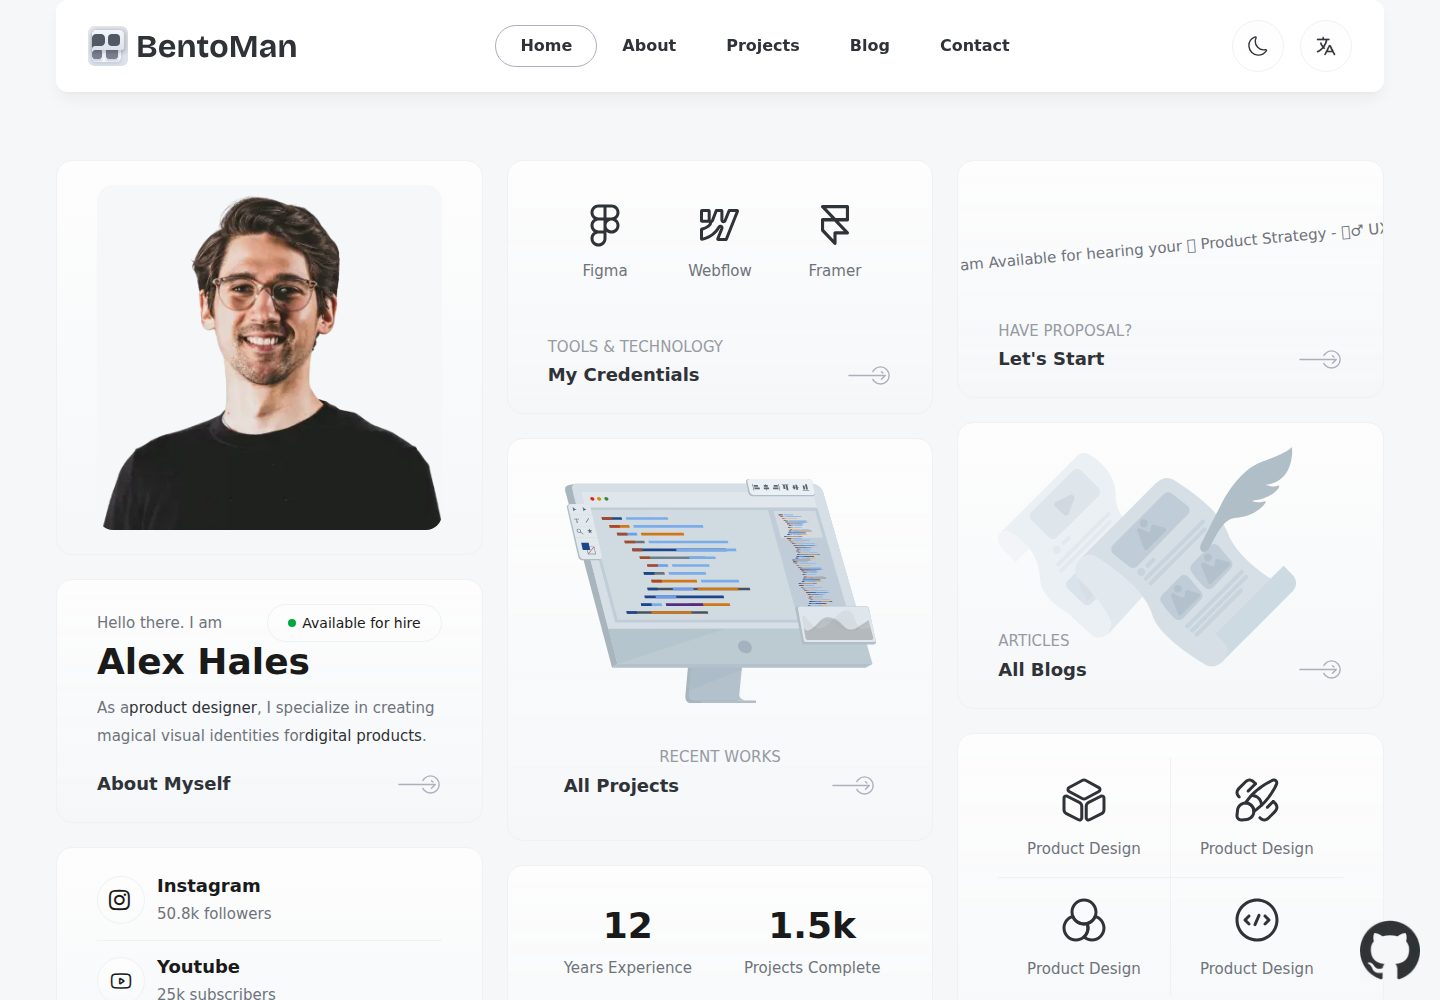
基于 Next.js App Router、TypeScript 与 Tailwind CSS,附带免费极简主题
Next.jsReact作品集启动器
nextjs-boilerplate-personal-website — Next.js 作品集模板
作者 benguo-dev
基于 Next.js App Router、Tailwind CSS 与 TypeScript 的个人简历与作品集网站模板,内置 Clerk 认证、Drizzle ORM、i18n 及完整的测试与代码质量工具链。
看看你的网站会是什么样
浏览真实页面截图,比较内容排版与手机效果。点击下方缩略图切换,放大查看整页细节。
全部页面与视图 3
截图用于了解视觉与布局,交互效果请以实际项目为准。
采集于 2026-10-02查看来源
值得关注的模板亮点
从已有项目资料中,快速了解它的特点。
集成 Clerk 认证,覆盖注册、登录、MFA、社交登录与 Passkey 等流程
使用 Drizzle ORM 实现类型安全数据库访问,兼容 PostgreSQL、SQLite 与 MySQL
内置 Vitest、Testing Library、Playwright 与 Storybook 的测试与组件开发工具链
提供 ESLint、Prettier、Husky、Lint-Staged、Commitlint 等代码质量与提交规范配置
包含 SEO 元数据、JSON-LD、Open Graph、sitemap.xml 与 robots.txt
模板详细介绍
该模板面向个人简历与作品集网站场景,基于 Next.js App Router 构建,使用 TypeScript 与 Tailwind CSS 编写界面,并附带一个免费极简主题。项目在开发体验上集成了 ESLint、Prettier、Husky、Lint-Staged、Commitlint、Commitizen、Vitest、Testing Library、Playwright、Storybook 与 VSCode 配置,同时提供 SEO 元数据、JSON-LD、Open Graph、sitemap.xml 与 robots.txt 等基础能力。
功能层面包含 Clerk 认证(注册、登录、登出、忘记密码、重置密码、Magic Link、MFA、社交登录、Passkey 与用户模拟)、基于 Drizzle ORM 的类型安全数据库访问(兼容 PostgreSQL、SQLite 与 MySQL,并可用 PGlite 做本地离线开发)、next-intl 与 Crowdin 的多语言方案、T3 Env 环境变量校验、React Hook Form 表单处理与 Zod 校验。此外还接入了 Sentry 错误监控、Pino.js 日志、PostHog 分析、Arcjet 安全防护、Codecov 覆盖率、Checkly 监控即代码以及可选的 Percy 视觉测试。
使用限制方面:模板要求 Node.js 20+ 与 npm;生产构建时需定义 DATABASE_URL,并配置 Clerk 的 NEXT_PUBLIC_CLERK_PUBLISHABLE_KEY 与 CLERK_SECRET_KEY;Sentry、Codecov 等外部服务需自行注册并填写对应密钥。代码采用 MIT 许可,可免费使用、修改、商用与分发,但演示图片、字体、图标等第三方素材需按各自许可单独核对,域名、托管、数据库等外部服务可能另外收费。
Next.js作品集启动器
适合你的项目吗?
适用场景
- 搭建个人简历或作品集网站,并希望自带认证与数据库层
- 需要一个包含测试、代码检查与提交规范的前端项目起始结构
- 为个人站点加入多语言支持并计划通过 Crowdin 管理翻译
- 在本地使用 PGlite 离线开发,随后切换到 PostgreSQL、SQLite 或 MySQL
适合人群
- 熟悉 Next.js 与 TypeScript、希望快速启动个人站点的开发者
- 需要认证、数据库与国际化等完整基础设施的个人项目
- 重视测试、代码质量与提交规范的开发团队或个人
上手与定制指南
结合仓库当前版本的说明,按下面的资料检查内容、配置与运行要求。
- 1
需要 Node.js 20+ 与 npm,克隆仓库后执行 npm install,再用 npm run dev 启动本地服务
- 2
生产构建前需定义 DATABASE_URL,构建过程会自动执行数据库迁移
- 3
使用 Clerk 认证需配置 NEXT_PUBLIC_CLERK_PUBLISHABLE_KEY 与 CLERK_SECRET_KEY
- 4
Sentry、Codecov 等外部服务需注册账号并填写对应密钥或 DSN
- 5
可通过全局搜索 FIXME: 定位需要替换的配置项,如 AppConfig.ts、BaseTemplate.tsx 与 favicon 等
授权与来源资料
使用条件与限制
免费使用 · 保留许可声明本次收录的是公开仓库中采用 MIT 许可的免费版本;免费范围为该版本代码,不代表外部服务或第三方素材免费。
使用时需要遵守
- 允许免费使用、修改、商用和分发该版本代码。
- 分发代码副本或实质性部分时,保留原作者版权声明和完整 MIT 许可声明。
- 代码按现状提供;担保与责任限制以原许可证及适用法律为准。
额外费用与待核对事项
- 运行环境要求:需使用 Node.js 20 或更高版本,并通过 npm 安装依赖。
- 生产构建前必须在环境变量中定义 DATABASE_URL,否则构建流程中的数据库迁移无法执行。
- 使用 Clerk 认证功能需自行注册 Clerk 账号,并配置 NEXT_PUBLIC_CLERK_PUBLISHABLE_KEY 与 CLERK_SECRET_KEY 两个环境变量。
- 生产环境使用 Sentry 错误监控需自行注册 Sentry 账号并创建项目,再填写 DSN 等配置。
- 启用 Codecov 代码覆盖率报告需注册 Codecov 账号并绑定 GitHub,同时配置 CODECOV_TOKEN。
- 生产环境日志管理依赖 Better Stack,需注册账号并创建 source,将令牌填入 LOGTAIL_SOURCE_TOKEN。
- 使用 Checkly 监控即代码需注册 Checkly 账号,并配置 CHECKLY_API_KEY 与 CHECKLY_ACCOUNT_ID。
- 启用 Arcjet 安全与机器人防护需注册账号获取 API key,并配置 ARCJET_KEY 环境变量。
- 按文档部署到 Sevalla 平台需先注册 Sevalla 账号,并创建数据库与应用。
- Percy 视觉测试为可选功能,本地默认禁用,仅在 GitHub Actions 中运行,需另行配置。
- 演示图片、字体、图标及其他第三方素材需按各自许可核对,不能仅凭代码的 MIT 许可判断。
- 域名、托管、数据库、支付或 AI 等外部服务可能另外收费。
查看原文依据
Permission is hereby granted, free of charge
许可证原文
Node.js 20+ and npm
README 原文
you must define `DATABASE_URL` in your environment variables
README 原文
define the environment variables `NEXT_PUBLIC_CLERK_PUBLISHABLE_KEY` and `CLERK_SECRET_KEY` from your Clerk account
README 原文
you'll need to create a Sentry account and a new project
README 原文
To enable Codecov, create a Codecov account and connect it to your GitHub account.
README 原文
To use Better Stack, you need to create a [Better Stack](https://betterstack.com/?utm_source=github&utm_medium=sponsorship&utm_campaign=next-js-boilerplate) account and create a new source
README 原文
To use Checkly, you must first create an account on [their website](https://www.checklyhq.com/?utm_source=github&utm_medium=sponsorship&utm_campaign=next-js-boilerplate).
README 原文
To set up Arcjet, [create a free account](https://launch.arcjet.com/Q6eLbRE) and get your API key.
README 原文
First, create an account on [Sevalla](https://sevalla.com).
README 原文
https://github.com/benguo-dev/nextjs-boilerplate-personal-website/blob/main/LICENSEhttps://github.com/benguo-dev/nextjs-boilerplate-personal-website/blob/main/README.mdvisual testing is disabled, and the terminal will display the message `[percy] Percy is not running, disabling snapshots.`
README 原文
DeepSeek 根据仓库许可证和 README 整理 ·2026-10-02。结果仅覆盖已读取资料,依赖、图片、字体及后续条款变更以各自原文为准。
项目核对记录与介绍依据
模板资料
- 来源平台
- GitHub
- 资料与维护参考分
- 资料较完整 · 82 / 100
- 技术栈
- Next.js · React
- 网站类型
- 作品集 · 启动器
这个分数如何计算
本站按许可资料(最高30分)、演示链接(12分)、预览图(10分)、Star数(15分)、记录的维护时间(15分)、描述完整度(8分)、功能记录(5分)和分类资料(5分)计算。它不是代码、安全或性能测试,也不是 Google 评分;有链接不代表已实测可用。
这个项目需要核对什么
- 记录的仓库更新时间
- 2025-04-09
- 截图检查日期
- 2026-10-02
已收录演示链接。请用你的内容与屏幕尺寸检查;有演示不代表表单、认证或支付已经可用。
目录记录的主要技术栈是 Next.js。请通过依赖清单和锁文件核对实际版本与托管要求。这些说明基于收录资料,不代表代码审计或部署实测。
查看具体选型方法 →介绍的制作与核对状态
介绍由 AI 辅助整理目录与仓库资料。仓库作者不等于这篇介绍的审核者。
已完成服务器许可规则与 AI 来源核对;未经过人工编辑审核。
查看当时使用的来源资料
SHA-256: cbf94e3b8c398212c01bbab33d6eab1919fd390f3fa808737e37139ef4d487dc
2026-10-02T23:05:37.156Z
来源文件 / 仓库# Boilerplate and Starter for Next.js 15+, Tailwind CSS 4, and TypeScript with popular personal website template. <p align="center"> <a href="https://personal-website-template-eosin.vercel.app/"><img width="100%" src="public/assets/images/home.png?raw=true" alt="Home page for personal website"></a> </p> <p align="center"> <a href="README-nextjs-boilerplate.md"><img width="100%" src="public/assets/images/nextjs-starter-banner.png?raw=true" alt="Next js starter banner"></a> </p> 🚀 Boilerplate and Starter for Next.js with App Router, Tailwind CSS, and TypeScript ⚡️ Prioritizing developer experience first: Next.js, TypeScript, ESLint, Prettier, Husky, Lint-Staged, Vitest (replacing Jest), Testing Library, Playwright, Commitlint, VSCode, Tailwind CSS, Authentication with [Clerk](https://clerk.com?utm_source=github&utm_medium=sponsorship&utm_campaign=nextjs-boilerplate), Database with DrizzleORM (PostgreSQL, SQLite, and MySQL), Error Monitoring with [Sentry](https://sentry.io/for/nextjs/?utm_source=github&utm_medium=paid-community&utm_campaign=general-fy25q1-nextjs&utm_content=github-banner-nextjsboilerplate-logo), Logging with Pino.js and Log Management, Monitoring as Code, Storybook, Multi-language (i18n), AI-powered code reviews with [CodeRabbit](https://app.coderabbit.ai/login?grsf=remi-wg-2qs2l9), Secure with [Arcjet](https://launch.arcjet.com/Q6eLbRE) (Bot detection, Rate limiting, Attack protection, etc.) and more. Thanks for GitHub open source project: [Next-js-Boilerplate](https://github.com/ixartz/Next-js-Boilerplate) ### Demo **Live demo: [Template for personal website](https://personal-website-template-eosin.vercel.app/)** ### Features Developer experience first, extremely flexible code structure and only keep what you need: - ⚡ [Next.js](https://nextjs.org) with App Router support - 🔥 Type checking [TypeScript](https://www.typescriptlang.org) - 💎 Integrate with [Tailwind CSS](https://tailwindcss.com) - ✅ Strict Mode for TypeScript and React 19 - 🔒 Authentication with [Clerk](https://clerk.com?utm_source=github&utm_medium=sponsorship&utm_campaign=nextjs-boilerplate): Sign up, Sign in, Sign out, Forgot password, Reset password, and more. - 👤 Passwordless Authentication with Magic Links, Multi-Factor Auth (MFA), Social Auth (Google, Facebook, Twitter, GitHub, Apple, and more), Passwordless login with Passkeys, User Impersonation - 📦 Type-safe ORM with DrizzleORM, compatible with PostgreSQL, SQLite, and MySQL - 💽 Offline and local development database with PGlite - 🌐 Multi-language (i18n) with [next-intl](https://next-intl-docs.vercel.app/) and [Crowdin](https://l.crowdin.com/next-js) - ♻️ Type-safe environment variables with T3 Env - ⌨️ Form handling with React Hook Form - 🔴 Validation library with Zod - 📏 Linter with [ESLint](https://eslint.org) (default Next.js, Next.js Core Web Vitals, Tailwind CSS and Antfu configuration) - 💖 Code Formatter with [Prettier](https://prettier.io) - 🦊 Husky for Git Hooks - 🚫 Lint-staged for running linters on Git staged files - 🚓 Lint git commit with Commitlint - 📓 Write standard compliant commit messages with Commitizen - 🦺 Unit Testing with Vitest and React Testing Library - 🧪 Integration and E2E Testing with Playwright - 👷 Run tests on pull request with GitHub Actions - 🎉 Storybook for UI development - 🐰 AI-powered code reviews with [CodeRabbit](https://app.coderabbit.ai/login?grsf=remi-wg-2qs2l9) - 🚨 Error Monitoring with [Sentry](https://sentry.io/for/nextjs/?utm_source=github&utm_medium=paid-community&utm_campaign=general-fy25q1-nextjs&utm_content=github-banner-nextjsboilerplate-logo) - ☂️ Code coverage with [Codecov](https://about.codecov.io/codecov-free-trial/?utm_source=github&utm_medium=paid-community&utm_campaign=general-fy25q1-nextjs&utm_content=github-banner-nextjsboilerplate-logo) - 📝 Logging with Pino.js and Log Management with [Better Stack](https://betterstack.com/?utm_source=github&utm_medium=sponsorship&utm_campaign=next-js-boilerplate) - 🖥️ Monitoring as Code with [Checkly](https://www.checklyhq.com/?utm_source=github&utm_medium=sponsorship&utm_campaign=next-js-boilerplate) - 🔐 Security and bot protection ([Arcjet](https://launch.arcjet.com/Q6eLbRE)) - 📊 Analytics with PostHog - 🎁 Automatic changelog generation with Semantic Release - 🔍 Visual testing with Percy (Optional) - 💡 Absolute Imports using `@` prefix - 🗂 VSCode configuration: Debug, Settings, Tasks and Extensions - 🤖 SEO metadata, JSON-LD and Open Graph tags - 🗺️ Sitemap.xml and robots.txt - ⌘ Database exploration with Drizzle Studio and CLI migration tool with Drizzle Kit - ⚙️ [Bundler Analyzer](https://www.npmjs.com/package/@next/bundle-analyzer) - 🌈 Include a FREE minimalist theme - 💯 Maximize lighthouse score Built-in feature from Next.js: - ☕ Minify HTML & CSS - 💨 Live reload - ✅ Cache busting ### Philosophy - Nothing is hidden from you, allowing you to make any necessary adjustments to suit your requirements and preferences. - Dependencies are regularly updated on a monthly basis - Start for free without upfront costs - Easy to customize - Minimal code - Unstyled template - SEO-friendly - Production-ready ### Requirements - Node.js 20+ and npm ### Getting started Run the following command on your local environment: ```shell git clone --depth=1 https://github.com/benguo-dev/nextjs-boilerplate-personal-website.git my-project-name cd my-project-name npm install ``` Once all dependencies installed then you can start the application locally: ```shell npm run dev ``` Open http://localhost:3000 with your favorite browser to see your project. ### Project structure ```shell . ├── README.md # README file ├── .github # GitHub folder ├── .husky # Husky configuration ├── .storybook # Storybook folder ├── .vscode # VSCode configuration ├── migrations # Database migrations ├── public # Public assets folder ├── src │ ├── app # Next JS App (App Router) │ ├── components # React components │ ├── libs # 3rd party libraries configuration │ ├── locales # Locales folder (i18n messages) │ ├── models # Database models │ ├── styles # Styles folder │ ├── templates # Templates folder │ ├── types # Type definitions │ ├── utils # Utilities folder │ └── validations # Validation schemas ├── tests │ ├── e2e # E2E tests, also includes Monitoring as Code │ └── integration # Integration tests ├── tailwind.config.js # Tailwind CSS configuration └── tsconfig.json # TypeScript configuration ``` ### Customization You can easily configure Next js Boilerplate by searching the entire project for `FIXME:` to make quick customizations. Here are some of the most important files to customize: - `public/apple-touch-icon.png`, `public/favicon.ico`, `public/favicon-16x16.png` and `public/favicon-32x32.png`: your website favicon - `src/utils/AppConfig.ts`: configuration file - `src/templates/BaseTemplate.tsx`: default theme - `next.config.ts`: Next.js configuration - `.env`: default environment variables You have full access to the source code for further customization. The provided code is just an example to help you start your project. The sky's the limit. ### Testing All unit tests are located alongside the source code in the same directory, making them easier to find. The project uses Vitest and React Testing Library for unit testing. You can run the tests with the following command: ```shell npm run test ``` ### Integration & E2E Testing The project uses Playwright for integration and end-to-end (E2E) testing. You can run the tests with the following commands: ```shell npx playwright install # Only for the first time in a new environment npm run test:e2e ``` In the local environment, visual testing is disabled, and the terminal will display the message `[percy] Percy is not running, disabling snapshots.`. By default, visual testing only runs in GitHub Actions. ### Deploy to production During the build process, database migrations are automatically executed, so there's no need to run them manually. However, you must define `DATABASE_URL` in your environment variables. Then, you can generate a production build with: ```shell $ npm run build ``` It generates an optimized production build of the boilerplate. To test the generated build, run: ```shell $ npm run start ``` This command starts a local server using the production build. You can now open http://localhost:3000 in your preferred browser to see the result. ### Deploy to Sevalla You can deploy a Next.js application along with its database on a single platform. First, create an account on [Sevalla](https://sevalla.com). After registration, you will be redirected to the dashboard. From there, navigate to `Database > Create a database`. Select PostgreSQL and and use the default settings for a quick setup. For advanced users, you can customize the database location and resource size. Finally, click on `Create` to complete the process. Once the database is created and ready, return to the dashboard and click `Application > Create an App`. After connecting your GitHub account, select the repository you want to deploy. Keep the default settings for the remaining options, then click `Create`. Next, connect your database to your application by going to `Networking > Connected services > Add connection` and select the database you just created. You also need to enable the `Add environment variables to the application` option, and rename `DB_URL` to `DATABASE_URL`. Then, click `Add connection`. Go to `Environment variables > Add environment variable`, and define the environment variables `NEXT_PUBLIC_CLERK_PUBLISHABLE_KEY` and `CLERK_SECRET_KEY` from your Clerk account. Click `Save`. Finally, initiate a new deployment by clicking `Overview > Latest deployments > Deploy now`. If everything is set up correctly, your application will be deployed successfully with a working database. ### Error Monitoring The project uses [Sentry](https://sentry.io/for/nextjs/?utm_source=github&utm_medium=paid-community&utm_campaign=general-fy25q1-nextjs&utm_content=github-banner-nextjsboilerplate-logo) to monitor errors. In the development environment, no additional setup is needed: Next.js Boilerplate is pre-configured to use Sentry and Spotlight (Sentry for Development). All errors will automatically be sent to your local Spotlight instance, allowing you to experience Sentry locally. For production environment, you'll need to create a Sentry account and a new project. Then, in `next.config.mjs`, you need to update the `org` and `project` attributes in `withSentryConfig` function. Additionally, add your Sentry DSN to `sentry.client.config.ts`, `sentry.edge.config.ts` and `sentry.server.config.ts`. ### Code coverage Next.js Boilerplate relies on [Codecov](https://about.codecov.io/codecov-free-trial/?utm_source=github&utm_medium=paid-community&utm_campaign=general-fy25q1-nextjs&utm_content=github-banner-nextjsboilerplate-logo) for code coverage reporting solution. To enable Codecov, create a Codecov account and connect it to your GitHub account. Your repositories should appear on your Codecov dashboard. Select the desired repository and copy the token. In GitHub Actions, define the `CODECOV_TOKEN` environment variable and paste the token. Make sure to create `CODECOV_TOKEN` as a GitHub Actions secret, do not paste it directly into your source code. ### Logging The project uses Pino.js for logging. In the development environment, logs are displayed in the console by default. For production, the project is already integrated with [Better Stack](https://betterstack.com/?utm_source=github&utm_medium=sponsorship&utm_campaign=next-js-boilerplate) to manage and query your logs using SQL. To use Better Stack, you need to create a [Better Stack](https://betterstack.com/?utm_source=github&utm_medium=sponsorship&utm_campaign=next-js-boilerplate) account and create a new source: go to your Better Stack Logs Dashboard > Sources > Connect source. Then, you need to give a name to your source and select Node.js as the platform. After creating the source, you will be able to view and copy your source token. In your environment variables, paste the token into the `LOGTAIL_SOURCE_TOKEN` variable. Now, all logs will automatically be sent to and ingested by Better Stack. ### Checkly monitoring The project uses [Checkly](https://www.checklyhq.com/?utm_source=github&utm_medium=sponsorship&utm_campaign=next-js-boilerplate) to ensure that your production environment is always up and running. At regular intervals, Checkly runs the tests ending with `*.check.e2e.ts` extension and notifies you if any of the tests fail. Additionally, you have the flexibility to execute tests from multiple locations to ensure that your application is available worldwide. To use Checkly, you must first create an account on [their website](https://www.checklyhq.com/?utm_source=github&utm_medium=sponsorship&utm_campaign=next-js-boilerplate). After creating an account, generate a new API key in the Checkly Dashboard and set the `CHECKLY_API_KEY` environment variable in GitHub Actions. Additionally, you will need to define the `CHECKLY_ACCOUNT_ID`, which can also be found in your Checkly Dashboard under User Settings > General. To complete the setup, update the `checkly.config.ts` file with your own email address and production URL. ### Arcjet security and bot protection The project uses [Arcjet](https://launch.arcjet.com/Q6eLbRE), a security as code product that includes several features that can be used individually or combined to provide defense in depth for your site. To set up Arcjet, [create a free account](https://launch.arcjet.com/Q6eLbRE) and get your API key. Then add it to the `ARCJET_KEY` environment variable. Arcjet is configured with two main features: bot detection and the Arcjet Shield WAF: - [Bot detection](https://docs.arcjet.com/bot-protection/concepts) is configured to allow search engines, preview link generators e.g. Slack and Twitter previews, and to allow common uptime monitoring services. All other bots, such as scrapers and AI crawlers, will be blocked. You can [configure additional bot types](https://docs.arcjet.com/bot-protection/identifying-bots) to allow or block. - [Arcjet Shield WAF](https://docs.arcjet.com/shield/concepts) will detect and block common attacks such as SQL injection, cross-site scripting, and other OWASP Top 10 vulnerabilities. Arcjet is configured with a central client at `src/libs/Arcjet.ts` that includes the Shield WAF rules. Additional rules are applied when Arcjet is called in `middleware.ts`. ### Useful commands #### Bundle Analyzer Next.js Boilerplate includes a built-in bundle analyzer. It can be used to analyze the size of your JavaScript bundles. To begin, run the following command: ```shell npm run build-stats ``` By running the command, it'll automatically open a new browser window with the results. #### Database Studio The project is already configured with Drizzle Studio to explore the database. You can run the following command to open the database studio: ```shell npm run db:studio ``` Then, you can open https://local.drizzle.studio with your favorite browser to explore your database. ### VSCode information (optional) If you are VSCode user, you can have a better integration with VSCode by installing the suggested extension in `.vscode/extension.json`. The starter code comes up with Settings for a seamless integration with VSCode. The Debug configuration is also provided for frontend and backend debugging experience. With the plugins installed in your VSCode, ESLint and Prettier can automatically fix the code and display errors. The same applies to testing: you can install the VSCode Vitest extension to automatically run your tests, and it also shows the code coverage in context. Pro tips: if you need a project wide-type checking with TypeScript, you can run a build with <kbd>Cmd</kbd> + <kbd>Shift</kbd> + <kbd>B</kbd> on Mac. ### License Licensed under the MIT License, Copyright © 2025 See [LICENSE](LICENSE) for more information.
看看同类模板
对比同技术栈与用途的模板,找到更适合的视觉与内容结构。
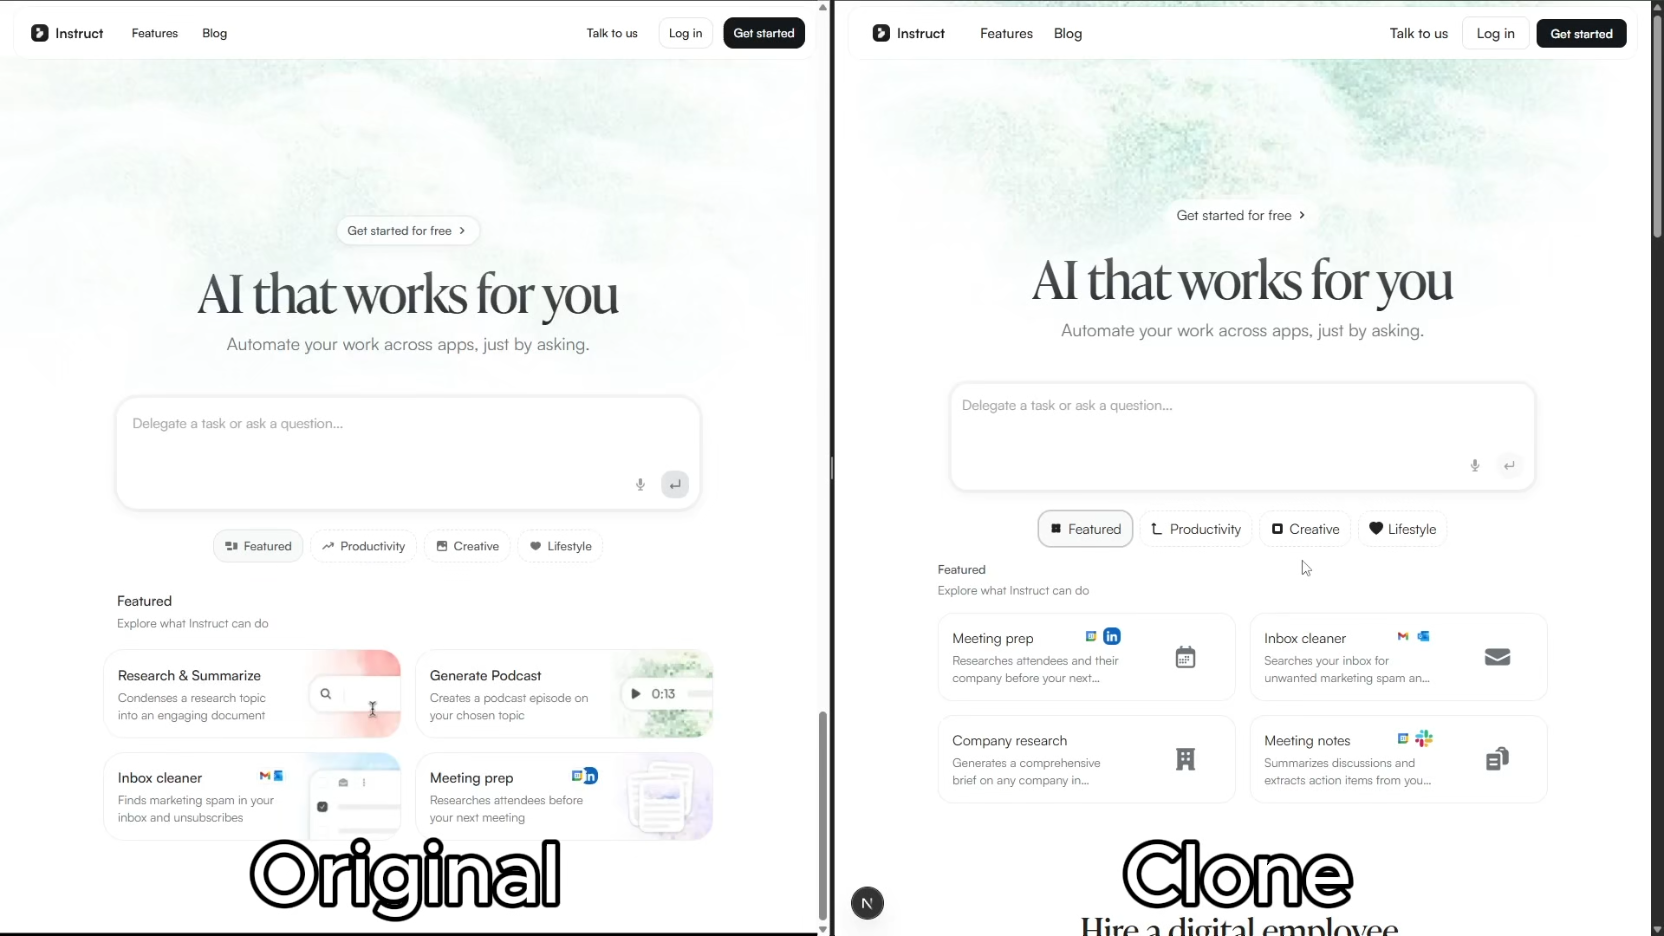
ai-website-cloner-template
Clone any website with one command using AI coding agents
Next.js · 启动器

Next.js SaaS Starter
Next.js SaaS Starter 是 Next.js 官方维护的 SaaS 起点模板,定位介于学习资源和可直接部署的脚手架之间。
Next.js · SaaS

Next.js Commerce
Next.js Commerce 是 Vercel 团队维护的电商启动模板,基于 Next.js App Router 构建,采用服务端渲染、React Server Components、Server Actions …
Next.js · 电商

Next-js-Boilerplate
Next-js-Boilerplate 是一个面向 Next.js 16、Tailwind CSS 4 和 TypeScript 的启动器,核心定位是开发者体验优先。
Next.js · 启动器

tailwind-nextjs-starter-blog
tailwind-nextjs-starter-blog 是一个面向个人技术博客的 Next.js 与 Tailwind CSS 启动模板,其 v2 版本基于 App Router 与 React Server Comp…
Next.js · 博客

next-forge
Production-grade Turborepo template for Next.js apps.
Next.js · 启动器