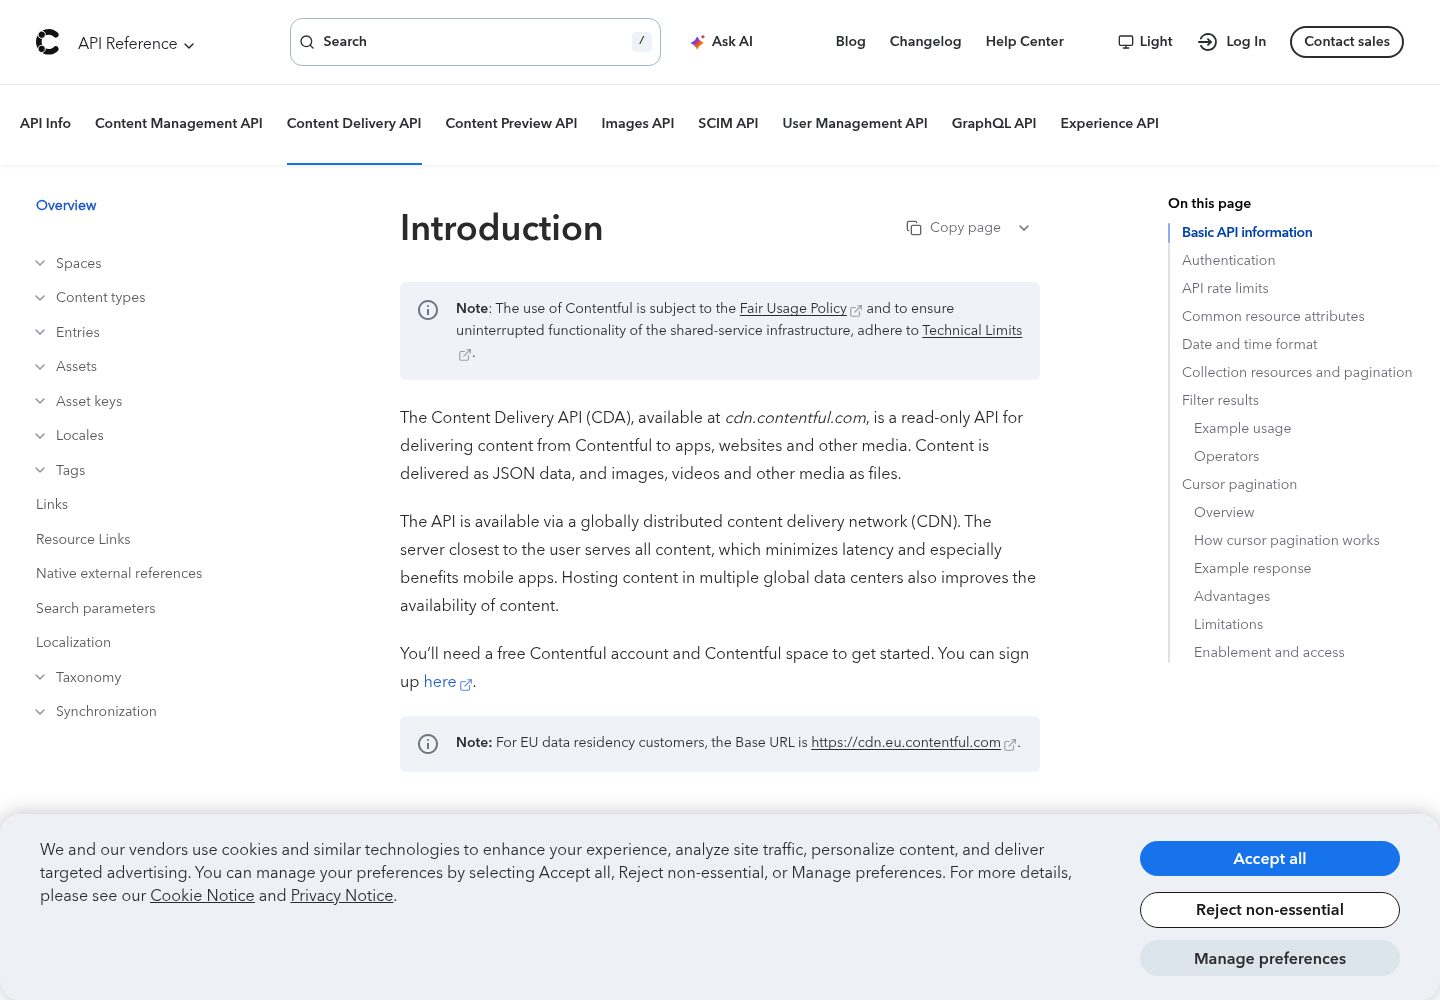
基于 Next.js 与 React 的博客前端,页面与组件已预先设计
Next.jsReact博客启动器
template-blog-webapp-nextjs — Next.js 博客模板
作者 contentful
Contentful 官方博客启动模板,基于 Next.js 与 React,通过 Contentful GraphQL API 获取内容,内置内容建模、本地化、SEO 与增量静态再生成等配置。
看看你的网站会是什么样
浏览真实页面截图,比较内容排版与手机效果。点击下方缩略图切换,放大查看整页细节。
全部页面与视图 3
截图用于了解视觉与布局,交互效果请以实际项目为准。
采集于 2026-10-02查看来源
值得关注的模板亮点
从已有项目资料中,快速了解它的特点。
内容通过 Contentful GraphQL API 获取,使用 graphql-request 发起请求
使用 graphql-codegen 从 .graphql 文件生成类型安全的 SDK
支持内容建模、本地化与 SEO 相关配置
集成 Content Preview 与草稿模式,便于预览未发布内容
使用 TypeScript,并配置 Husky 提交钩子与 lint-staged
模板详细介绍
这是一个由 Contentful 维护的博客启动模板,仓库名为 template-blog-webapp-nextjs,技术栈为 Next.js 与 React。模板围绕 Contentful 的内容基础设施构建:内容在 Contentful 中建模与管理,前端通过 Contentful 的 GraphQL API 读取数据,并使用 graphql-request 发起请求。项目包含预设计的页面与组件,覆盖博客常见的首页、文章页等结构,同时提供内容预览(Content Preview)与草稿模式(Draft Mode)的接入代码。
在开发体验方面,模板使用 TypeScript,并通过 graphql-codegen 依据 lib/graphql 目录下的 .graphql 文件生成类型与 SDK,生成结果位于 src/lib/__generated,需要提交到仓库。仓库配置了 Husky 的 pre-commit 与 pre-push 钩子,在提交前运行 TypeScript 编译检查与 lint-staged(ESLint、Prettier)。
使用前需要注意:README 声明 Starter Templates 体验目前仅面向新用户,需通过 Contentful 的注册链接创建账号并选择该模板安装。运行模板必须配置 Contentful 的 Space ID、Content Delivery API token 与 Content Preview API token 三个环境变量。模板可部署到自选托管平台,官方提供了 Vercel 与 Netlify 的部署入口。代码采用 MIT 许可,但演示图片、字体、图标等第三方素材以及 Contentful 等外部服务的费用需另行核对。
Next.jsReact博客启动器
适合你的项目吗?
适用场景
- 使用 Contentful 作为内容源搭建博客站点
- 需要内容预览与草稿模式来审阅未发布文章
- 希望通过 GraphQL 与代码生成获得类型安全的数据访问
- 将博客部署到 Vercel 或 Netlify 等托管平台
适合人群
- 已使用或计划使用 Contentful 管理内容的团队
- 熟悉 Next.js、React 与 TypeScript 的开发者
- 需要本地化与 SEO 基础配置的博客项目
- 希望以启动模板快速开始内容驱动型博客的开发者
上手与定制指南
结合仓库当前版本的说明,按下面的资料检查内容、配置与运行要求。
- 1
README 声明 Starter Templates 体验目前仅面向新用户,需通过 Contentful 注册链接创建账号并选择该模板安装
- 2
需将 .env.example 重命名为 .env,并填入 Contentful Space ID、Content Delivery API token 与 Content Preview API token
- 3
使用 yarn 安装依赖,yarn dev 启动开发服务器,默认运行在 http://localhost:3000
- 4
修改 .graphql 文件后需运行 yarn graphql-codegen:generate 重新生成 schema、类型与 SDK,生成文件位于 src/lib/__generated 并应提交到仓库
- 5
部署到 Vercel 或 Netlify 时需在托管平台配置上述环境变量;内容预览还需设置 CONTENTFUL_PREVIEW_SECRET 并在 Contentful 中配置预览 URL
授权与来源资料
使用条件与限制
免费使用 · 保留许可声明本次收录的是公开仓库中采用 MIT 许可的免费版本;免费范围为该版本代码,不代表外部服务或第三方素材免费。
使用时需要遵守
- 允许免费使用、修改、商用和分发该版本代码。
- 分发代码副本或实质性部分时,保留原作者版权声明和完整 MIT 许可声明。
- 代码按现状提供;担保与责任限制以原许可证及适用法律为准。
额外费用与待核对事项
- 该启动模板体验目前仅面向新用户,需通过 Contentful 注册链接创建新账号并选择该模板安装,已有账号用户可能无法使用此安装方式。
- 运行模板必须配置 Contentful 的 Space ID、Content Delivery API token 与 Content Preview API token,即依赖 Contentful 外部服务与账号。
- 使用内容预览功能需自行设置 CONTENTFUL_PREVIEW_SECRET 环境变量,并在 Contentful 中配置预览 URL。
- 演示图片、字体、图标及其他第三方素材需按各自许可核对,不能仅凭代码的 MIT 许可判断。
- 域名、托管、数据库、支付或 AI 等外部服务可能另外收费。
查看原文依据
Permission is hereby granted, free of charge
许可证原文
The Starter Templates experience is currently only available to new users.
README 原文
In order to authenticate the requests to the Contentful APIs, the following values are necessary:
README 原文
https://github.com/contentful/template-blog-webapp-nextjs/blob/main/LICENSEhttps://github.com/contentful/template-blog-webapp-nextjs/blob/main/README.mdSet a unique value for `process.env.CONTENTFUL_PREVIEW_SECRET` in your environment variables.
README 原文
DeepSeek 根据仓库许可证和 README 整理 ·2026-10-02。结果仅覆盖已读取资料,依赖、图片、字体及后续条款变更以各自原文为准。
项目核对记录与介绍依据
模板资料
- 来源平台
- GitHub
- 资料与维护参考分
- 资料较完整 · 88 / 100
- 技术栈
- Next.js · React
- 网站类型
- 博客 · 启动器
这个分数如何计算
本站按许可资料(最高30分)、演示链接(12分)、预览图(10分)、Star数(15分)、记录的维护时间(15分)、描述完整度(8分)、功能记录(5分)和分类资料(5分)计算。它不是代码、安全或性能测试,也不是 Google 评分;有链接不代表已实测可用。
这个项目需要核对什么
- 记录的仓库更新时间
- 2026-09-30
- 截图检查日期
- 2026-10-02
已收录演示链接。请用你的内容与屏幕尺寸检查;有演示不代表表单、认证或支付已经可用。
目录记录的主要技术栈是 Next.js。请通过依赖清单和锁文件核对实际版本与托管要求。这些说明基于收录资料,不代表代码审计或部署实测。
查看具体选型方法 →介绍的制作与核对状态
介绍由 AI 辅助整理目录与仓库资料。仓库作者不等于这篇介绍的审核者。
已完成服务器许可规则与 AI 来源核对;未经过人工编辑审核。
查看当时使用的来源资料
SHA-256: 66cdcd7d9ea7586ae64bb87d353106c4f94a1c32e9d0fb6c6f75ac5154c89c9e
2026-10-02T09:29:05.087Z
来源文件 / 仓库# Contentful Blog Starter Template
A Blog Starter Template powered by Next.js & Contentful, pre-designed with optimized & adjustable pages, components, and data management.

$~$
## What is Contentful?
[Contentful](https://www.contentful.com/) provides content infrastructure for digital teams to power websites, apps, and devices. Unlike a CMS, Contentful was built to integrate with the modern software stack. It offers a central hub for structured content, powerful management, and delivery APIs, and a customizable web app that enables developers and content creators to ship their products faster.
$~$
## DISCLAIMER ⚠️
The Starter Templates experience is currently only available to new users.
To benefit from this experience, please follow this link to create a new
account and select the template to install: [https://www.contentful.com/starter-templates/nextjs-blog/sign-up/?action=create_starter_template](https://www.contentful.com/starter-templates/nextjs-blog/sign-up/?action=create_starter_template&utm_source=github.com&utm_medium=referral&utm_campaign=template-blog-webapp-nextjs).
Alternatively, to immediately start the auto installation of this template after creating a new account,
please follow this link:
[https://www.contentful.com/starter-templates/nextjs-blog/sign-up/?action=create_starter_template&template_name=blog](https://www.contentful.com/starter-templates/nextjs-blog/sign-up/?action=create_starter_template&template_name=blog&utm_source=github.com&utm_medium=referral&utm_campaign=template-blog-webapp-nextjs).
$~$
## Begin your journey with Contentful and the Blog Starter Template
Follow this [guide](https://github.com/contentful/template-blog-webapp-nextjs/blob/main/docs/tutorials/contentful-and-the-starter-template.md/?utm_source=github.com-guide&utm_medium=referral&utm_campaign=template-blog-webapp-nextjs) to understand the relationship between
Contentful and the Starter Template source code through guided steps:
- Entry editing, and updates preview in the Starter Template application (online/locally)
- Content type editing in the Contentful web app, as well as in the Starter Template's code
$~$
## Features
- Composable content through powerful & flexible content modeling.
- Localization ready.
- SEO ready.
- Incremental Static Regeneration with Next.js[^1].
- Generation of GraphQL[^2] typed code (schema, and types), in sync with the content types through graphql-codegen[^3].
- Enhanced Developer Experience with TypeScript[^4].
$~$
## Getting started
To get started, read the following guidelines.
- [Environment variables](./README.md#environment-variables)
- [Dependencies](./README.md#dependencies)
- [Development](./README.md#development)
- [Contentful API & GraphQL](./README.md#contentful-api--graphql)
- [Deployment](./README.md#deployment)
$~$
### Environment variables
In order to authenticate the requests to the Contentful APIs, the following values are necessary:
- Your space ID: [https://www.contentful.com/help/find-space-id/](https://www.contentful.com/help/find-space-id/)
- Contentful Delivery API token: [https://www.contentful.com/developers/docs/references/content-delivery-api/](https://www.contentful.com/developers/docs/references/content-delivery-api/)
- Contentful Preview API token: [https://www.contentful.com/developers/docs/references/content-preview-api/](https://www.contentful.com/developers/docs/references/content-preview-api/)
Rename the `.env.example` file to `.env` and add the necessary values.
$~$
### Dependencies
To install the necessary dependencies, run:
```bash
yarn
```
### Run the Starter Template in development mode
```bash
yarn dev
```
The Starter Template should be up and running on `http://localhost:3000`.
All necessary dependencies are installed under `node_modules` and any necessary tools can be accessed via npm scripts.
$~$
## Development
### Husky & git hooks
This repository makes use of [Husky](https://github.com/typicode/husky) to enforce commit hooks.
The config for both the `pre-commit` and `pre-push` hooks can be found in the `.husky` folder, located in the root of the project.
---
#### Pre-commit
Before allowing a commit, we require a successful result from the TypeScript compiler (`tsc`) and our `lint-staged` script will be run.
This ensures all ESLint and Prettier rules are enforced on the files that are staged to be committed.
The `tsc` command is run separately from the `lint-staged` step because we require the Typescript compiler to sample _all_ files.
This is important to ensure that no deviating types were introduced by the [codegen](./README.md#graphql--code-generation) for example.
---
#### Pre-push
The same two tasks are run for pre-push and for pre-commit.
---
#### Overriding the Husky git hooks
In case of wanting to bypass the `pre-commit` or `pre-push` hooks, pass a `--noVerify` flag to your Git commands.
⚠️ Make sure you only use this if you know why you're using it. ⚠️
$~$
### Contentful API & GraphQL
This project makes use of Contentful's [GraphQL API](https://www.contentful.com/developers/docs/references/graphql/).
API calls made to the Contentful GraphQL endpoint are made through `graphql-request`.
The types are generated from the `.graphql` files located in the `/lib/graphql/` directory:
1. `lib/graphql/[fileName].graphql` is detected by the [codegen](./README.md#graphql--code-generation)
2. `lib/__generated/sdk.ts` is generated
3. Within the generated file, their types and a new `getSdk` function are generated
4. The `getSdk` function can now be imported and used within the `getStaticProps` in the pages files
$~$
### GraphQL & code generation
We use `graphql-codegen` to generate a type-safe API client, utilizing [GraphQLClient](https://the-guild.dev/graphql/codegen/plugins/typescript/typescript-graphql-request) as the "client".
---
#### Commands
In order to (re-)generate the GraphQL schema, types and sdk, please use either of the following commands:
- `yarn graphql-codegen:generate` generates a schema, types and code to fetch data from the Contentful APIs
- `yarn graphql-codegen:watch` similar to the `generate` command, but it runs as a watch task which will rerun the steps when changes are made in the `.graphql` files
The first steps of the codegen generate files that contain the GraphQL schema and matching TypeScript types. All these files are located in the `src/lib/graphql` folder.
They're generated to the `src/lib/__generated` folder and ought to be committed once altered/added to the repository.
The TS types for these files are generated in the same location, in a `__generated` folder and like the other files ought to be committed.
---
#### Configuration
The configuration for the codegen can be found in `codegen.ts`, located in the root of the project.
$~$
---
$~$
## Deployment
The Starter Template can be deployed to your hosting provider of choice.
We offer integrations with Vercel and Netlify to speed up the process by clicking one of the deploy buttons below. The GitHub repository and
the necessary environment variables keys are pre-configured in the hosting provider space.
| Vercel | Netlify |
| -------------------------------------------------------------------------------------------------------------------------------------------------------------------------------------------------------------------------------------------------------------------------------------------------------------------------------------------------------------------------------------------------------------------- | -------------------------------------------------------------------------------------------------------------------------------------------------------------------------------------------------------------------------------------------------------------------------------- |
| [](https://vercel.com/new/clone?repository-url=https%3A%2F%2Fgithub.com%2Fcontentful%2Ftemplate-blog-webapp-nextjs&env=CONTENTFUL_SPACE_ID,CONTENTFUL_ACCESS_TOKEN,CONTENTFUL_PREVIEW_ACCESS_TOKEN&envDescription=API%20Keys%20needed%20for%20the%20application&envLink=https%3A%2F%2Fgithub.com%2Fcontentful%2Ftemplate-blog-webapp-nextjs%23environment-variables) | [](https://app.netlify.com/start/deploy?repository=https%3A%2F%2Fgithub.com%2Fcontentful%2Ftemplate-blog-webapp-nextjs#CONTENTFUL_SPACE_ID=&CONTENTFUL_ACCESS_TOKEN=&CONTENTFUL_PREVIEW_ACCESS_TOKEN=) |
| [Environment variables docs](https://vercel.com/docs/concepts/projects/environment-variables) | [Environment variables docs](https://docs.netlify.com/environment-variables/overview/) |
Make sure to add the necessary [environment variables values](./README.md#environment-variables) to the hosting provider
environment variables.
---
## Content preview
Once you have the Starter Template deployed on your hosting provider, you can update the Content preview URL in your space settings.
You can follow our guide to learn how to do
so: [https://www.contentful.com/help/setup-content-preview](https://www.contentful.com/help/setup-content-preview/?utm_source=github.com-preview-guide&utm_medium=referral&utm_campaign=template-marketing-webapp-nextjs).
For the live preview the basic field tagging for the inspector mode and live updates are already implemented.
For custom components, you can find the instructions at our [guide](https://www.contentful.com/developers/docs/tutorials/general/live-preview/).
### Adjustments in code
1. Set a unique value for `process.env.CONTENTFUL_PREVIEW_SECRET` in your environment variables. This value should be kept secret and only known to the API route and the CMS.
2. Configure the entry preview URLs in Contentful to match the draft API route's URL structure. This can be done in the Contentful web interface under "Settings" for each content type. For more information see: https://www.contentful.com/help/setup-content-preview/#preview-content-in-your-online-environment
3. The draft mode API route is already written in the app and can be found in `src/app/api/enable-draft/route.ts`. This route checks for a valid secret and slug before redirecting to the corresponding page\*.
_\*The `slug` field is optional; When not passed we redirect the page to the root of the domain._
### Adjustments in Contentful
1. Next, you will need to configure your Contentful space to use the correct preview URLs. To do this, go to the "Settings" section of your space, and click on the "Content Preview" tab. From here, you can configure the preview URLs for each of your content models.
2. Edit all content models that need a preview url. We usually expect that to only be the models prefixed with `📄 page -`.
3. Add a new URL with the following format: `https://<your-site>/api/enable-draft?path=%2F{locale}%2F{entry.fields.slug}&x-contentful-preview-secret=<token>`. Make sure to replace `<your-site>` with the URL of your Next.js site, and `<token>` with the value of `process.env.CONTENTFUL_PREVIEW_SECRET`.
4. Now, when you view an unpublished entry in Contentful, you should see a "Preview" button that will take you to the preview URL for that entry. Clicking this button should show you a preview of the entry on your Next.js site, using the draft API route that we set up earlier.
$~$
---
$~$
## Support
If you have a problem with this Starter Template, post a message in our [Contentful Community Slack](https://www.contentful.com/slack/).
Can't find your answer there? You can file a feedback issue through [this template](https://github.com/contentful/template-blog-webapp-nextjs/tree/main/.github/ISSUE_TEMPLATE/feedback.md).
If you have other problems with Contentful not related to the Starter Template, you can contact the [Customer Support](https://support.contentful.com/).
$~$
## Contributing
See [CONTRIBUTING.md](./CONTRIBUTING.md).
$~$
## License
MIT License, see [LICENSE](./LICENSE).
$~$
<!-- FOOTNOTES -->
[^1]: [Next.js docs](https://nextjs.org/docs/basic-features/data-fetching/get-static-props)
[^2]: [GraphQL docs](https://graphql.org/learn/)
[^3]: [graphql-codegen](https://www.the-guild.dev/graphql/codegen)
[^4]: [TypeScript](https://www.typescriptlang.org/)
[^note]: [React docs](https://reactjs.org/docs/getting-started.html)
看看同类模板
对比同技术栈与用途的模板,找到更适合的视觉与内容结构。
ai-website-cloner-template
Clone any website with one command using AI coding agents
Next.js · 启动器

Next.js SaaS Starter
Next.js SaaS Starter 是 Next.js 官方维护的 SaaS 起点模板,定位介于学习资源和可直接部署的脚手架之间。
Next.js · SaaS

Next.js Commerce
Next.js Commerce 是 Vercel 团队维护的电商启动模板,基于 Next.js App Router 构建,采用服务端渲染、React Server Components、Server Actions …
Next.js · 电商

Next-js-Boilerplate
Next-js-Boilerplate 是一个面向 Next.js 16、Tailwind CSS 4 和 TypeScript 的启动器,核心定位是开发者体验优先。
Next.js · 启动器

tailwind-nextjs-starter-blog
tailwind-nextjs-starter-blog 是一个面向个人技术博客的 Next.js 与 Tailwind CSS 启动模板,其 v2 版本基于 App Router 与 React Server Comp…
Next.js · 博客

next-forge
Production-grade Turborepo template for Next.js apps.
Next.js · 启动器