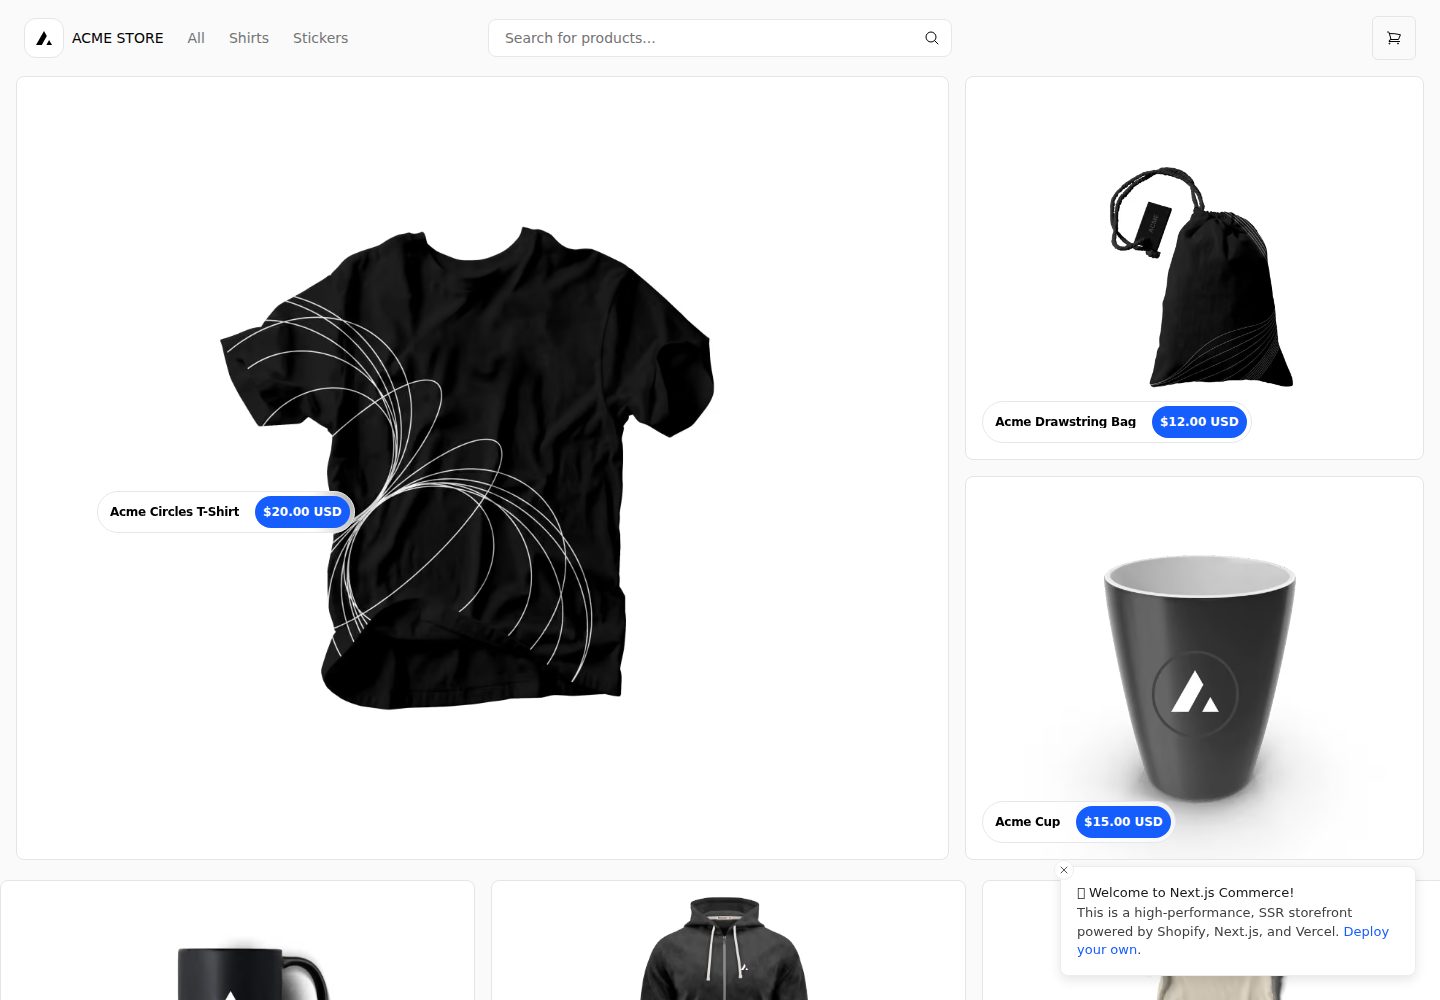
基于 Next.js Commerce 起始模板,保留 TypeScript 强类型组件与 provider 结构
Next.jsReact电商启动器
streetwares-v2 — Next.js 电商模板
作者 ethanny2
基于 Next.js Commerce 改造的街头服饰电商前端,使用 TypeScript、Tailwind CSS,并通过 GraphQL 对接 Headless Shopify 商品数据。
看看你的网站会是什么样
浏览真实页面截图,比较内容排版与手机效果。点击下方缩略图切换,放大查看整页细节。
全部页面与视图 3
截图用于了解视觉与布局,交互效果请以实际项目为准。
采集于 2026-10-02查看来源
值得关注的模板亮点
从已有项目资料中,快速了解它的特点。
通过 GraphQL 连接 Shopify Storefront API 获取商品数据
使用 Framer Motion 与 react-intersection-observer 实现进入视口触发的动画
样式混合 Tailwind CSS 工具类与 CSS Modules 局部作用域类名
购物车用 Cookie 持久化,结账跳转至 Shopify 结算页
README 记录了 PurgeCSS 清除拼接式 Tailwind 类的已知问题及规避方式
模板详细介绍
streetwares-v2 是作者对 Next.js Commerce 起始模板的定制版本,目标是把通用电商骨架改造成面向街头/滑板服饰的店面。项目保留 Next.js + TypeScript 的强类型组件结构,样式使用 Tailwind CSS 工具类与 CSS Modules 混合,动画由 Framer Motion 配合 react-intersection-observer 在元素进入视口时触发。商品数据通过 GraphQL 从 Shopify Storefront API 获取,购物车信息用 Cookie 持久化,结账环节借助 Headless Shopify Lite 跳转到 Shopify 的结算页。
仓库 README 同时保留了 Next.js Commerce 原始说明,其中包含多后端 provider 机制、commerce.config.json 功能开关、环境变量配置方式等内容。这些属于上游模板的通用能力,是否在本定制版中全部可用需以仓库实际代码为准。README 还记录了一个已知问题:生产构建时 PurgeCSS 无法识别通过字符串拼接生成的 Tailwind 工具类,作者用隐藏 span 的方式规避,说明该定制版在样式构建上存在需要留意的边界。
项目最后更新于 2021 年,仓库星标数较少,演示站点由 Vercel 托管。它更适合作为学习或二次开发的起点,而非直接上线的成品商店。
Next.jsReact电商启动器
适合你的项目吗?
适用场景
- 学习如何把 Next.js Commerce 模板改造成特定品类(街头服饰)的店面
- 参考 TypeScript 组件目录组织与 Framer Motion 视口动画的写法
- 了解 Headless Shopify 与 Next.js 前端通过 GraphQL 对接的基本流程
- 作为个人练习项目,在本地搭建并修改页面与组件
适合人群
- 希望研究 Next.js Commerce 定制流程的前端开发者
- 需要 TypeScript + Tailwind CSS 电商组件示例的学习者
- 计划自行接入 Shopify Storefront API 的个人项目作者
上手与定制指南
结合仓库当前版本的说明,按下面的资料检查内容、配置与运行要求。
- 1
复制 .env.template 为 .env.local,填入 Shopify Storefront 访问令牌与店铺域名
- 2
在 .env.local 中设置 COMMERCE_PROVIDER=shopify,并确认 tsconfig.json 的 @framework 路径指向 shopify
- 3
使用 yarn 安装依赖后运行 yarn dev 启动本地开发
- 4
生产构建时注意 PurgeCSS 可能清除字符串拼接生成的 Tailwind 类,需按 README 中的方式处理
- 5
演示图片、字体等第三方素材需单独核对其许可,代码的 MIT 许可不覆盖这些素材
授权与来源资料
使用条件与限制
免费使用 · 保留许可声明本次收录的是公开仓库中采用 MIT 许可的免费版本;免费范围为该版本代码,不代表外部服务或第三方素材免费。
使用时需要遵守
- 允许免费使用、修改、商用和分发该版本代码。
- 分发代码副本或实质性部分时,保留原作者版权声明和完整 MIT 许可声明。
- 代码按现状提供;担保与责任限制以原许可证及适用法律为准。
额外费用与待核对事项
- 使用该模板需自行提供 Shopify Storefront API 访问令牌,并配置店铺域名等环境变量,否则无法获取商品数据。
- 结账流程依赖 Shopify 平台,用户会被重定向到 Shopify 结算页,需拥有可用的 Shopify 店铺才能完成下单。
- 生产构建时 PurgeCSS 会清除通过字符串拼接生成的 Tailwind 工具类,可能导致响应式样式丢失,需按 README 方式规避。
- 演示所用图片等第三方素材为外部来源,其许可不包含在 MIT 代码许可内,商用前需自行核实授权。
- 演示图片、字体、图标及其他第三方素材需按各自许可核对,不能仅凭代码的 MIT 许可判断。
- 域名、托管、数据库、支付或 AI 等外部服务可能另外收费。
查看原文依据
Permission is hereby granted, free of charge
许可证原文
NEXT_PUBLIC_SHOPIFY_STOREFRONT_ACCESS_TOKEN=xxxxxxxxxxxxxxxxxxxxxxxxxxxx
README 原文
Headless Shopify Lite integration to redirect the user to a Shopify checkout page
README 原文
In production PurgeCSS (activated through Tailwind) doesn't recognize Tailwind utility classes made via string concatenation.
README 原文
https://github.com/ethanny2/streetwares-v2/blob/master/license.mdhttps://github.com/ethanny2/streetwares-v2/blob/master/README.mdI looked online for sample images I could use to replicate the feel / UI of other popular online streetwear stores
README 原文
DeepSeek 根据仓库许可证和 README 整理 ·2026-10-02。结果仅覆盖已读取资料,依赖、图片、字体及后续条款变更以各自原文为准。
项目核对记录与介绍依据
模板资料
- 来源平台
- GitHub
- 资料与维护参考分
- 资料一般 · 73 / 100
- 技术栈
- Next.js · React
- 网站类型
- 电商 · 启动器
这个分数如何计算
本站按许可资料(最高30分)、演示链接(12分)、预览图(10分)、Star数(15分)、记录的维护时间(15分)、描述完整度(8分)、功能记录(5分)和分类资料(5分)计算。它不是代码、安全或性能测试,也不是 Google 评分;有链接不代表已实测可用。
这个项目需要核对什么
- 记录的仓库更新时间
- 2021-06-03
- 截图检查日期
- 2026-10-02
已收录演示链接。请用你的内容与屏幕尺寸检查;有演示不代表表单、认证或支付已经可用。
目录记录的主要技术栈是 Next.js。请通过依赖清单和锁文件核对实际版本与托管要求。这些说明基于收录资料,不代表代码审计或部署实测。
查看具体选型方法 →介绍的制作与核对状态
介绍由 AI 辅助整理目录与仓库资料。仓库作者不等于这篇介绍的审核者。
已完成服务器许可规则与 AI 来源核对;未经过人工编辑审核。
查看当时使用的来源资料
SHA-256: 733df882f81d18ad24280c8dbe925ec424c9228eab8cbf06a62fb4edb365347a
2026-10-02T15:57:34.838Z
来源文件 / 仓库[](https://github.com/ethanny2/streetwares-v2/issues)[](https://github.com/ethanny2/streetwares-v2/network)[](https://github.com/ethanny2/streetwares-v2/stargazers)[](https://github.com/ethanny2/streetwares-v2/blob/master/license.md)[](https://twitter.com/ArrayLikeObj)
# 100 Streetwares Ecommerce
#### (Headless Shopify + Nextjs and TypeScript)
## [https://100streetwares.vercel.app/](https://100streetwares.vercel.app/)
<p align="center">
<img src="https://media3.giphy.com/media/2a2FrTYMXXNS5cbH1F/giphy.gif?cid=790b7611a7912e2491c0adb9e8a0a7535213aeae15e93193&rid=giphy.gif&ct=g" alt="Demo gif">
</p>
## Background
The goal of this project was to gain insight on how to connect an ecommerce
storefront with a CMS backend that could easily be handed off to a client. I eventually chose Next.js for its strong ecommerce facing templates and ended up using headless Shopify as the backend (as opposed to Sanity CMS or Bigcommerce).
**Goals** :
- Gain experience with the Nextjs ecosystem and learn when to implement SSG (static site generation) vs SSR (server side rendering)
- Practice using Tailwind CSS animation and styling
- Use Framer motion as a declarative animation library rather than making the animations through Tailwind CSS
- Gain insight into how a professional level TypeScript + Next.js application is built by reading through the codebase and creating new components as necessary
## Technology used
- Next.js
- Framer Motion
- react-intersection-observer to trigger animations when element in viewport
- Basic TypeScript to make strongly typed components to extend functionality
- GraphQL to connect to the Shopify Storefront API and fetch the backend product information
- Tailwind CSS for styling with utility classes
- CSS modules for classes scoped to a specific component
- Cookies to persist user cart information
- Headless Shopify Lite integration to redirect the user to a Shopify checkout page
## Concepts
### Working in a strongly typed professional codebase
Using this template helped me gain experience understanding how to navigate a well maintained codebase and how to add functionality to it by following the project conventions and structure when making my own TypeScript components.
```
100-streetwares
└───components
│ └─── auth
│ └─── cart
│ └─── common
| └─── icons
| └─── product
| └─── ui
| └─── wishlist
| └─── customize
| └─── HeroImage
| └─── HeroImage.module.css
| └─── HeroImage.tsx
| └─── index.ts
| └─── ImageZoom
| └─── ImageZoom.module.css
| └─── ImageZoom.tsx
| └─── index.ts
...
...
```
### Intersection Observer Animations
Using the react-intersection-observer along with Framer motion's declarative syntax I only trigger the Framer motion animation when the element specified by the ref is in the viewport.
```
const controls = useAnimation()
const { ref, inView } = useInView({ threshold: 0.5, delay: 50 })
useEffect(() => {
if (inView) controls.start('visible')
}, [inView, controls])
const imageZoomVariant = {
hidden: { opacity: 0 },
visible: {
opacity: 1,
transition: {
duration: 0.6,
},
},
}
<motion.a
ref={ref}
initial="hidden"
animate={controls}
variants={imageZoomVariant}
className={` ${colClass} ${mediaQueryColClass}
>
// nested content...
</motion.a>
```
### Resigning the Homepage with TypeScript Components
Since I wanted to make a streetwear / skate clothing store I looked online for sample images I could use to replicate the feel / UI of other popular online streetwear stores such as...
- [Black Sheep skateshop](https://blacksheepskateshop.com/)
- [CCS](https://shop.ccs.com/)
- [Skate Warehouse](https://www.skatewarehouse.com/)
- [Tactics](https://www.tactics.com/skate)
I typed my custom components and added in styling via Tailwind CSS and CSS modules to keep the generated class names unique.
**Issues:** In production PurgeCSS (activated through Tailwind) doesn't recognize Tailwind utility classes made via string concatenation. This was unintentionally deleting my responsive code for this component, so as a short work around I applied the generated classes on a hidden span to prevent it from being purged.
```
const ImageZoom: FC<{
colSpanned?: number | any
backgroundImage?: string
title?: string
width?: number
height?: number
to?: any
text?: string | undefined
smallColSpanned?: number | any
hide?: boolean
}> = ({
colSpanned,
backgroundImage,
title,
width,
height,
to,
text,
smallColSpanned,
hide,
}) => {
// other code...
return (
<>
{/* Prevent purging of generated Tailwind classes made through string concatenation */}
<span className="hidden sm:hidden col-span-3 sm:col-span-1 sm:col-span-3"></span>
<Link href={to}>
<motion.a
ref={ref}
initial="hidden"
animate={controls}
variants={imageZoomVariant}
className={` ${colClass} ${mediaQueryColClass}
${hide ? styles.hide : ''}`}
>
<div className={styles['card-zoom']}>
<div
title={title}
className={`${styles['card-zoom-image']} ${backgroundImage}`}
></div>
{text && <h1 className={`${styles['card-zoom-text']}`}>{text}</h1>}
</div>
</motion.a>
</Link>
</>
)
}
```
---
(_Original README_)
# Next.js Commerce
The all-in-one starter kit for high-performance e-commerce sites. With a few clicks, Next.js developers can clone, deploy and fully customize their own store.
Start right now at [nextjs.org/commerce](https://nextjs.org/commerce)
Demo live at: [demo.vercel.store](https://demo.vercel.store/)
- Shopify Demo: https://shopify.vercel.store/
- Swell Demo: https://swell.vercel.store/
- BigCommerce Demo: https://bigcommerce.vercel.store/
- Vendure Demo: https://vendure.vercel.store
## Features
- Performant by default
- SEO Ready
- Internationalization
- Responsive
- UI Components
- Theming
- Standardized Data Hooks
- Integrations - Integrate seamlessly with the most common ecommerce platforms.
- Dark Mode Support
## Integrations
Next.js Commerce integrates out-of-the-box with BigCommerce and Shopify. We plan to support all major ecommerce backends.
## Considerations
- `framework/commerce` contains all types, helpers and functions to be used as base to build a new **provider**.
- **Providers** live under `framework`'s root folder and they will extend Next.js Commerce types and functionality (`framework/commerce`).
- We have a **Features API** to ensure feature parity between the UI and the Provider. The UI should update accordingly and no extra code should be bundled. All extra configuration for features will live under `features` in `commerce.config.json` and if needed it can also be accessed programatically.
- Each **provider** should add its corresponding `next.config.js` and `commerce.config.json` adding specific data related to the provider. For example in case of BigCommerce, the images CDN and additional API routes.
- **Providers don't depend on anything that's specific to the application they're used in**. They only depend on `framework/commerce`, on their own framework folder and on some dependencies included in `package.json`
## Configuration
### How to change providers
Open `.env.local` and change the value of `COMMERCE_PROVIDER` to the provider you would like to use, then set the environment variables for that provider (use `.env.template` as the base).
The setup for Shopify would look like this for example:
```
COMMERCE_PROVIDER=shopify
NEXT_PUBLIC_SHOPIFY_STOREFRONT_ACCESS_TOKEN=xxxxxxxxxxxxxxxxxxxxxxxxxxxx
NEXT_PUBLIC_SHOPIFY_STORE_DOMAIN=xxxxxxx.myshopify.com
```
And check that the `tsconfig.json` resolves to the chosen provider:
```
"@framework": ["framework/shopify"],
"@framework/*": ["framework/shopify/*"]
```
That's it!
### Features
Every provider defines the features that it supports under `framework/{provider}/commerce.config.json`
#### How to turn Features on and off
> NOTE: The selected provider should support the feature that you are toggling. (This means that you can't turn wishlist on if the provider doesn't support this functionality out the box)
- Open `commerce.config.json`
- You'll see a config file like this:
```json
{
"features": {
"wishlist": false
}
}
```
- Turn wishlist on by setting wishlist to true.
- Run the app and the wishlist functionality should be back on.
### How to create a new provider
Follow our docs for [Adding a new Commerce Provider](framework/commerce/new-provider.md).
If you succeeded building a provider, submit a PR with a valid demo and we'll review it asap.
## Contribute
Our commitment to Open Source can be found [here](https://vercel.com/oss).
1. [Fork](https://help.github.com/articles/fork-a-repo/) this repository to your own GitHub account and then [clone](https://help.github.com/articles/cloning-a-repository/) it to your local device.
2. Create a new branch `git checkout -b MY_BRANCH_NAME`
3. Install yarn: `npm install -g yarn`
4. Install the dependencies: `yarn`
5. Duplicate `.env.template` and rename it to `.env.local`
6. Add proper store values to `.env.local`
7. Run `yarn dev` to build and watch for code changes
## Work in progress
We're using Github Projects to keep track of issues in progress and todo's. Here is our [Board](https://github.com/vercel/commerce/projects/1)
People actively working on this project: @okbel & @lfades.
## Troubleshoot
<details>
<summary>I already own a BigCommerce store. What should I do?</summary>
<br>
First thing you do is: <b>set your environment variables</b>
<br>
<br>
.env.local
```sh
BIGCOMMERCE_STOREFRONT_API_URL=<>
BIGCOMMERCE_STOREFRONT_API_TOKEN=<>
BIGCOMMERCE_STORE_API_URL=<>
BIGCOMMERCE_STORE_API_TOKEN=<>
BIGCOMMERCE_STORE_API_CLIENT_ID=<>
BIGCOMMERCE_CHANNEL_ID=<>
```
If your project was started with a "Deploy with Vercel" button, you can use Vercel's CLI to retrieve these credentials.
1. Install Vercel CLI: `npm i -g vercel`
2. Link local instance with Vercel and Github accounts (creates .vercel file): `vercel link`
3. Download your environment variables: `vercel env pull .env.local`
Next, you're free to customize the starter. More updates coming soon. Stay tuned.
</details>
<details>
<summary>BigCommerce shows a Coming Soon page and requests a Preview Code</summary>
<br>
After Email confirmation, Checkout should be manually enabled through BigCommerce platform. Look for "Review & test your store" section through BigCommerce's dashboard.
<br>
<br>
BigCommerce team has been notified and they plan to add more detailed about this subject.
</details>
看看同类模板
对比同技术栈与用途的模板,找到更适合的视觉与内容结构。
ai-website-cloner-template
Clone any website with one command using AI coding agents
Next.js · 启动器

Next.js SaaS Starter
Next.js SaaS Starter 是 Next.js 官方维护的 SaaS 起点模板,定位介于学习资源和可直接部署的脚手架之间。
Next.js · SaaS

Next.js Commerce
Next.js Commerce 是 Vercel 团队维护的电商启动模板,基于 Next.js App Router 构建,采用服务端渲染、React Server Components、Server Actions …
Next.js · 电商

Next-js-Boilerplate
Next-js-Boilerplate 是一个面向 Next.js 16、Tailwind CSS 4 和 TypeScript 的启动器,核心定位是开发者体验优先。
Next.js · 启动器

tailwind-nextjs-starter-blog
tailwind-nextjs-starter-blog 是一个面向个人技术博客的 Next.js 与 Tailwind CSS 启动模板,其 v2 版本基于 App Router 与 React Server Comp…
Next.js · 博客

next-forge
Production-grade Turborepo template for Next.js apps.
Next.js · 启动器