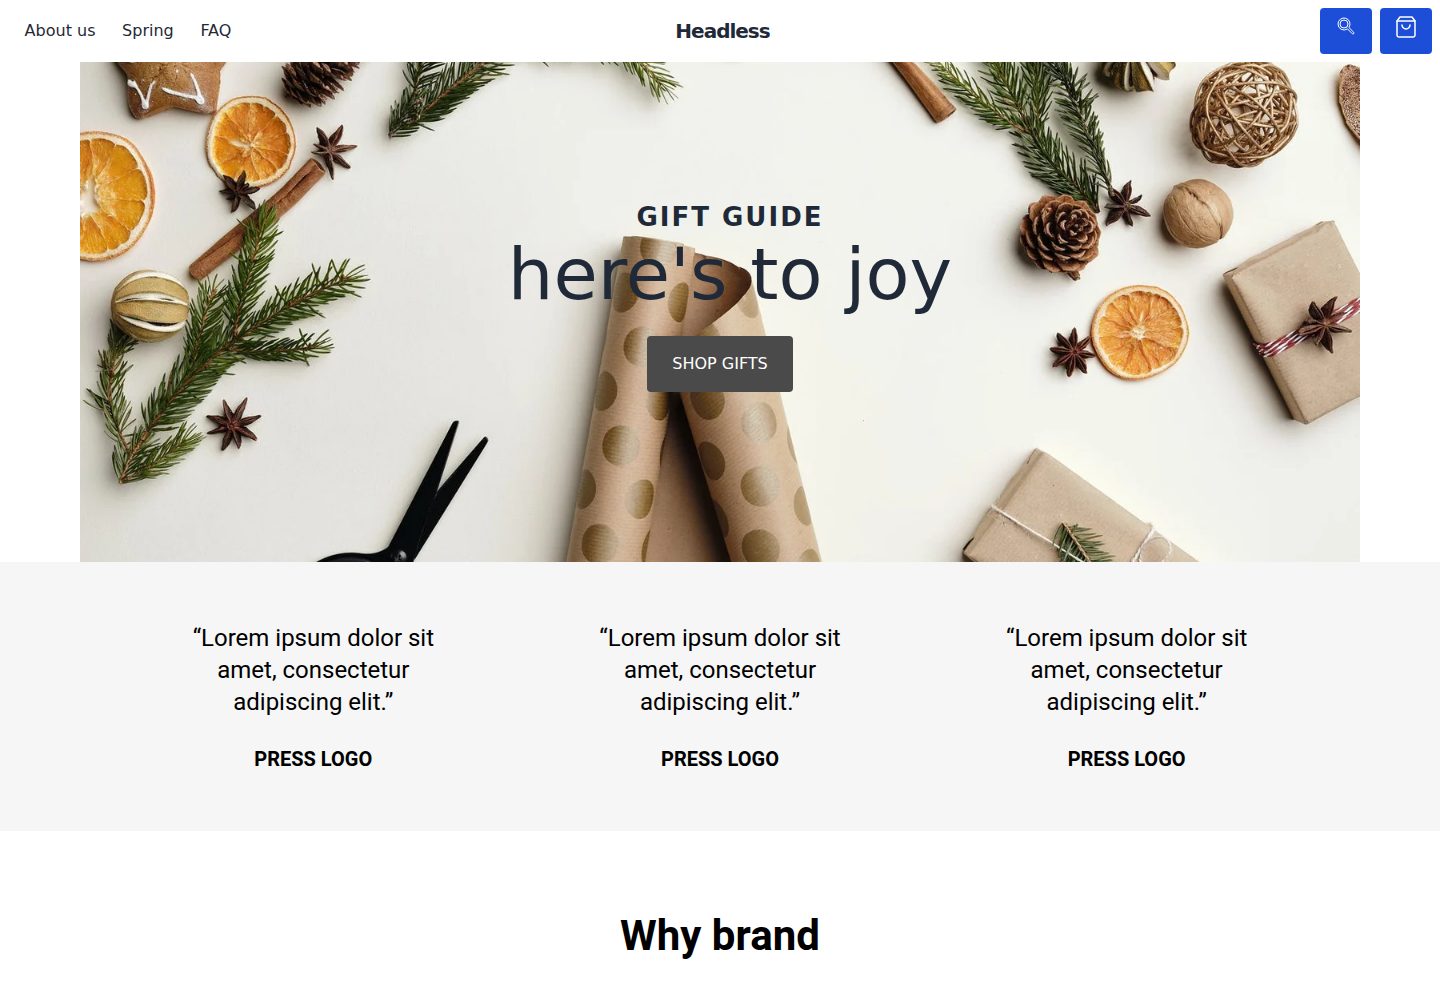
Next.js 前端与 Shopify Storefront API 对接,商品和集合数据来自 Shopify
Next.jsReact电商启动器
shopify-builderIO-template — Next.js 电商模板
作者 gabipfeffer
基于 Next.js 的 Shopify 无头电商启动模板,使用 Builder.io 可视化 CMS 管理页面内容,通过 Shopify Storefront API 拉取商品与集合数据。
看看你的网站会是什么样
浏览真实页面截图,比较内容排版与手机效果。点击下方缩略图切换,放大查看整页细节。
全部页面与视图 3
截图用于了解视觉与布局,交互效果请以实际项目为准。
采集于 2026-10-02查看来源
值得关注的模板亮点
从已有项目资料中,快速了解它的特点。
集成 Builder.io 可视化 CMS,页面内容可在 Builder 中编辑并发布
通过 Builder CLI 创建空间时自动发布首页、商品页、集合页等初始内容
提供仅落地页的创建命令,可按需选择更轻的起始内容
README 包含从 Builder 账号、Shopify 自定义应用到环境变量配置的完整步骤
文档列出 Vercel 与 Netlify 的一键部署入口
模板详细介绍
该模板是一个自托管的 Next.js 项目,前端页面由 Builder.io 可视化 CMS 驱动,电商后台数据来自 Shopify。按照 README 的步骤,你需要先注册 Builder.io 账号并获取私钥,用 Builder CLI 克隆仓库并创建对应的 Builder 空间;随后在 Shopify 中创建自定义应用,开启 Storefront API 权限并取得访问令牌;再把 Shopify 的访问令牌和店铺域名填入 Builder 空间设置,使 Builder 能读取店铺数据;最后在 .env.development 与 .env.production 中配置 BUILDER_PUBLIC_KEY、SHOPIFY_STOREFRONT_API_TOKEN 和 SHOPIFY_STORE_DOMAIN,运行 npm install 与 npm run dev 后可在本地 3000 端口访问。
模板自带部分 Builder 内容(首页、通用商品页、通用集合页),创建空间时会一并发布。README 还提供仅用于落地页的创建命令,以及指向视频教程和在线演示 headless.builders 的链接。部署方面,文档列出 Vercel 与 Netlify 两种一键部署方式,也说明可部署到任意支持 Next.js 的托管环境。
使用前需要准备 Node.js(>=12.0.0)、npm、git,以及已注册的 Shopify 账号和店铺。仓库采用 MIT 许可,免费范围限于该版本代码;演示图片、字体、图标等第三方素材需单独核对许可,域名、托管等外部服务可能产生费用。
Next.js电商启动器
适合你的项目吗?
适用场景
- 用 Shopify 作为电商后台、Next.js 作为自托管前端的无头商店搭建
- 需要由非开发人员通过可视化 CMS 编辑首页与营销页面的项目
- 希望从现成模板起步,快速跑通 Builder.io 与 Shopify 数据连通流程
- 仅需一个与 Shopify 商品数据结合的落地页,而非完整商店前端
适合人群
- 已有 Shopify 店铺并希望自托管前端的开发者
- 熟悉 Next.js、愿意配置环境变量与第三方服务的团队
- 需要将页面内容交给 Builder.io 可视化编辑的电商项目
上手与定制指南
结合仓库当前版本的说明,按下面的资料检查内容、配置与运行要求。
- 1
需先注册 Builder.io 账号并创建私钥,再用 Builder CLI 克隆仓库、创建空间并获取公开 API Key
- 2
需在 Shopify 创建自定义应用,开启 Storefront API 权限并复制访问令牌
- 3
需在 Builder 空间设置中填入 Shopify 访问令牌与店铺域名以完成连接
- 4
需在 .env.development 和 .env.production 中配置 BUILDER_PUBLIC_KEY、SHOPIFY_STOREFRONT_API_TOKEN、SHOPIFY_STORE_DOMAIN
- 5
本地运行需 Node.js >= 12.0.0、npm 与 git,执行 npm install 后 npm run dev 启动
授权与来源资料
使用条件与限制
免费使用 · 保留许可声明本次收录的是公开仓库中采用 MIT 许可的免费版本;免费范围为该版本代码,不代表外部服务或第三方素材免费。
使用时需要遵守
- 允许免费使用、修改、商用和分发该版本代码。
- 分发代码副本或实质性部分时,保留原作者版权声明和完整 MIT 许可声明。
- 代码按现状提供;担保与责任限制以原许可证及适用法律为准。
额外费用与待核对事项
- 使用前必须拥有已注册的 Shopify 账号和店铺,否则无法完成配置与运行。
- 必须注册 Builder.io 账号才能获取私钥并创建内容空间。
- 需在 Builder.io 组织设置中生成并复制私钥,用于 CLI 创建空间。
- 需在 Shopify 中创建自定义应用并开启 Storefront API 权限,获取访问令牌。
- 需在 Builder 空间设置中填入 Shopify 访问令牌与店铺域名,才能让 Builder 读取店铺数据。
- 必须在 .env.development 与 .env.production 中配置 Builder 公开 API Key。
- 还需配置 SHOPIFY_STOREFRONT_API_TOKEN 与 SHOPIFY_STORE_DOMAIN 两个环境变量。
- 需全局安装 Builder.io CLI 才能执行创建空间的命令。
- 创建空间时会自动向 Builder 空间发布仓库内自带的初始 CMS 内容。
- 演示图片、字体、图标及其他第三方素材需按各自许可核对,不能仅凭代码的 MIT 许可判断。
- 域名、托管、数据库、支付或 AI 等外部服务可能另外收费。
查看原文依据
Permission is hereby granted, free of charge
许可证原文
You should already have a [Shopify](https://www.shopify.com/online-store) account and store created before starting as well.
README 原文
head over to Builder.io and [create an account](https://builder.io/signup).
README 原文
create a private key, copy the key for the next step.
README 原文
Create a [custom app](https://help.shopify.com/en/manual/apps/custom-apps) for your Shopify store.
README 原文
Fill in the required keys and press "Connect your Shopify Custom App"!
README 原文
set the value of `BUILDER_PUBLIC_KEY` to the public key you just copied.
README 原文
set the other two Shopify keys.
README 原文
npm install --global "@builder.io/cli"
README 原文
https://github.com/gabipfeffer/shopify-builderIO-template/blob/master/license.mdhttps://github.com/gabipfeffer/shopify-builderIO-template/blob/master/README.mdThis command will also publish some starter builder.io cms content from the ./builder directory to your new space when it's created.
README 原文
DeepSeek 根据仓库许可证和 README 整理 ·2026-10-02。结果仅覆盖已读取资料,依赖、图片、字体及后续条款变更以各自原文为准。
项目核对记录与介绍依据
模板资料
- 来源平台
- GitHub
- 资料与维护参考分
- 资料一般 · 73 / 100
- 技术栈
- Next.js · React
- 网站类型
- 电商 · 启动器
这个分数如何计算
本站按许可资料(最高30分)、演示链接(12分)、预览图(10分)、Star数(15分)、记录的维护时间(15分)、描述完整度(8分)、功能记录(5分)和分类资料(5分)计算。它不是代码、安全或性能测试,也不是 Google 评分;有链接不代表已实测可用。
这个项目需要核对什么
- 记录的仓库更新时间
- 2023-01-29
- 截图检查日期
- 2026-10-02
已收录演示链接。请用你的内容与屏幕尺寸检查;有演示不代表表单、认证或支付已经可用。
目录记录的主要技术栈是 Next.js。请通过依赖清单和锁文件核对实际版本与托管要求。这些说明基于收录资料,不代表代码审计或部署实测。
查看具体选型方法 →介绍的制作与核对状态
介绍由 AI 辅助整理目录与仓库资料。仓库作者不等于这篇介绍的审核者。
已完成服务器许可规则与 AI 来源核对;未经过人工编辑审核。
查看当时使用的来源资料
SHA-256: 4164ad83ececf4d19c00726398dc95d3cfc204f95427fe66f6f266fb549bbf8a
2026-10-02T19:46:47.947Z
来源文件 / 仓库
# Next.js + Shopify + Builder.io starter kit
The ultimate starter for headless Shopify stores.
Demo live at: [headless.builders](https://headless.builders/)
## Goals and Features
- Ultra high performance
- SEO optimized
- Themable
- Personalizable (internationalization, a/b testing, etc)
- Builder.io Visual CMS integrated
## Video walkthrough
Learn how to get started with this Builder + Next.js + Shopify starter with this step by step video guide here:
<a href="https://www.youtube.com/watch?v=uIHqPu2t1O0">
<img width="400" src="https://cdn.builder.io/api/v1/image/assets%2FYJIGb4i01jvw0SRdL5Bt%2Fc161ccb26f6446869cba865d014c7caf" />
</a>
## Table of contents
- [Getting Started](#getting-started)
- [1: Create an account for Builder.io](#1-create-an-account-for-builderio)
- [2: Your Builder.io private key](#2-your-builderio-private-key)
- [3: Clone this repository and initialize a Builder.io space](#3-clone-this-repository-and-initialize-a-builderio-space)
- [4. Shopify private app](#4-shopify-private-app)
- [5. Connecting Builder to Shopify](#5-connecting-builder-to-shopify)
- [6. Configure the project to talk to Shopify](#6-configure-the-project-to-talk-to-shopify)
- [7. Up and Running!](#7-up-and-running)
- [Deploy](#deploy)
<!-- markdown-toc end -->
## Getting Started
**Pre-requisites**
This guide will assume that you have the following software installed:
- nodejs (>=12.0.0)
- npm
- git
You should already have a [Shopify](https://www.shopify.com/online-store) account and store created before starting as well.
**Introduction**
This starter kit is everything you need to get your own self hosted
Next.js project powered by Builder.io for content and Shopify as an
e-commerce back office.
After following this guide you will have
- A Next.js app, ready to deploy to a hosting provider of your choice
- Pulling live collection and product information from Shopify
- Powered by the Builder.io visual CMS
### 1: Create an account for Builder.io
Before we start, head over to Builder.io and [create an account](https://builder.io/signup).
### 2: Your Builder.io private key
Head over to your [organization settings page](https://builder.io/account/organization?root=true) and create a
private key, copy the key for the next step.
- Visit the [organization settings page](https://builder.io/account/organization?root=true), or select
an organization from the list

- Click "Account" from the left hand sidebar
- Click the edit icon for the "Private keys" row
- Copy the value of the auto-generated key, or create a new one with a name that's meaningful to you

### 3: Clone this repository and initialize a Builder.io space
Next, we'll create a copy of the starter project, and create a new
[space](https://www.builder.io/c/docs/spaces) for it's content to live
in.
In the example below, replace `<private-key>` with the key you copied
in the previous step, and change `<space-name>` to something that's
meaningful to you -- don't worry, you can change it later!
```
git clone https://github.com/BuilderIO/nextjs-shopify.git
cd nextjs-shopify
npm install --global "@builder.io/cli"
builder create --key "<private-key>" --name "<space-name>" --debug
```
Note:
if you're only interested in using this starter for a landing page with Shopify use this command instead:
```
builder create --key "<private-key>" --name "<space-name>" --input builder-landing-page-only --debug
```
If this was a success you should be greeted with a message that
includes a public API key for your newly minted Builder.io space.
*Note: This command will also publish some starter builder.io cms
content from the ./builder directory to your new space when it's
created.*
``` bash
____ _ _ _ _ _ _
| __ ) _ _ (_) | | __| | ___ _ __ (_) ___ ___ | | (_)
| _ \ | | | | | | | | / _` | / _ \ | '__| | | / _ \ / __| | | | |
| |_) | | |_| | | | | | | (_| | | __/ | | _ | | | (_) | | (__ | | | |
|____/ \__,_| |_| |_| \__,_| \___| |_| (_) |_| \___/ \___| |_| |_|
|████████████████████████████████████████| shopify-product | 0/0
|████████████████████████████████████████| product-page: writing generic-template.json | 1/1
|████████████████████████████████████████| shopify-collection | 0/0
|████████████████████████████████████████| collection-page: writing generic-collection.json | 1/1
|████████████████████████████████████████| page: writing homepage.json | 2/2
Your new space "next.js shopify starter" public API Key: 012345abcdef0123456789abcdef0123
```
Copy the public API key ("012345abcdef0123456789abcdef0123" in the example above) for the next step.
This starter project uses dotenv files to configure environment variables.
Open the files [.env.development](./.env.development) and
[.env.production](./.env.production) in your favorite text editor, and
set the value of `BUILDER_PUBLIC_KEY` to the public key you just copied.
You can ignore the other variables for now, we'll set them later.
```diff
+ BUILDER_PUBLIC_KEY=012345abcdef0123456789abcdef0123
- BUILDER_PUBLIC_KEY=
SHOPIFY_STOREFRONT_API_TOKEN=
SHOPIFY_STORE_DOMAIN=
```
### 4. Shopify Custom App
Create a [custom app](https://help.shopify.com/en/manual/apps/custom-apps) for your Shopify store. If you don't have a Shopify store already, you can create a [development store](https://help.shopify.com/en/partners/dashboard/managing-stores/development-stores).
When creating the private app you'll have to set a number of permissions so that builder can retrieve your Shopify inventory. For this press on `Storefront API` in the configuration tab and choose all the following permissions:
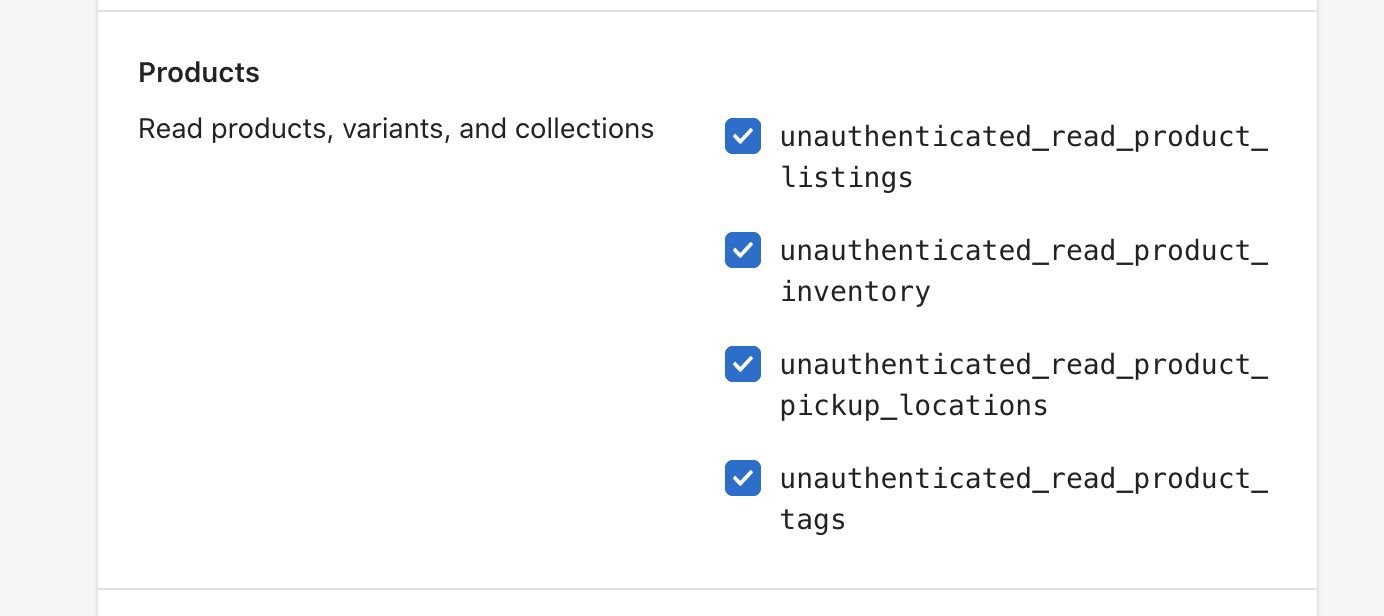
Then in the `API Credentials` tab, click `install`:
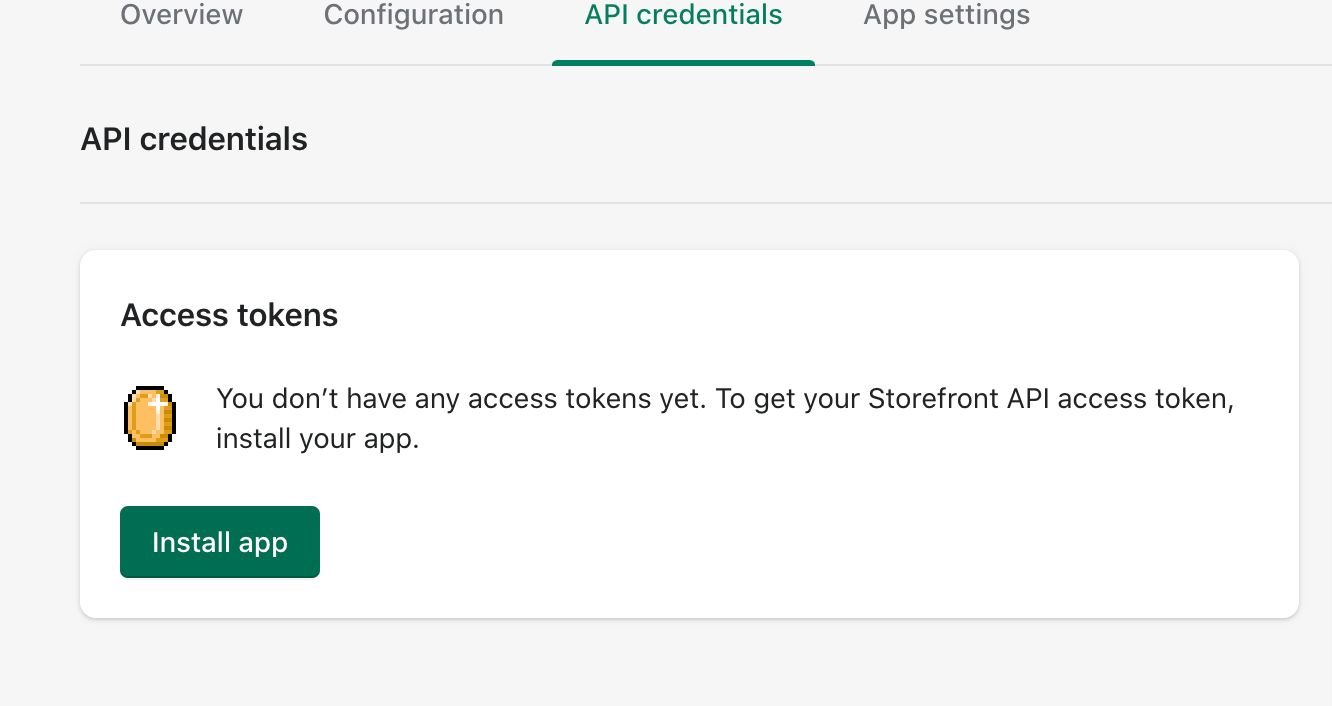
And copy the generated access token.
### 5. Connecting Builder to Shopify
Access your newly created space by selecting it from the [list of spaces](https://builder.io/spaces?root=true)
in your organization.
You should be greeted by a modal asking for various your storefront Access toke (from preview step) and your store domain, this will allow Builder.io to communicate with your store API:
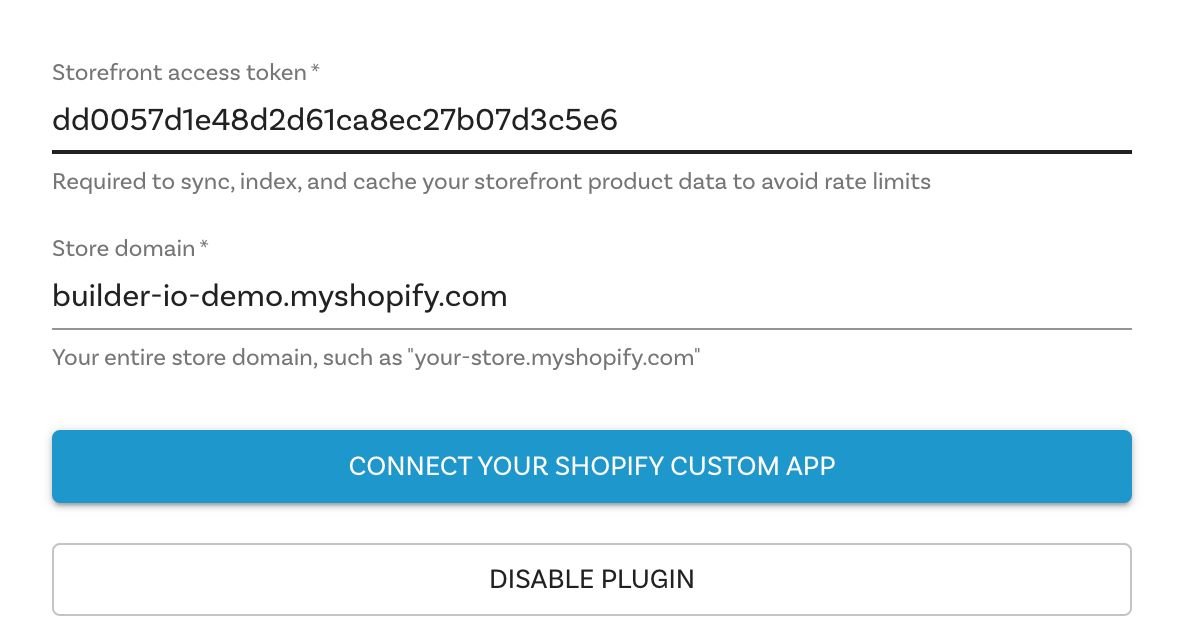
Fill in the required keys and press "Connect your Shopify Custom App"!
### 6. Configure the project to talk to Shopify
Open up [.env.development](./.env.development) and [.env.production](./.env.production) again,
but this time set the other two Shopify keys.
```diff
BUILDER_PUBLIC_KEY=012345abcdef0123456789abcdef0123
+ SHOPIFY_STOREFRONT_API_TOKEN=c11b4053408085753bd76a45806f80dd
- SHOPIFY_STOREFRONT_API_TOKEN=
+ SHOPIFY_STORE_DOMAIN=dylanbuilder.myshopify.com
- SHOPIFY_STORE_DOMAIN=
```
### 7. Up and Running!
The hard part is over, all you have to do is start up the project now.
```bash
npm install
npm run dev
```
This will start a server at `http://localhost:3000`.
### 8. Start building
Now that we have everything setup, start building and publishing pages on builder.io, for a demo on building something similar to the [demo homepage](https://headless.builders), follow the steps in this [short video](https://www.loom.com/share/9b947acbbf714ee3ac6c319c130cdb85)
## Deployment Options
You can deploy this code anywhere you like - you can find many deployment options for Next.js [here](https://nextjs.org/docs/deployment). The following options support one click installs and are super easy to start with:
[](https://vercel.com/new/git/external?repository-url=https%3A%2F%2Fgithub.com%2Fbuilderio%2Fnextjs-shopify)
- Vercel: for more information check [Vercel docs on Next.js deployments](https://vercel.com/docs/next.js/overview) Or try the one click install by clicking the button above.
[](https://app.netlify.com/start/deploy?repository=https://github.com/BuilderIO/nextjs-shopify)
- Netlify: For more information check [Netlify docs on Next.js deployments](https://www.netlify.com/blog/2020/11/30/how-to-deploy-next.js-sites-to-netlify/) Or try the one click install by clicking the button above.
看看同类模板
对比同技术栈与用途的模板,找到更适合的视觉与内容结构。
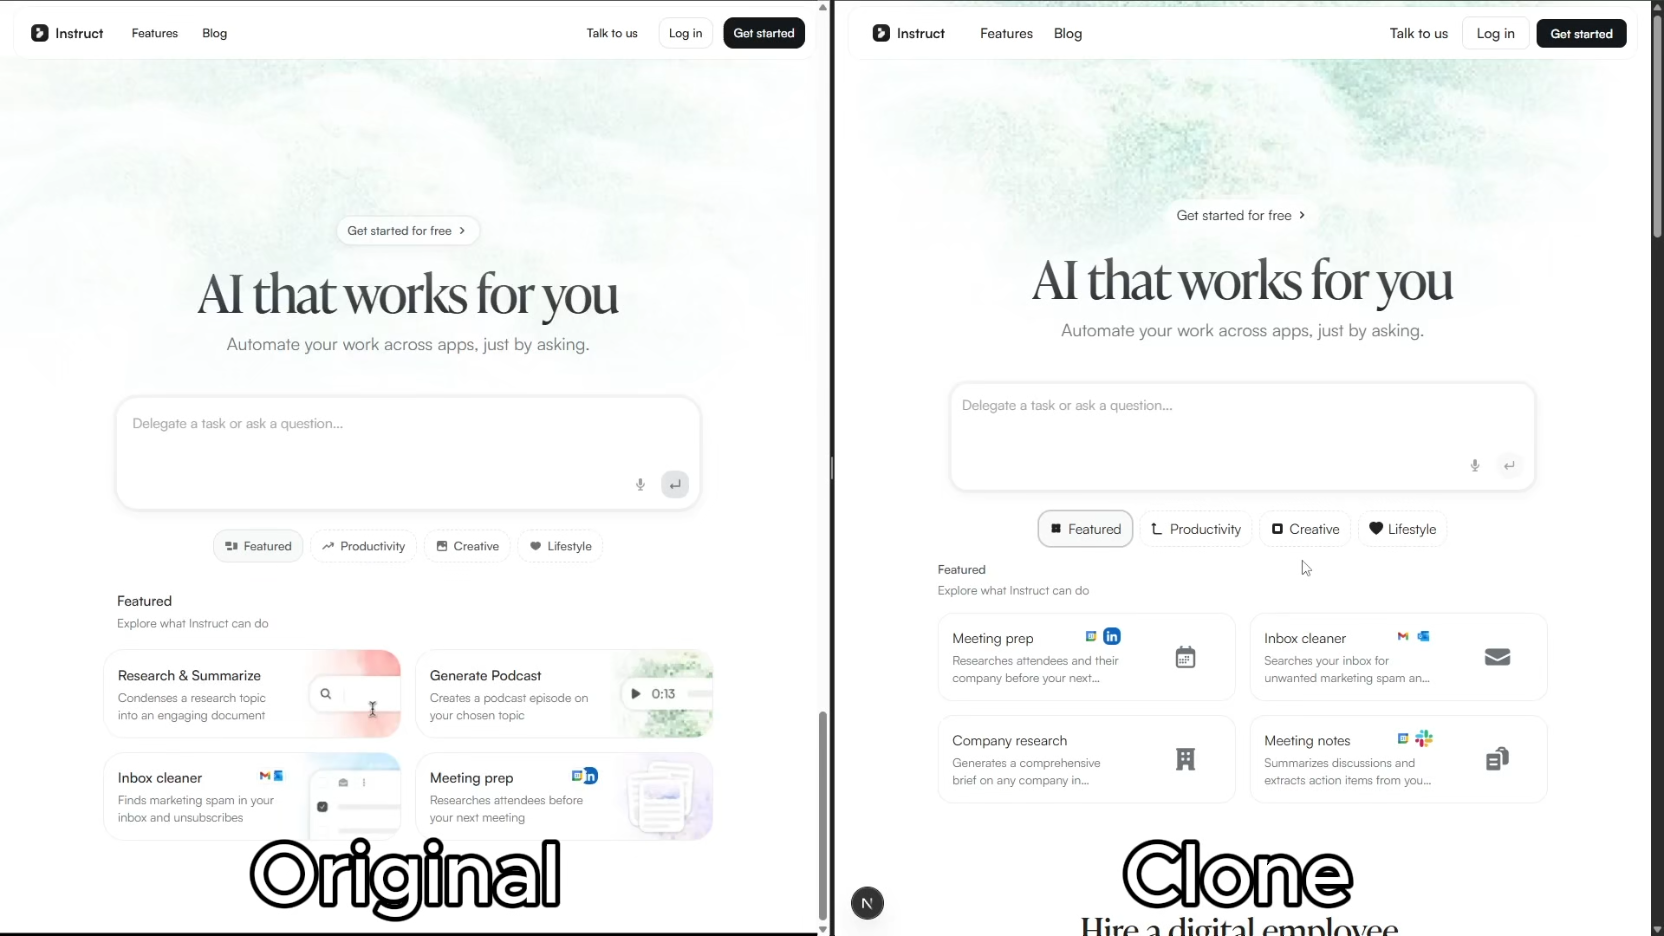
ai-website-cloner-template
Clone any website with one command using AI coding agents
Next.js · 启动器

Next.js SaaS Starter
Next.js SaaS Starter 是 Next.js 官方维护的 SaaS 起点模板,定位介于学习资源和可直接部署的脚手架之间。
Next.js · SaaS

Next.js Commerce
Next.js Commerce 是 Vercel 团队维护的电商启动模板,基于 Next.js App Router 构建,采用服务端渲染、React Server Components、Server Actions …
Next.js · 电商

Next-js-Boilerplate
Next-js-Boilerplate 是一个面向 Next.js 16、Tailwind CSS 4 和 TypeScript 的启动器,核心定位是开发者体验优先。
Next.js · 启动器

tailwind-nextjs-starter-blog
tailwind-nextjs-starter-blog 是一个面向个人技术博客的 Next.js 与 Tailwind CSS 启动模板,其 v2 版本基于 App Router 与 React Server Comp…
Next.js · 博客

next-forge
Production-grade Turborepo template for Next.js apps.
Next.js · 启动器