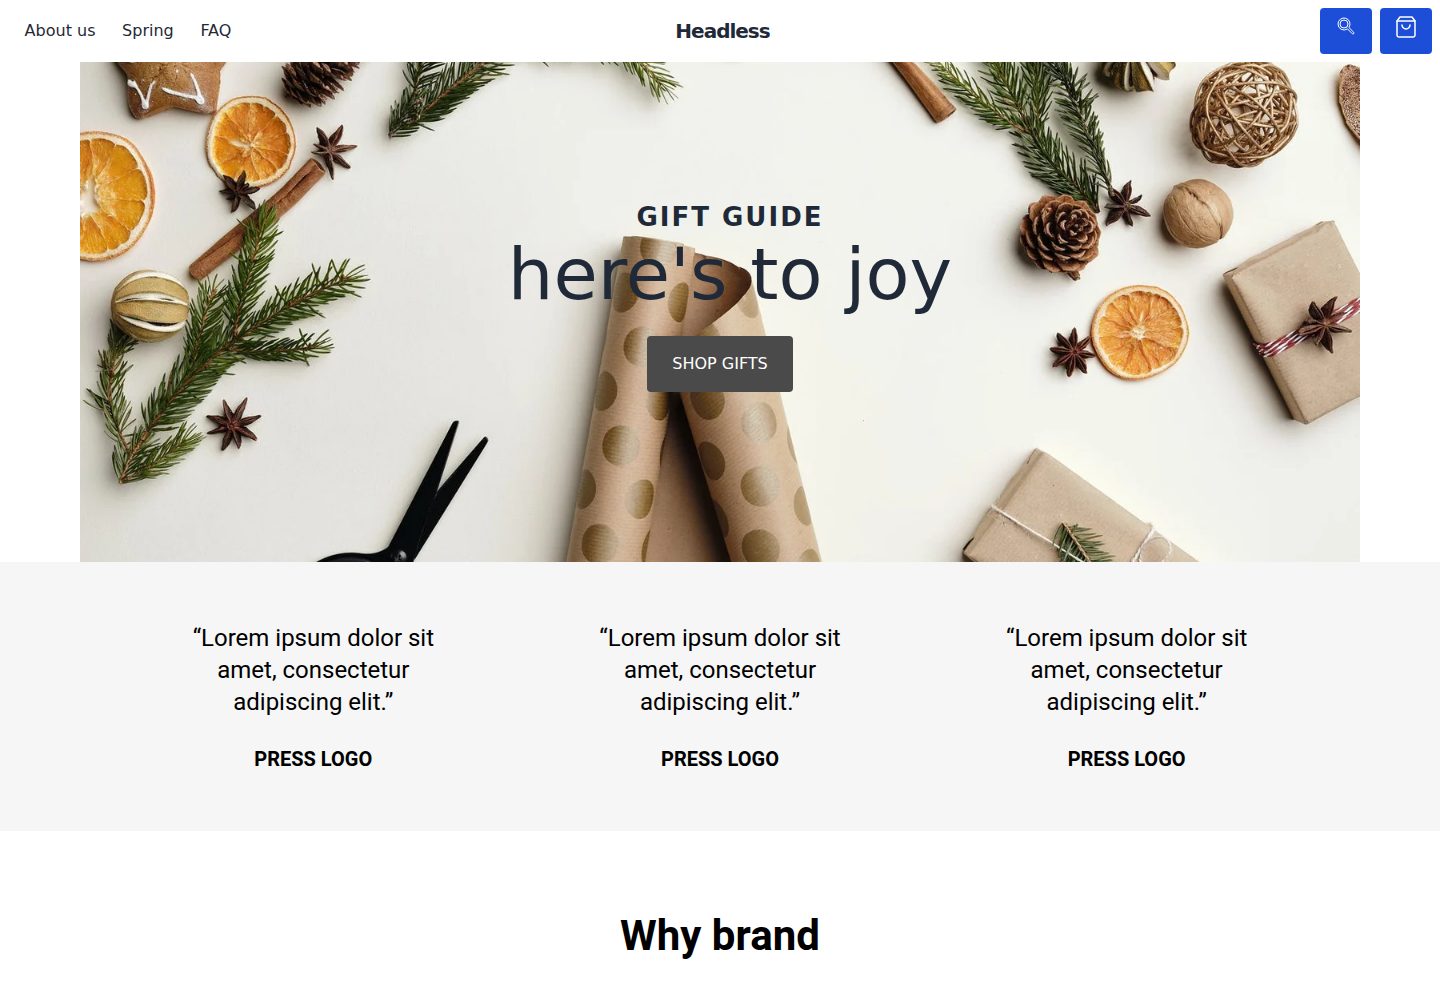
Next.js frontend integrates with Shopify Storefront API, with product and collection data coming from Shopify
Next.jsReactE-commerceStarter
shopify-builderIO-template — Next.js Ecommerce Template
By gabipfeffer
A Next.js-based Shopify headless commerce starter template that uses Builder.io visual CMS to manage page content and pulls product and collection data via the Shopify Storefront API.
Explore the design
Compare the page layouts and mobile experience. Open any screenshot for a closer look.
Desktop homepage1 / 3
Desktop captureTop of page
Actual screenshot captured by the server browser.
All pages & views 3
Screenshots show visual appearance; interactive behavior may differ.
Recorded 2026-10-02View source
What stands out
A quick read of the recorded project description.
Integrates Builder.io visual CMS, allowing page content to be edited and published in Builder
Automatically publishes initial content such as homepage, product page, and collection page when creating a space via Builder CLI
Provides a creation command for landing pages only, allowing a lighter starting content set as needed
README includes complete steps from Builder account and Shopify custom app to environment variable configuration
Documentation lists one-click deployment entries for Vercel and Netlify
Template Details
This template is a self-hosted Next.js project where frontend pages are driven by Builder.io visual CMS, and e-commerce backend data comes from Shopify. Following the README steps, you first need to register a Builder.io account and obtain a private key, use the Builder CLI to clone the repository and create a corresponding Builder space; then create a custom app in Shopify, enable Storefront API permissions and obtain an access token; next, enter the Shopify access token and store domain into the Builder space settings so Builder can read store data; finally, configure BUILDER_PUBLIC_KEY, SHOPIFY_STOREFRONT_API_TOKEN, and SHOPIFY_STORE_DOMAIN in .env.development and .env.production, run npm install and npm run dev, and access locally on port 3000.
The template includes some Builder content (homepage, generic product page, generic collection page) that is published when the space is created. The README also provides a creation command for landing pages only, as well as links to a video tutorial and an online demo at headless.builders. For deployment, the documentation lists one-click deployment options for Vercel and Netlify, and notes that it can be deployed to any hosting environment that supports Next.js.
Before use, you need Node.js (>=12.0.0), npm, git, and a registered Shopify account and store. The repository uses the MIT license, and the free scope is limited to this version of the code; third-party assets such as demo images, fonts, and icons require separate license verification, and external services like domains and hosting may incur costs.
Next.jsE-commerceStarter
Is it right for your project?
Use Cases
- Building a headless store with Shopify as the e-commerce backend and Next.js as the self-hosted frontend
- Projects where non-developers need to edit homepage and marketing pages via a visual CMS
- Starting from a ready-made template to quickly get the Builder.io and Shopify data connection working
- When only a landing page integrated with Shopify product data is needed, rather than a full store frontend
Suitable For
- Developers who already have a Shopify store and want a self-hosted frontend
- Teams familiar with Next.js and willing to configure environment variables and third-party services
- E-commerce projects that need to hand page content over to Builder.io for visual editing
Getting started & customization
Use these recorded setup notes alongside the repository instructions for your chosen version.
- 1
First register a Builder.io account and create a private key, then use the Builder CLI to clone the repository, create a space, and obtain the public API key
- 2
Create a custom app in Shopify, enable Storefront API permissions, and copy the access token
- 3
Enter the Shopify access token and store domain in the Builder space settings to complete the connection
- 4
Configure BUILDER_PUBLIC_KEY, SHOPIFY_STOREFRONT_API_TOKEN, and SHOPIFY_STORE_DOMAIN in .env.development and .env.production
- 5
Local run requires Node.js >= 12.0.0, npm, and git; run npm install then npm run dev to start
License & source material
Usage conditions & limitations
Free to use · keep license noticeThis entry covers the free version under the MIT license in the public repository; the free scope is limited to this version of the code and does not imply that external services or third-party assets are free.
Must comply with when using
- Permits free use, modification, commercial use, and distribution of this version of the code.
- When distributing copies or substantial portions of the code, retain the original author's copyright notice and the full MIT license notice.
- The code is provided as-is; warranties and limitations of liability are governed by the original license and applicable law.
Additional costs & items to verify
- A registered Shopify account and store are required before use; otherwise configuration and running cannot be completed.
- A Builder.io account must be registered to obtain a private key and create a content space.
- A private key must be generated and copied in the Builder.io organization settings for use with the CLI to create a space.
- A custom app must be created in Shopify with Storefront API permissions enabled to obtain an access token.
- The Shopify access token and store domain must be entered in the Builder space settings for Builder to read store data.
- The Builder public API key must be configured in .env.development and .env.production.
- The two environment variables SHOPIFY_STOREFRONT_API_TOKEN and SHOPIFY_STORE_DOMAIN must also be configured.
- The Builder.io CLI must be installed globally to execute the space creation command.
- When creating a space, the initial CMS content included in the repository is automatically published to the Builder space.
- Demo images, fonts, icons, and other third-party assets must be checked against their respective licenses; they cannot be judged solely by the code's MIT license.
- External services such as domains, hosting, databases, payments, or AI may incur additional charges.
View Original Text Basis
Permission is hereby granted, free of charge
Original License Text
You should already have a [Shopify](https://www.shopify.com/online-store) account and store created before starting as well.
Original README
head over to Builder.io and [create an account](https://builder.io/signup).
Original README
create a private key, copy the key for the next step.
Original README
Create a [custom app](https://help.shopify.com/en/manual/apps/custom-apps) for your Shopify store.
Original README
Fill in the required keys and press "Connect your Shopify Custom App"!
Original README
set the value of `BUILDER_PUBLIC_KEY` to the public key you just copied.
Original README
set the other two Shopify keys.
Original README
npm install --global "@builder.io/cli"
Original README
https://github.com/gabipfeffer/shopify-builderIO-template/blob/master/license.mdhttps://github.com/gabipfeffer/shopify-builderIO-template/blob/master/README.mdThis command will also publish some starter builder.io cms content from the ./builder directory to your new space when it's created.
Original README
Compiled by DeepSeek based on repository license and README ·2026-10-02. Results only cover the materials read; dependencies, images, fonts, and subsequent term changes are subject to their respective original texts.
Project checks & description sources
Template Information
- Source platforms
- GitHub
- Documentation and maintenance reference score
- Partly documented · 73 / 100
- Technologies
- Next.js · React
- Website type
- E-commerce · Starter
How this score is calculated
Our heuristic uses license records (up to 30), a demo link (12), a preview (10), stars (15), recorded maintenance (15), description completeness (8), feature records (5) and classification data (5). It is not a code, security or performance test, or a Google score. A link does not establish tested functionality.
What to verify for this project
- Repository update recorded
- 2023-01-29
- Screenshot last checked
- 2026-10-02
A demo link is listed. Check it with your own content and viewport sizes; its presence does not confirm that forms, authentication or payments work.
The catalog identifies Next.js as the primary stack. Check the actual dependency manifest and lockfile for versions and hosting requirements. These notes use recorded metadata, not a code audit or a deployment test.
Use a selection guide →How this description was prepared
AI-assisted description based on catalog records and repository material. Repository authors are not automatically the reviewers of this description.
Automatically checked against source and license rules; no manual editorial review.
Inspect the recorded source material
SHA-256: 4164ad83ececf4d19c00726398dc95d3cfc204f95427fe66f6f266fb549bbf8a
2026-10-02T19:46:47.947Z
Source file / repository
# Next.js + Shopify + Builder.io starter kit
The ultimate starter for headless Shopify stores.
Demo live at: [headless.builders](https://headless.builders/)
## Goals and Features
- Ultra high performance
- SEO optimized
- Themable
- Personalizable (internationalization, a/b testing, etc)
- Builder.io Visual CMS integrated
## Video walkthrough
Learn how to get started with this Builder + Next.js + Shopify starter with this step by step video guide here:
<a href="https://www.youtube.com/watch?v=uIHqPu2t1O0">
<img width="400" src="https://cdn.builder.io/api/v1/image/assets%2FYJIGb4i01jvw0SRdL5Bt%2Fc161ccb26f6446869cba865d014c7caf" />
</a>
## Table of contents
- [Getting Started](#getting-started)
- [1: Create an account for Builder.io](#1-create-an-account-for-builderio)
- [2: Your Builder.io private key](#2-your-builderio-private-key)
- [3: Clone this repository and initialize a Builder.io space](#3-clone-this-repository-and-initialize-a-builderio-space)
- [4. Shopify private app](#4-shopify-private-app)
- [5. Connecting Builder to Shopify](#5-connecting-builder-to-shopify)
- [6. Configure the project to talk to Shopify](#6-configure-the-project-to-talk-to-shopify)
- [7. Up and Running!](#7-up-and-running)
- [Deploy](#deploy)
<!-- markdown-toc end -->
## Getting Started
**Pre-requisites**
This guide will assume that you have the following software installed:
- nodejs (>=12.0.0)
- npm
- git
You should already have a [Shopify](https://www.shopify.com/online-store) account and store created before starting as well.
**Introduction**
This starter kit is everything you need to get your own self hosted
Next.js project powered by Builder.io for content and Shopify as an
e-commerce back office.
After following this guide you will have
- A Next.js app, ready to deploy to a hosting provider of your choice
- Pulling live collection and product information from Shopify
- Powered by the Builder.io visual CMS
### 1: Create an account for Builder.io
Before we start, head over to Builder.io and [create an account](https://builder.io/signup).
### 2: Your Builder.io private key
Head over to your [organization settings page](https://builder.io/account/organization?root=true) and create a
private key, copy the key for the next step.
- Visit the [organization settings page](https://builder.io/account/organization?root=true), or select
an organization from the list

- Click "Account" from the left hand sidebar
- Click the edit icon for the "Private keys" row
- Copy the value of the auto-generated key, or create a new one with a name that's meaningful to you

### 3: Clone this repository and initialize a Builder.io space
Next, we'll create a copy of the starter project, and create a new
[space](https://www.builder.io/c/docs/spaces) for it's content to live
in.
In the example below, replace `<private-key>` with the key you copied
in the previous step, and change `<space-name>` to something that's
meaningful to you -- don't worry, you can change it later!
```
git clone https://github.com/BuilderIO/nextjs-shopify.git
cd nextjs-shopify
npm install --global "@builder.io/cli"
builder create --key "<private-key>" --name "<space-name>" --debug
```
Note:
if you're only interested in using this starter for a landing page with Shopify use this command instead:
```
builder create --key "<private-key>" --name "<space-name>" --input builder-landing-page-only --debug
```
If this was a success you should be greeted with a message that
includes a public API key for your newly minted Builder.io space.
*Note: This command will also publish some starter builder.io cms
content from the ./builder directory to your new space when it's
created.*
``` bash
____ _ _ _ _ _ _
| __ ) _ _ (_) | | __| | ___ _ __ (_) ___ ___ | | (_)
| _ \ | | | | | | | | / _` | / _ \ | '__| | | / _ \ / __| | | | |
| |_) | | |_| | | | | | | (_| | | __/ | | _ | | | (_) | | (__ | | | |
|____/ \__,_| |_| |_| \__,_| \___| |_| (_) |_| \___/ \___| |_| |_|
|████████████████████████████████████████| shopify-product | 0/0
|████████████████████████████████████████| product-page: writing generic-template.json | 1/1
|████████████████████████████████████████| shopify-collection | 0/0
|████████████████████████████████████████| collection-page: writing generic-collection.json | 1/1
|████████████████████████████████████████| page: writing homepage.json | 2/2
Your new space "next.js shopify starter" public API Key: 012345abcdef0123456789abcdef0123
```
Copy the public API key ("012345abcdef0123456789abcdef0123" in the example above) for the next step.
This starter project uses dotenv files to configure environment variables.
Open the files [.env.development](./.env.development) and
[.env.production](./.env.production) in your favorite text editor, and
set the value of `BUILDER_PUBLIC_KEY` to the public key you just copied.
You can ignore the other variables for now, we'll set them later.
```diff
+ BUILDER_PUBLIC_KEY=012345abcdef0123456789abcdef0123
- BUILDER_PUBLIC_KEY=
SHOPIFY_STOREFRONT_API_TOKEN=
SHOPIFY_STORE_DOMAIN=
```
### 4. Shopify Custom App
Create a [custom app](https://help.shopify.com/en/manual/apps/custom-apps) for your Shopify store. If you don't have a Shopify store already, you can create a [development store](https://help.shopify.com/en/partners/dashboard/managing-stores/development-stores).
When creating the private app you'll have to set a number of permissions so that builder can retrieve your Shopify inventory. For this press on `Storefront API` in the configuration tab and choose all the following permissions:
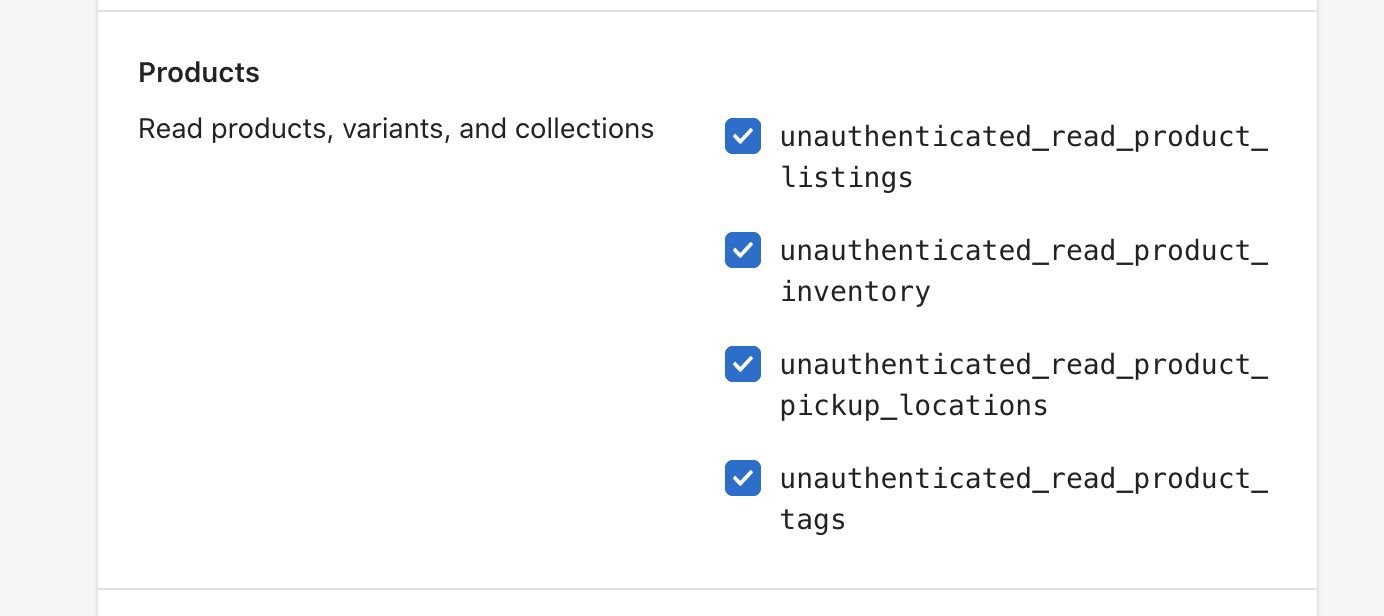
Then in the `API Credentials` tab, click `install`:
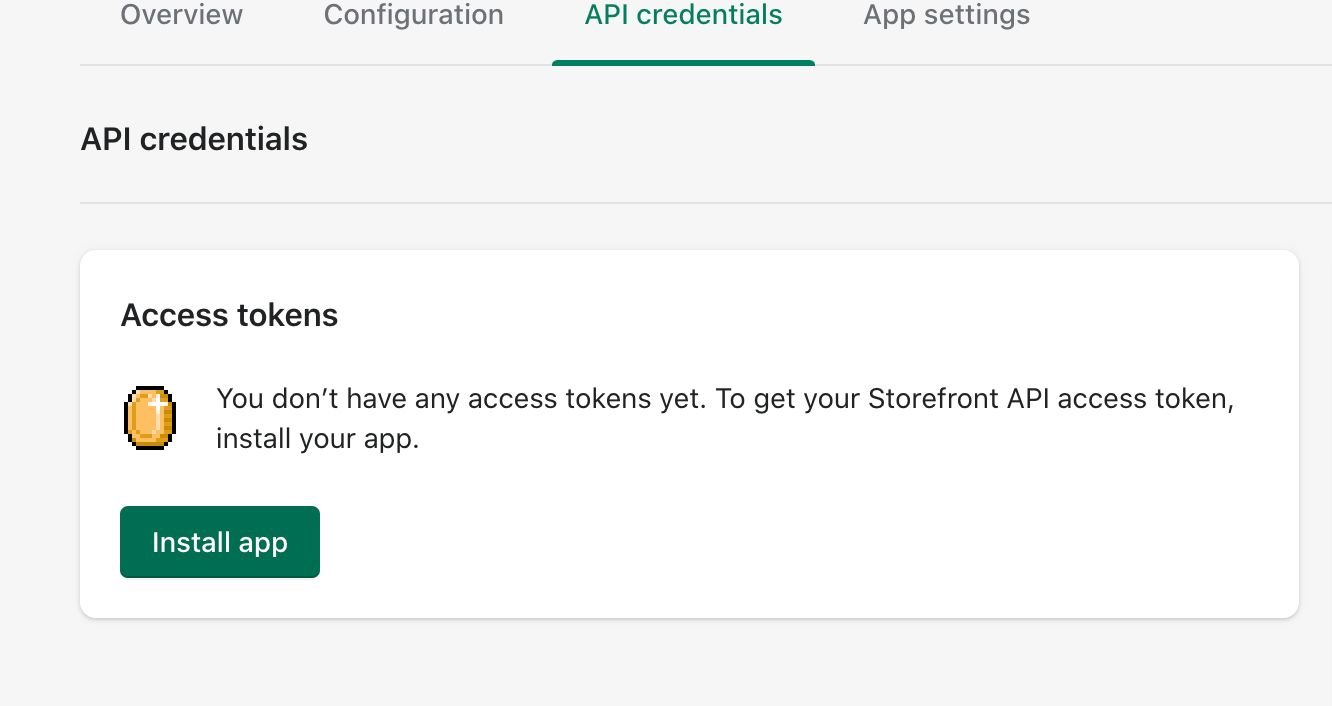
And copy the generated access token.
### 5. Connecting Builder to Shopify
Access your newly created space by selecting it from the [list of spaces](https://builder.io/spaces?root=true)
in your organization.
You should be greeted by a modal asking for various your storefront Access toke (from preview step) and your store domain, this will allow Builder.io to communicate with your store API:
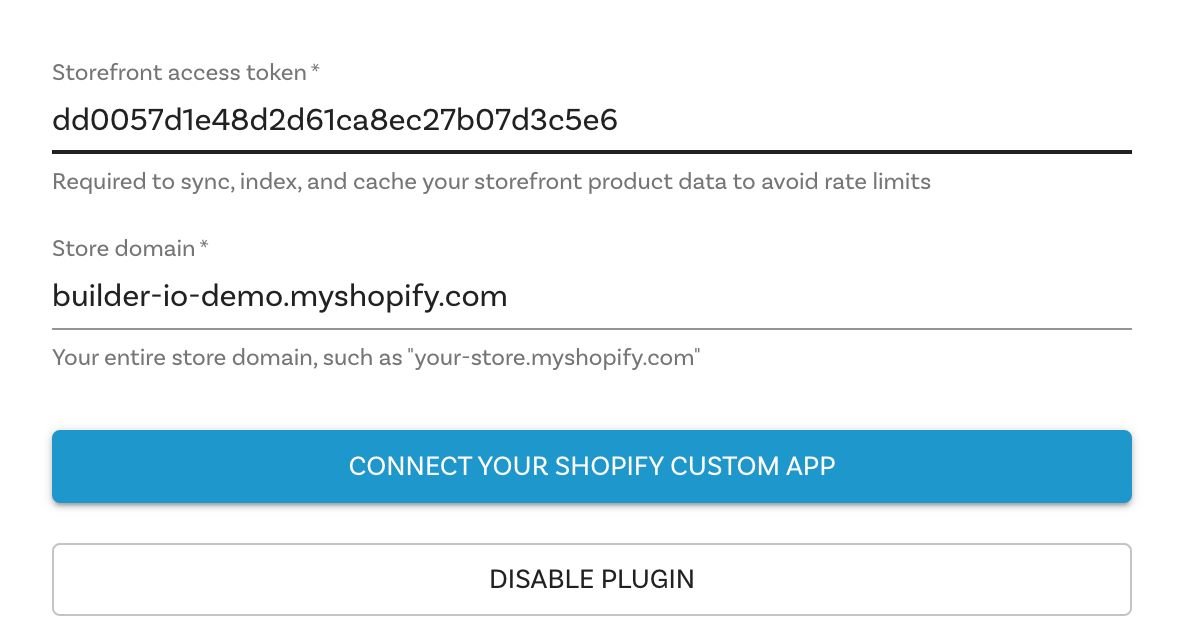
Fill in the required keys and press "Connect your Shopify Custom App"!
### 6. Configure the project to talk to Shopify
Open up [.env.development](./.env.development) and [.env.production](./.env.production) again,
but this time set the other two Shopify keys.
```diff
BUILDER_PUBLIC_KEY=012345abcdef0123456789abcdef0123
+ SHOPIFY_STOREFRONT_API_TOKEN=c11b4053408085753bd76a45806f80dd
- SHOPIFY_STOREFRONT_API_TOKEN=
+ SHOPIFY_STORE_DOMAIN=dylanbuilder.myshopify.com
- SHOPIFY_STORE_DOMAIN=
```
### 7. Up and Running!
The hard part is over, all you have to do is start up the project now.
```bash
npm install
npm run dev
```
This will start a server at `http://localhost:3000`.
### 8. Start building
Now that we have everything setup, start building and publishing pages on builder.io, for a demo on building something similar to the [demo homepage](https://headless.builders), follow the steps in this [short video](https://www.loom.com/share/9b947acbbf714ee3ac6c319c130cdb85)
## Deployment Options
You can deploy this code anywhere you like - you can find many deployment options for Next.js [here](https://nextjs.org/docs/deployment). The following options support one click installs and are super easy to start with:
[](https://vercel.com/new/git/external?repository-url=https%3A%2F%2Fgithub.com%2Fbuilderio%2Fnextjs-shopify)
- Vercel: for more information check [Vercel docs on Next.js deployments](https://vercel.com/docs/next.js/overview) Or try the one click install by clicking the button above.
[](https://app.netlify.com/start/deploy?repository=https://github.com/BuilderIO/nextjs-shopify)
- Netlify: For more information check [Netlify docs on Next.js deployments](https://www.netlify.com/blog/2020/11/30/how-to-deploy-next.js-sites-to-netlify/) Or try the one click install by clicking the button above.
Explore similar templates
Compare previews and descriptions within the same stack and category.

Next.js SaaS Starter
The official Next.js SaaS starter template, integrating email/password authentication, Stripe Checkout subscriptions, a dashboard with user/team CRUD, basic Owner/Member RBAC, and activity logging.
Next.js · SaaS

Next.js Commerce
Vercel's officially maintained Next.js App Router ecommerce starter with deep Shopify integration, offering a complete product catalog, cart, and checkout flow. Core logic is modular for swapping backends, and community provider versions exist for BigCommerce, Medusa, and Saleor.
Next.js · E-commerce

Next-js-Boilerplate
A developer-first Next.js 16 starter with Tailwind CSS 4 and TypeScript, supporting both App Router and Page Router.
Next.js · Starter

tailwind-nextjs-starter-blog
A Next.js and Tailwind CSS blog starter template using Contentlayer for Markdown/MDX, with built-in SEO, code highlighting, and tags. It targets personal technical blogs and migration from Jekyll/Hugo to React, and supports one-click Vercel deployment.
Next.js · Blog

next-forge
next-forge is a Turborepo-based Next.js template maintained by Vercel, positioned as a starting point for SaaS products.
Next.js · Starter
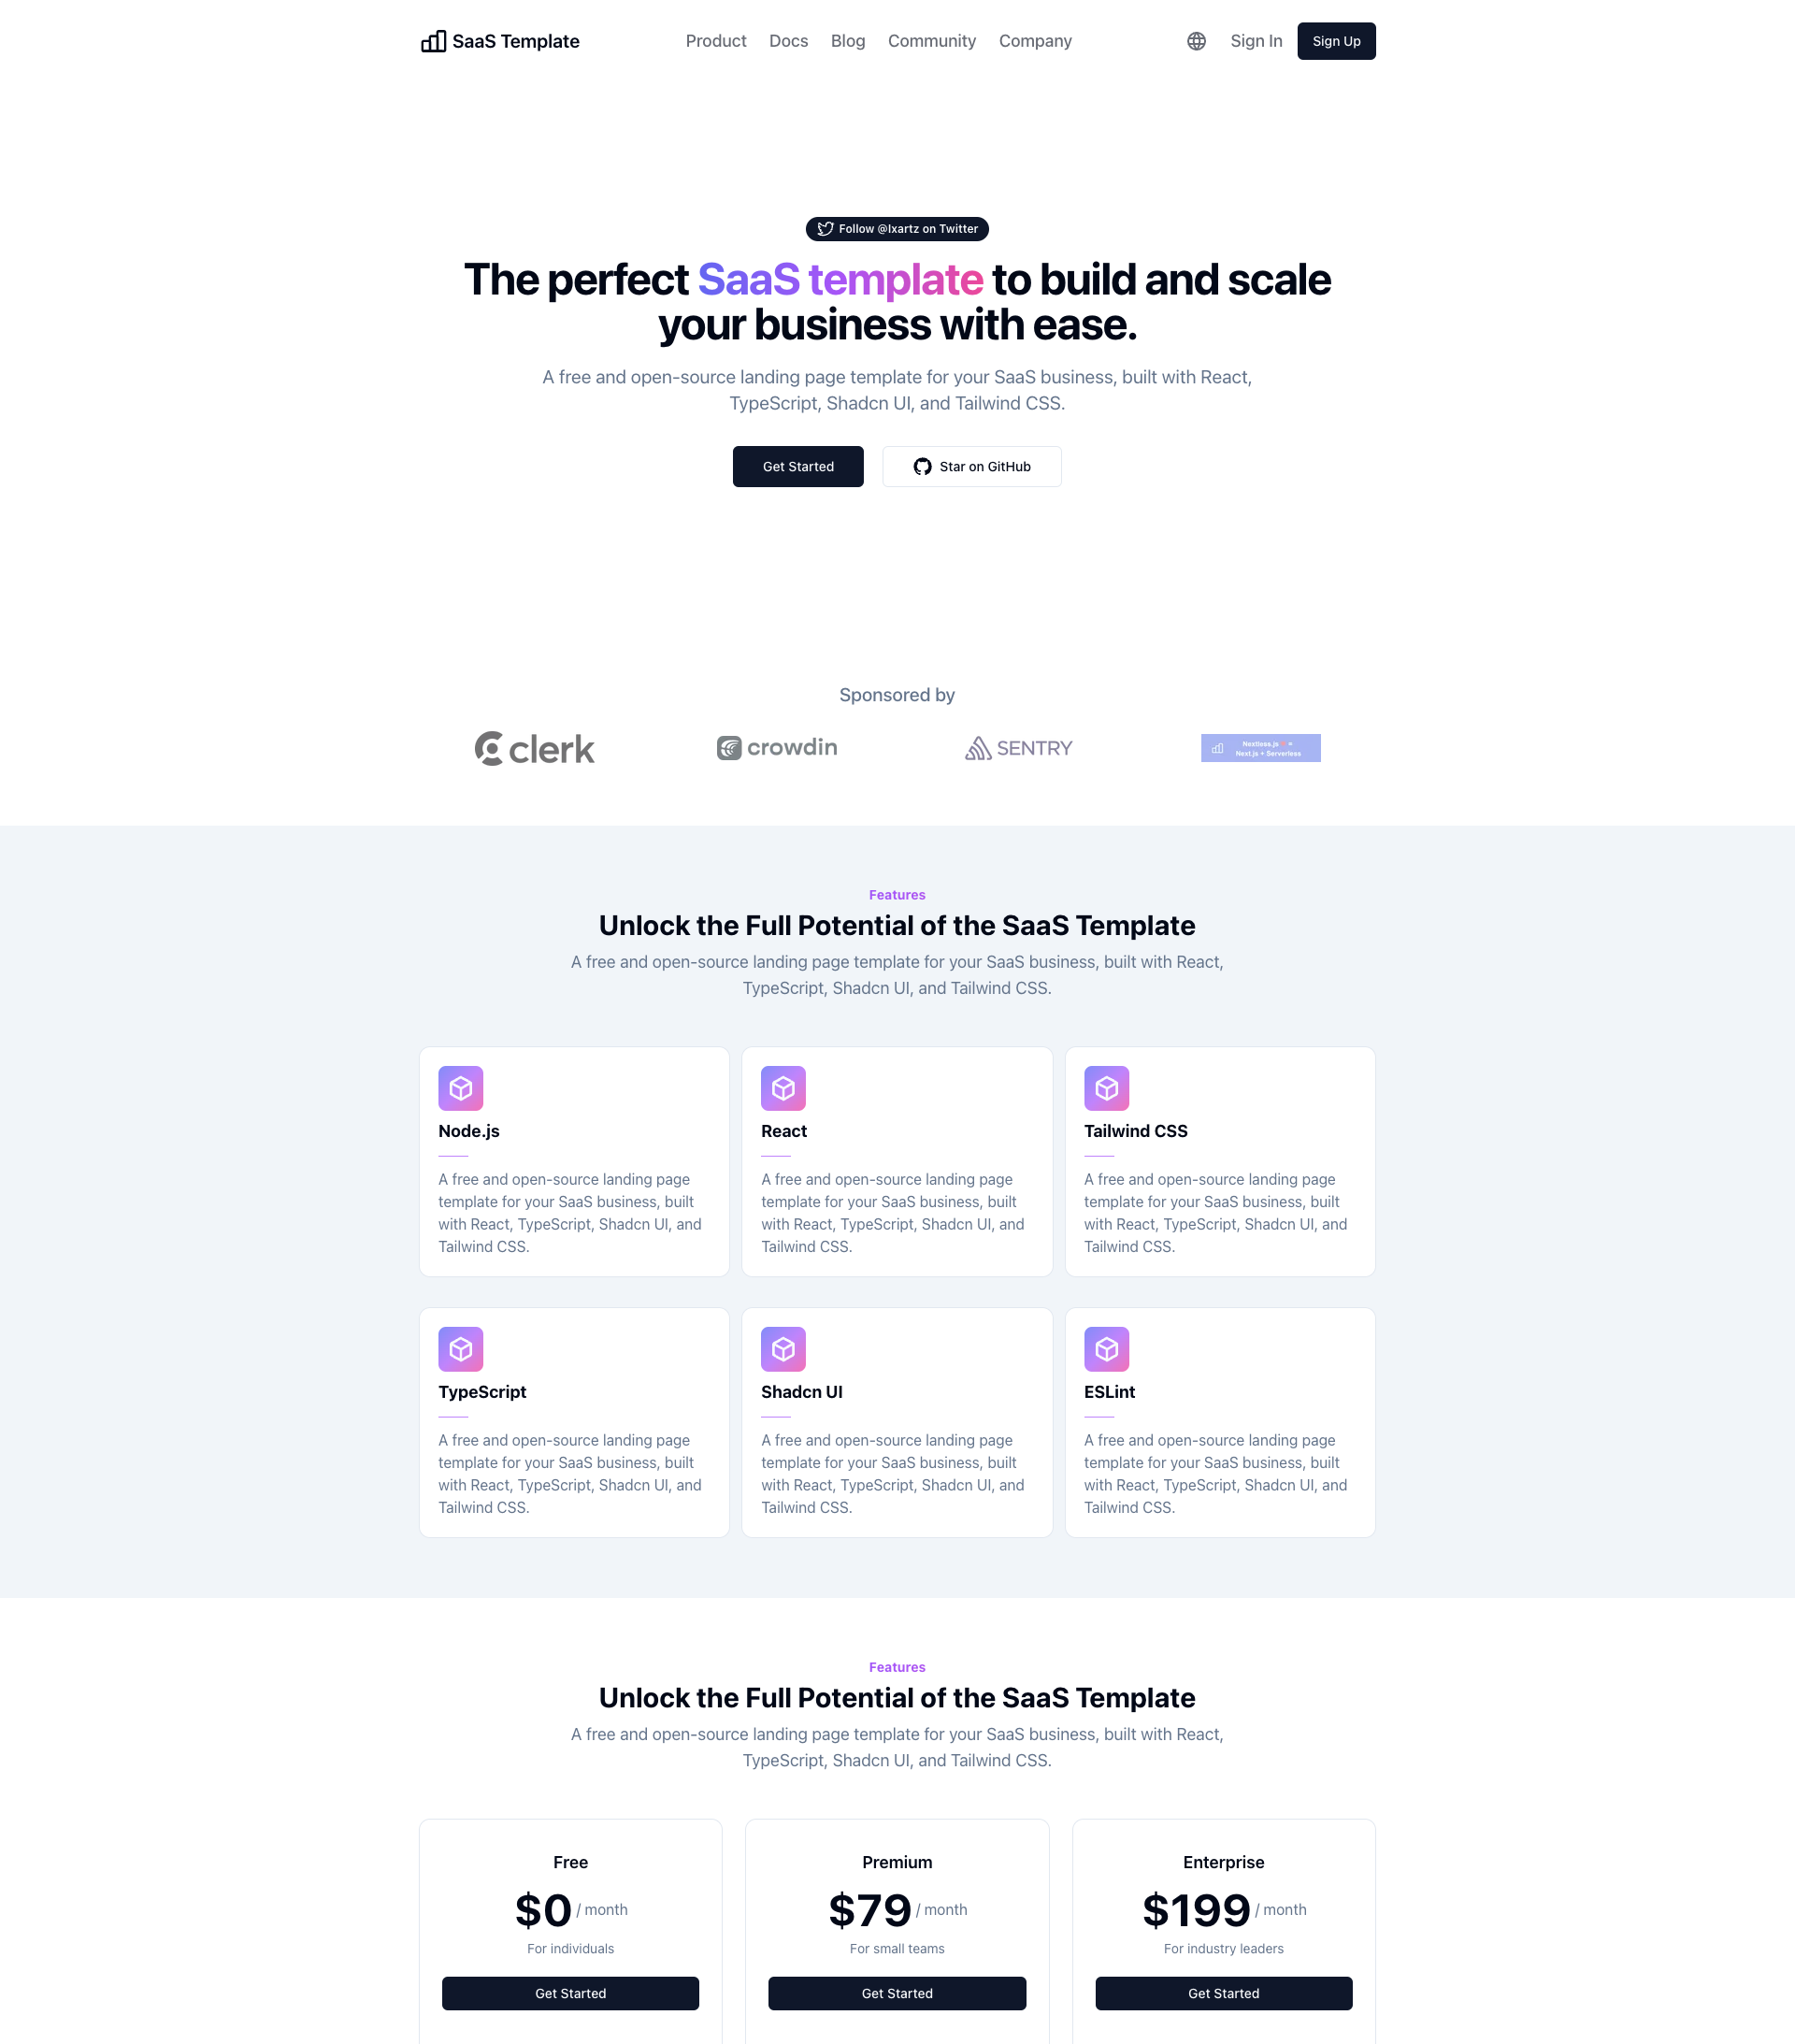
SaaS-Boilerplate
SaaS-Boilerplate is an open-source SaaS starter template built with Next.js App Router, React 19, TypeScript, Tailwind CSS, and Shadcn UI.
Next.js · SaaS