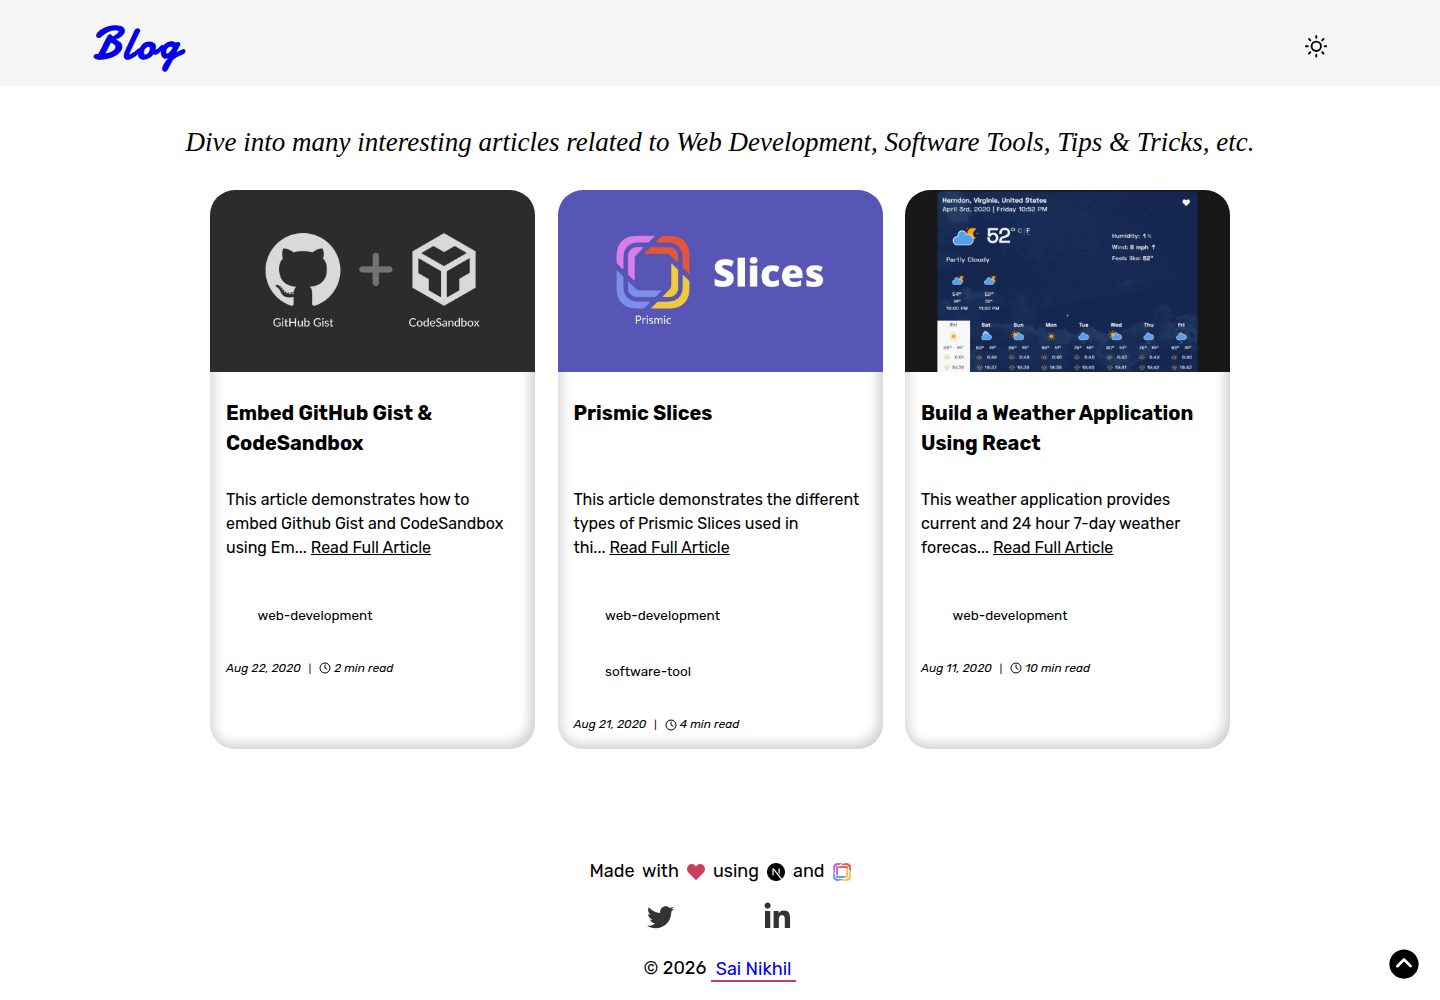
使用 Prismic 作为无头 CMS,文章、作者、分类等通过自定义类型管理
Next.jsReact博客启动器
nextjs-prismic-blog-starter — Next.js 博客模板
作者 iamsainikhil
基于 Next.js 与 Prismic CMS 的博客启动器,使用 Prismic Slices 组织文章内容,内置预览、SEO 与响应式图片等配置。
看看你的网站会是什么样
浏览真实页面截图,比较内容排版与手机效果。点击下方缩略图切换,放大查看整页细节。
全部页面与视图 3
截图用于了解视觉与布局,交互效果请以实际项目为准。
采集于 2026-10-03查看来源
值得关注的模板亮点
从已有项目资料中,快速了解它的特点。
文章正文由 Prismic Slices 组成,支持富文本、引用、提示框、图片、嵌入内容、链接元信息与代码块
内置 Prismic 预览功能,可在发布前查看文章页面
使用 Theme UI 进行样式定制,主题可通过 theme.js 调整
图片通过 next/image 与 Prismic Imgix 处理,支持响应式尺寸与 WebP
包含 SEO 标签、OpenGraph、Twitter 卡片、离线支持与 WebApp Manifest 配置
模板详细介绍
这是一个基于 Next.js 的博客启动器,内容由 Prismic 无头 CMS 驱动。文章、作者、分类等数据通过 Prismic 的自定义类型管理,文章正文使用 Slices 组合富文本、引用、提示框、图片、嵌入内容、链接元信息与代码块等区块,并可在 Prismic 后台调整顺序。项目内置 Prismic 预览功能,可在发布前查看文章页面效果;样式使用 Theme UI,代码高亮使用 PrismJS,图片通过 next/image 与 Prismic Imgix 处理,SEO 相关标签由 next/head 输出。使用前需要在 Prismic 创建账号与项目,并按仓库提供的 JSON schema 建立 Article、Author、Category 自定义类型,同时配置环境变量中的仓库名称、API 地址与访问令牌;评论功能依赖 DISQUS 项目短名。仓库采用 MIT 许可,但演示图片、字体、图标等第三方素材需单独核对许可,Prismic、DISQUS 等外部服务也可能产生费用。
Next.js博客启动器
适合你的项目吗?
适用场景
- 使用 Prismic 作为内容源搭建个人或团队博客
- 需要文章内混合富文本、代码块、图片与嵌入内容的编辑场景
- 希望在发布前通过 Prismic 预览检查文章页面效果
- 需要基于 Next.js 的博客启动器进行二次开发与主题定制
适合人群
- 熟悉 Next.js 并希望以 Prismic 管理内容的开发者
- 需要结构化文章区块与预览流程的博客项目
- 接受使用外部 CMS 与评论服务的前端项目
上手与定制指南
结合仓库当前版本的说明,按下面的资料检查内容、配置与运行要求。
- 1
需在 Prismic 创建账号与项目,并按仓库中的 JSON schema 建立 Article、Author、Category 自定义类型
- 2
在 .env 中配置 NEXT_PUBLIC_PRISMIC_REPO、PRISMIC_API_URL、PRISMIC_ACCESS_TOKEN 等变量,评论功能还需配置 DISQUS 项目短名
- 3
克隆仓库后执行 npm install,再通过 npm run dev 启动开发环境
- 4
Prismic、DISQUS 等外部服务可能产生费用,演示图片、字体、图标等第三方素材需单独核对许可
授权与来源资料
使用条件与限制
免费使用 · 保留许可声明本次收录的是公开仓库中采用 MIT 许可的免费版本;免费范围为该版本代码,不代表外部服务或第三方素材免费。
使用时需要遵守
- 允许免费使用、修改、商用和分发该版本代码。
- 分发代码副本或实质性部分时,保留原作者版权声明和完整 MIT 许可声明。
- 代码按现状提供;担保与责任限制以原许可证及适用法律为准。
额外费用与待核对事项
- 该模板以 Prismic 作为无头 CMS,使用前必须先在 Prismic 创建账号与项目并准备内容数据,无法脱离 Prismic 独立运行。
- 需要注册 Prismic 账号并创建项目,属于外部服务依赖,可能受其服务条款与付费方案限制。
- 必须从 Prismic 获取永久访问令牌并配置到环境变量中,否则无法读取内容。
- 评论功能依赖 DISQUS 外部服务,需提供 DISQUS 项目短名,并受其服务条款约束。
- 必须配置 Prismic 仓库名称等必填环境变量,未配置则无法正常启动。
- 必须配置 Prismic 永久访问令牌,属于必填项。
- DISQUS 项目短名为必填环境变量,评论功能依赖该外部服务。
- 演示图片、字体、图标及其他第三方素材需按各自许可核对,不能仅凭代码的 MIT 许可判断。
- 域名、托管、数据库、支付或 AI 等外部服务可能另外收费。
查看原文依据
Permission is hereby granted, free of charge
许可证原文
This blog starter uses [Prismic](https://prismic.io/) as the Content Management System. Hence, you need to have the required data first before start using this starter.
README 原文
Create your Prismic account [here](https://prismic.io/signup)
README 原文
grab the Permanent Access Token with _Access to master/README_images_.
README 原文
This project has the support for [DISQUS](https://disqus.com/) comments section which need your DISQUS project name
README 原文
NEXT_PUBLIC_PRISMIC_REPO=<your prismic repository name (Required)>
README 原文
PRISMIC_ACCESS_TOKEN=<your prismic permanent access token> (Required)
README 原文
https://github.com/iamsainikhil/nextjs-prismic-blog-starter/blob/master/LICENSEhttps://github.com/iamsainikhil/nextjs-prismic-blog-starter/blob/master/README.mdNEXT_PUBLIC_DISQUS_NAME=<your disqus project shortname> (Required)
README 原文
DeepSeek 根据仓库许可证和 README 整理 ·2026-10-03。结果仅覆盖已读取资料,依赖、图片、字体及后续条款变更以各自原文为准。
项目核对记录与介绍依据
模板资料
- 来源平台
- GitHub
- 资料与维护参考分
- 资料较完整 · 92 / 100
- 技术栈
- Next.js · React
- 网站类型
- 博客 · 启动器
这个分数如何计算
本站按许可资料(最高30分)、演示链接(12分)、预览图(10分)、Star数(15分)、记录的维护时间(15分)、描述完整度(8分)、功能记录(5分)和分类资料(5分)计算。它不是代码、安全或性能测试,也不是 Google 评分;有链接不代表已实测可用。
这个项目需要核对什么
- 记录的仓库更新时间
- 2026-09-06
- 截图检查日期
- 2026-10-03
已收录演示链接。请用你的内容与屏幕尺寸检查;有演示不代表表单、认证或支付已经可用。
目录记录的主要技术栈是 Next.js。请通过依赖清单和锁文件核对实际版本与托管要求。这些说明基于收录资料,不代表代码审计或部署实测。
查看具体选型方法 →介绍的制作与核对状态
介绍由 AI 辅助整理目录与仓库资料。仓库作者不等于这篇介绍的审核者。
已完成服务器许可规则与 AI 来源核对;未经过人工编辑审核。
查看当时使用的来源资料
SHA-256: f354a7f9229876d550910986b57206ce082ba04e99f74799ef6c75d49de8d032
2026-10-03T05:52:45.142Z
来源文件 / 仓库<p align="center">
<a href="https://nextjs-prismic-blog-starter.vercel.app/">
<img alt="NextJS" src="https://github.com/iamsainikhil/nextjs-prismic-blog-starter/raw/master/README_images/nextjs_prismic.png" width="300" />
</a>
</p>
<h1 align="center">
Blog | NextJS Prismic Blog Starter
</h1>
<p align="center">
<a href="https://www.npmjs.com/package/nextjs-prismic-blog-starter" target="_blank" rel="noreferrer noopener">
<img alt="npm" src="https://img.shields.io/npm/v/nextjs-prismic-blog-starter?style=flat-square">
</a>
<a href="https://www.npmjs.com/package/nextjs-prismic-blog-starter" target="_blank" rel="noreferrer noopener" style="margin: 0 0.25rem;">
<img alt="npm downloads" src="https://img.shields.io/npm/dt/nextjs-prismic-blog-starter?style=flat-square">
</a>
<a href="https://github.com/iamsainikhil/nextjs-prismic-blog-starter/blob/master/LICENSE" target="_blank" rel="noreferrer noopener">
<img alt="GitHub" src="https://img.shields.io/github/license/iamsainikhil/nextjs-prismic-blog-starter?style=flat-square">
</a>
</p>
This is a [Next.js](https://nextjs.org/) project bootstrapped with [`create-next-app`](https://github.com/vercel/next.js/tree/canary/packages/create-next-app).
# 👀 Demo
- [https://nextjs-prismic-blog-starter.vercel.app/](https://nextjs-prismic-blog-starter.vercel.app/)
- [https://blog.iamsainikhil.com](https://blog.iamsainikhil.com/)
- Prismic Slices available with the starter can be seen in action [here](https://nextjs-prismic-blog-starter.vercel.app/article/prismic-slices).
# 🎉 **Features**
Multiple features of Prismic are used in this starter:
- **Slices**: Enrich your blogposts with custom quotes, images or codeblocks. You can order them how you like. When you used the *Image-Slice* the image will get inserted and optimized by **nextjs-image**
- **Relationship fields**: Categorize your blog articles in Categories via a relationship field. You can change categories on the fly
- **Both custom types (Single / Repeatable)**: Articles, Tags, Categories, Author sections of the website are managed with Prismic. The social media links or the header & footer sections are hardcoded content which can be customized easily!
- **Prismic Preview**: Prismic allows preview of any document which comes handy before publishing a document. This starter has got preview setup for article page. For more info, check [here](https://prismic.io/docs/technologies/previews-nextjs) and [here](https://user-guides.prismic.io/en/articles/768819-preview-a-document)
Therefore the starter has following features:
- Prismic as Headless CMS
- Prismic Previews
- [Theme UI](https://theme-ui.com/home) for styling
- Prism React Renderer plugin using PrismJS highlighting
- Responsive images (nextjs-image)
- The right image size for every screen size
- Traced SVG Loading (Lazy-Loading)
- WebP Support
- Prismic Imgix transformations
- SEO (nextjs-head)
- OpenGraph Tags
- Twitter Tags
- Favicons
- Offline Support
- WebApp Manifest Support
- NextJS dynamic code-splitting of components
- NextJS optimized google fonts (nextjs-google-fonts)
- Configurable
- Use the `next-config.js`, `Head.jsx`, and `Layout.jsx` to easily change the most important information
- Themeable with `theme.js`
**⚠️ Note: This blog starter uses [Prismic](https://prismic.io/) as the Content Management System. Hence, you need to have the required data first before start using this starter.**
# 🛠️ **Prismic Setup**
## Account
- Create your Prismic account [here](https://prismic.io/signup)
- Create a project
## API Token
- After creating an account, head over to settings of the project you created earlier.
- Go to _API & Security_ section, grab the Permanent Access Token with _Access to master/README_images_.
## Custom Types
### Article
- Create a _Repeatable_ custom type with name _Article._
- Simply paste the JSON schema in `_src/schemas/article.json_` file in the _JSON editor_ of the `_Article_` type in _Prismic_. This will create all the below fields in the _Article_ type on the fly for you.
- Beauty of Prismic Slices is that they are optional data sections which can be customized very easily in the Prismic UI.
- **`Primary`** content of the article:
- **uid** → ID of the article which you will find in the URL
- **created** → Created date of the article
- **modified** → Modified date of the article
- **title** → Title of the article
- **excerpt** → Short description of the article
- **read_time** → Total time to read the article
- **article_image** → Image of the article (ex- Thumbnail)

- **`Slices`**(Optional):
- **Content**: This slice has 2 types (Rich Text and Quote) based on which the `content` is rendered in the UI. Support for `inline code` using `codespan` label which appear in the HTML with a class `codespan`.
- **Text** (Rich Text Section) **→** Rich WYSIWYG editor content which is consumed in the UI as the HTML.
- **Quote** (Blockquote Section) → Select this type to have any blockquote content in the article.

- **Alert**: This slice has 4 types (Info, Success, Warning, and Danger) based on which the `alert` UI will have different background color as well as border color. Support for `inline code` using `codespan` label which appear in the HTML with a class `codespan`.

- **Image** (banner or gallery) → Use this slice to show a `banner` (single image with caption) or a `gallery` (group of images)

- **Embed** → Use this slice to embed any platform content like YouTube, Vimeo, GitHub Gist, CodeSandbox, CodePen, etc.
- **type** → Type of the embed like `GitHub Gist` or `Default` (YouTube, Vimeo, CodeSandbox, etc).
- **embed_title** → Title of the embed.
- **embed_url →** URL of the embed which will be consumed in an iframe in the UI

- **Meta Information** (Website URL meta info Section) → Use this slice to show a meta info of any URL. You can obtain all the below information using [https://www.heymeta.com/](https://www.heymeta.com/)
- **website_title →** Title of the website
- **website_description →** Description of the website
- **website_image** → Image of the website
- **website_url →** URL of the website

- **Code →** Use this slice to show any code block in the article
- **type →** Mention the type of scenario where this code block is used. For ex- type of "List" will add some padding to the code block.
- **lang →** Language of the code to have appropriate syntax highlighting using PrismJS
- **code →** Actual code content

- **`Meta`** (meta information of the article)
- **Categories** (repeatable section) with fields like:
- category → Category of the article
- slug → Category name in the URL
_Category_ custom type is discussed later.
- **Author** (non-repeatable section) → relationship field with _Author_ custom type discussed later.
- **`Tags` →** This is not defined in the Article type but can be set when you create any article like below:

### Author
- Create a _Repeatable_ custom type with name _Author._
- Simply paste the JSON schema in `_src/schemas/author.json_` file in the _JSON editor_ of the `_Author_` type in _Prismic_. This will create all the below fields in the _Author_ type on the fly for you.
- Contents:
- **uid →** URL slug of the author
- **name →** Name of the author
- **bio →** About the author
- **avatar →** Image of the author
- **social_links** (repeatble section) **→** Social links of the author
- **platform_name →** Name of the platform (Facebook, Twitter, LinkedIn, Medium, GitHub, CodePen, Portfolio (website). However, you can customize the icons which is discussed later.
- **platform_url →** URL of the platform


### Category
- Create a _Repeatable_ custom type with name _Category._
- Simply paste the JSON schema in `_src/schemas/category.json_` file in the _JSON editor_ of the `_Category_` type in _Prismic_. This will create all the below fields in the _Category_ type on the fly for you.
- Contents:
- **name →** Name of the category
# 💻 Quick start
1. **Create a NextJS site.**
```bash
npx create-next-app
# create a new NextJS site using this starter
git clone https://github.com/iamsainikhil/nextjs-prismic-blog-starter
```
2. **Install the packages**
Install the packages using the command `npm install`
3. **Environment File**
- Go to _API & Security_ section of your _Prismic_ project, grab the Permanent Access Token with _Access to master_.
- The Repository Name is the name you have entered at the creation of the repository (you’ll also find it as the subdomain in the URL)
- This project has the support for [DISQUS](https://disqus.com/) comments section which need your DISQUS project name which can be found at _https://<your-project-shortname>.disqus.com/admin/settings/general/_
- Create an `.env` file in the root directory of the project. Add the following properties in it:
```json
NEXT_PUBLIC_GA_ID=<your Google Analytics tracking ID> (Optional)
NEXT_PUBLIC_SITE_URL=<URL of the deployed app (Optional)>
NEXT_PUBLIC_PRISMIC_REPO=<your prismic repository name (Required)>
PRISMIC_API_URL=<your prismic repository API URL> (Required)
PRISMIC_ACCESS_TOKEN=<your prismic permanent access token> (Required)
NEXT_PUBLIC_DISQUS_NAME=<your disqus project shortname> (Required)
```
4. **Start developing.**
Navigate into your new site’s directory and start it up.
```bash
# Go to project directory
cd <name>
# start the application
npm run dev
```
5. **Open the source code and start editing!**
Your site is now running at `http://localhost:3000`!
Open the `<name>` directory in your code editor of choice and edit the contents. Save your changes and the browser will update in real time!
# ⚙️ Available Scripts
---
In the project directory, you can run:
`npm run dev`
Runs the app in the development mode.Open `[http://localhost:3000](http://localhost:3000/)` to view it in the browser. The page will reload if you make edits. You will also see any lint or nextjs develop errors in the console.
`npm run start`
Runs the app in the production mode.Open `[http://localhost:3000](http://localhost:3000/)` to view it in the browser. The page will reload if you make edits. You will also see any lint or nextjs develop errors in the console.
`npm run build`
Builds the app for production to the `build` folder.It correctly bundles React in production mode and optimizes the build for the best performance.
The build is minified and the filenames include the hashes. Your app is ready to be deployed!
See the section about **[deployment](https://nextjs.org/docs/deployment)** for more information.
`npm format`
Formats the app files like _js, jsx, json, and md_ using Prettier. You can learn more about the format **[here](https://prettier.io/docs/en/install.html)**.
# **🧐 What's inside?**
A quick look at the top-level files and directories you'll see in a NextJS project.
```
.
├── node_modules
├── src
├── .gitignore
├── nextjs-config.js
├── LICENSE
├── package-lock.json
├── package.json
└── README.md
```
1. **`/node_modules`**: This directory contains all of the modules of code that your project depends on (npm packages) are automatically installed.
2. **`/src`**: This directory will contain all of the code related to what you will see on the front-end of your site (what you see in the browser) such as your site header or a page template. `src` is a convention for “source code”.
3. **`.gitignore`**: This file tells git which files it should not track / not maintain a version history for.
4. **`nextjs-config.js`**: This is the main configuration file for a NextJS site. This is where you can specify information about your plugins config you’d like to include, etc.
5. **`LICENSE`**: NextJS Prismic Blog Starter is licensed under the MIT license.
6. **`package-lock.json`** (See `package.json` below, first). This is an automatically generated file based on the exact versions of your npm dependencies that were installed for your project. **(You won’t change this file directly).**
7. **`package.json`**: A manifest file for Node.js projects, which includes things like metadata (the project’s name, author, etc). This manifest is how npm knows which packages to install for your project.
8. **`README.md`**: A text file containing useful reference information about your project.
# 🔬 **What's inside?**
A quick look at the top-level files and directories you'll see in the application.
```
/
├── components
├── public/fonts
├── public/images
├── pages
├── schemas
├── slices
├── styles
├── utils
```
1. **`components`:** This directory contain all of the reusable React components like Chip, Icon, Image, Listing, Layout, SEO, SliceMachine, etc.
2. **`public/fonts`:** This directory contain any custom font files which are imported in `styles/_fonts.scss` and later consumed in `theme.js`.
3. **`public/images`:** This directory contain images which are used in the components and later be optimized during NextJS build.
4. **`pages`:** This directory contain files which represent web pages like 404, index.js (homepage), \_app.js, etc. Moreover, you can generate dynamic pages using the `getStaticPaths` and `getStaticProps` methods based on the structure `pages/[sub-page]/[param].js`.
5. **`schemas`:** This directory contain JSON schema files which represent each custom type defined in Prismic.
6. **`slices`:** This directory is the ❤️ of the article page with files representing the slices discussed earlier in Prismic setup section.
7. **`styles`:** This directory contain scss files which include further styling of the HTML using old school process. PS: New process is to just use `Emotion` based `CSS-in-JS` styling which is also used extensively across the project.
8. **`utils`:** This directory contain general utility JS functions to reuse the functionality across the components.
# 🧰 3rd Party Packages
A list of packages used in this starter project.
1. **`dayjs`:** A 2KB immutable date library alternative to Moment.js with the same modern API. For more info, check [here](https://github.com/iamkun/dayjs).
2. **`theme-ui`:** Build consistent, themeable React apps based on constraint-based design principles. For more info, check [here](https://github.com/system-ui/theme-ui).
3. **`prism-react-renderer`:** Renders highlighted Prism output to React (+ theming & vendored Prism). This package is used to syntax highlight the code blocks in article. For more info, check [here](https://github.com/FormidableLabs/prism-react-renderer).
4. **`react-copy-to-clipboard`:** Copy-to-clipboard React component used in Code slice `src/slices/Code.jsx`. For more info, check [here](https://github.com/nkbt/react-copy-to-clipboard).
5. **`react-gist`:** Github Gist React component used in Embed slice `src/slices/Embed.jsx`. For more info, check [here](https://github.com/tleunen/react-gist).
6. **`react-headroom`:** A handy react component to hide the site header until you need it. For more info, check [here](https://github.com/KyleAMathews/react-headroom).
7. **`react-icons`:** Absolutely useful package to get svg react icons of popular icon packs. For more info, check [here](https://github.com/react-icons/react-icons).
8. **`react-images`:** A mobile-friendly, highly customizable, carousel component for displaying media in ReactJS. For more info, check [here](https://github.com/jossmac/react-images).
9. **`react-snakke`:** Reading position indicator for React used to display the progress of the article as you scroll down the page. For more info, check [here](https://github.com/diogomoretti/react-snakke). This is one of the package which can be completely avoidable if you don't want it 😄.
10. **`react-toastify`:** React notification made easy. This is used to notify users of which code block they copied to clipboard used in Code slice `src/slices/Code.jsx`. For more info, check [here](https://github.com/fkhadra/react-toastify).
11. **`disqus-react`:** A React component for Disqus. For more info, check [here](https://github.com/disqus/disqus-react).
12. **`next-google-fonts`:** A simple plugin for loading Google Fonts fast and asynchronously. For more info, check [here](https://github.com/joe-bell/next-google-fonts)
13. **`next-pwa`:** A simple plugin to add PWA support for NextJS app. For more info, check [here](https://github.com/shadowwalker/next-pwa)
14. **`prismic-javascript`:** JavaScript development for prismic.io API v2. For more info, check [here](https://github.com/prismicio/prismic-javascript)
15. **`prismic-reactjs`:** A simple utility to render Rich Text with Prismic API V2. For more info, check [here](https://github.com/prismicio/prismic-reactjs)
# ⛏️ Customization
List of files where you can customize stuff to make this starter your own!!
1. **`Head.jsx`:** This file is where meta tags and other tags get injected to the document `head`.
2. **`next-config.js`:** As the name suggests, bulk of the customization resides in this file. I left so many comments which help you customize the options for several plugins.
3. **`theme.js`:** This is the 👁️ of the project with all the theme options declared in this file. Take some time understanding the theme-ui configuration [here](https://theme-ui.com/theme-spec).
4. **`Listing.jsx` & `Footer.jsx`:** Sample tracking logic is setup in the code which can be used as an example to customize the GA tracking events. You can remove this code logic entirely or customize to your needs.
5. **`public/site_image.png`:** Replace this image to update website meta image.
# 🚀 Deploy
[](https://app.netlify.com/start/deploy?repository=https://github.com/iamsainikhil/nextjs-prismic-blog-starter)
[](https://vercel.com/import/project?template=https://github.com/iamsainikhil/nextjs-prismic-blog-starter)
# ⚓ Prismic Webhook
Prismic Webhook allows you to automatically or manually trigger a deployment process in Netlify or Vercel if any post is published or unpublished OR for other events in Prismic. I use Vercel as the example and I guess it might be quite similar for Netlify or any other cloud service.
## Steps:
- Create a Deploy Hook in Vercel [here](https://vercel.com/iamsainikhil/nextjs-prismic-blog-starter/settings/git-integration). For more info, check [here](https://vercel.com/docs/v2/more/deploy-hooks)

- Copy the hook link and past in the URL section of the prismic Webhook
- Create a Prismic Webhook [here](https://iamsainikhil-blog.prismic.io/settings/webhooks/). For more info, check [here](https://user-guides.prismic.io/en/articles/790505-webhooks). -

- The `Secret` field is _optional_ in the Prismic Webhook. If you set it, Prismic will send the content to your server, so that you can verify that the request is coming from prismic.io.
- After successful creation of the Webhook, you can manually trigger it and can also see the logs.

> You can create any number of Webhooks for a prismic project!
# 🏎 Roadmap
- [x] Publish this starter as a template
- [x] Analytics support (Google Analytics)
- [x] Prismic Preview Setup
- [ ] Pagination Feature
- [ ] Search Feature
- [ ] Testing
# **🙌 Contribution**
- Open pull request with improvements.
- If you have any new idea, check the **[feature request](https://github.com/iamsainikhil/nextjs-prismic-blog-starter/raw/master/README_images/.github/ISSUE_TEMPLATE/feature_request.md)** template to create a request.
- If you found any issue or a bug, check the **[bug report](https://github.com/iamsainikhil/nextjs-prismic-blog-starter/raw/master/README_images/.github/ISSUE_TEMPLATE/bug_report.md)** template to create a report.
# **📃 License**
Have a look at the **[license file](https://github.com/iamsainikhil/nextjs-prismic-blog-starter/raw/master/README_images/LICENSE)** for details
# **📧 Contact**
Whether you’d like to discuss about this starter template or simply say “hello”, I’d love to hear from you.
Email: **[[email protected]](mailto:[email protected])**
# **🎓 Learning NextJS**
Looking for more guidance? Full documentation for NextJS lives [on the website](https://nextjs.org/docs/getting-started). Here are some places to start:
- **For most developers, I recommend starting with the [in-depth tutorial for creating a site with NextJS](https://nextjs.org/learn/basics/create-nextjs-app).** It starts with zero assumptions about your level of ability and walks through every step of the process.
- **To dive straight into code samples, head [to the documentation](https://nextjs.org/docs/getting-started).** In particular, check out the *Basic Features*, *API Reference*, and *Advanced Features* sections in the sidebar.
# **🎓 Learning Prsimic**
Looking for more guidance? Full documentation for Prismic lives [on the website](https://prismic.io/docs). Here are some places to start:
- **For most developers, I recommend starting with our [in-depth tutorial for creating a site with NextJS & Prismic](https://user-guides.prismic.io/en/collections/22783-examples#next-js-samples).** It starts with zero assumptions about your level of ability and walks through every step of the process.
- **To dive straight into code samples, check the** [How To Guides](https://prismic.io/docs/technologies/prismic-and-nextjs)**.**
看看同类模板
对比同技术栈与用途的模板,找到更适合的视觉与内容结构。
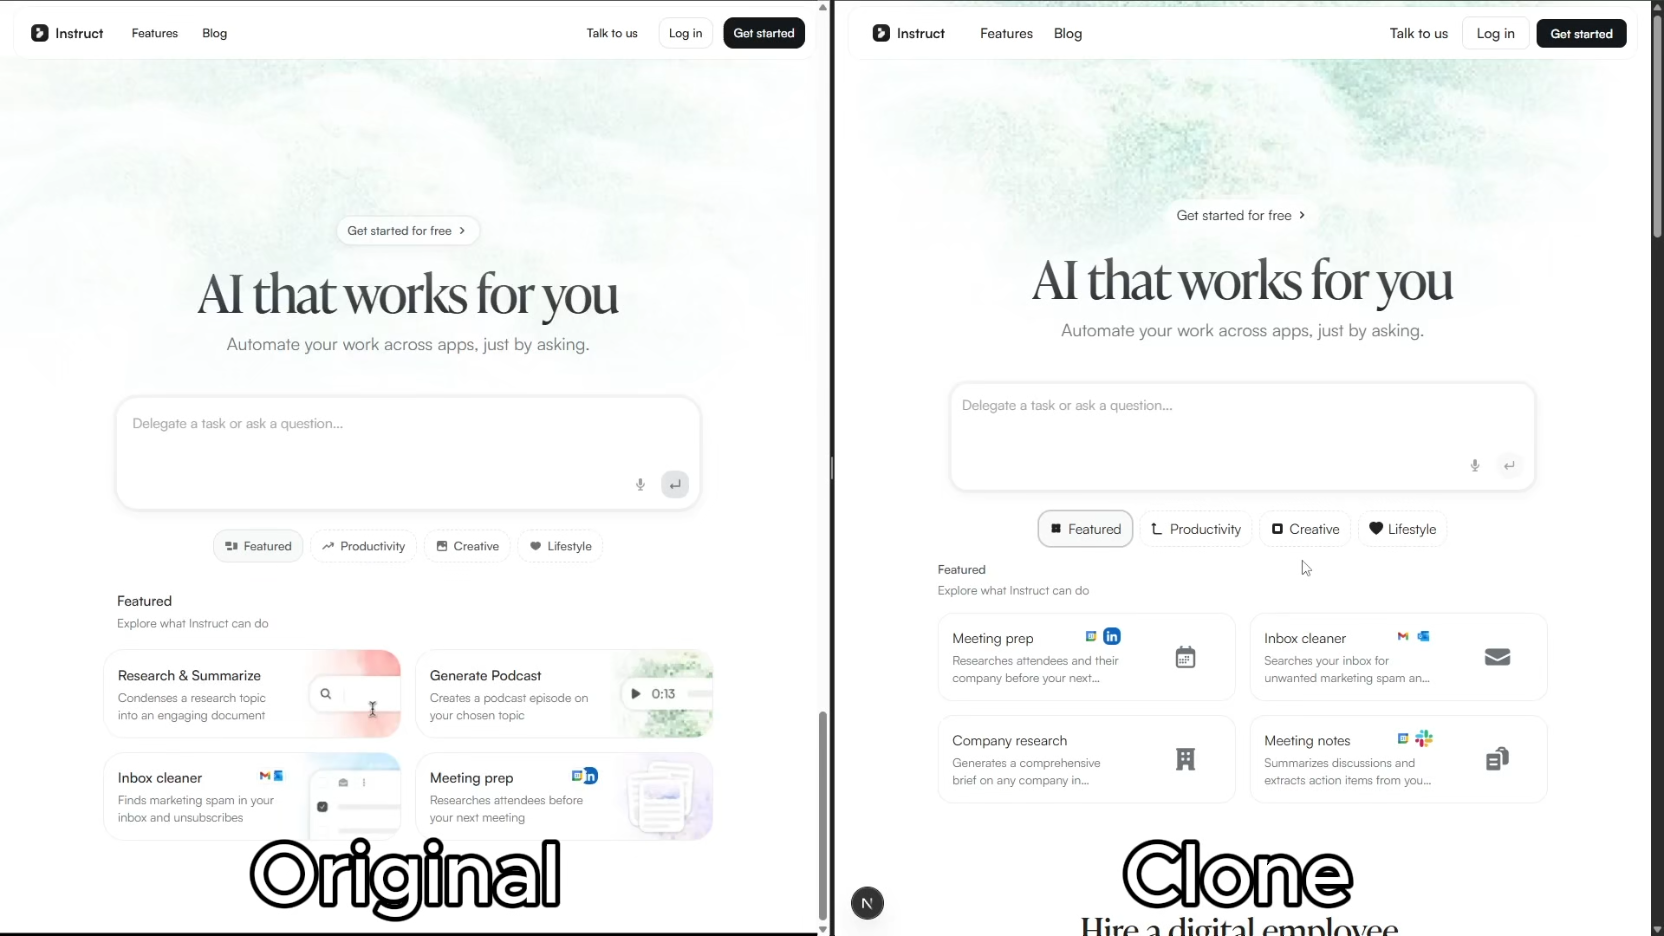
ai-website-cloner-template
Clone any website with one command using AI coding agents
Next.js · 启动器

Next.js SaaS Starter
Next.js SaaS Starter 是 Next.js 官方维护的 SaaS 起点模板,定位介于学习资源和可直接部署的脚手架之间。
Next.js · SaaS

Next.js Commerce
Next.js Commerce 是 Vercel 团队维护的电商启动模板,基于 Next.js App Router 构建,采用服务端渲染、React Server Components、Server Actions …
Next.js · 电商

Next-js-Boilerplate
Next-js-Boilerplate 是一个面向 Next.js 16、Tailwind CSS 4 和 TypeScript 的启动器,核心定位是开发者体验优先。
Next.js · 启动器

tailwind-nextjs-starter-blog
tailwind-nextjs-starter-blog 是一个面向个人技术博客的 Next.js 与 Tailwind CSS 启动模板,其 v2 版本基于 App Router 与 React Server Comp…
Next.js · 博客

next-forge
Production-grade Turborepo template for Next.js apps.
Next.js · 启动器