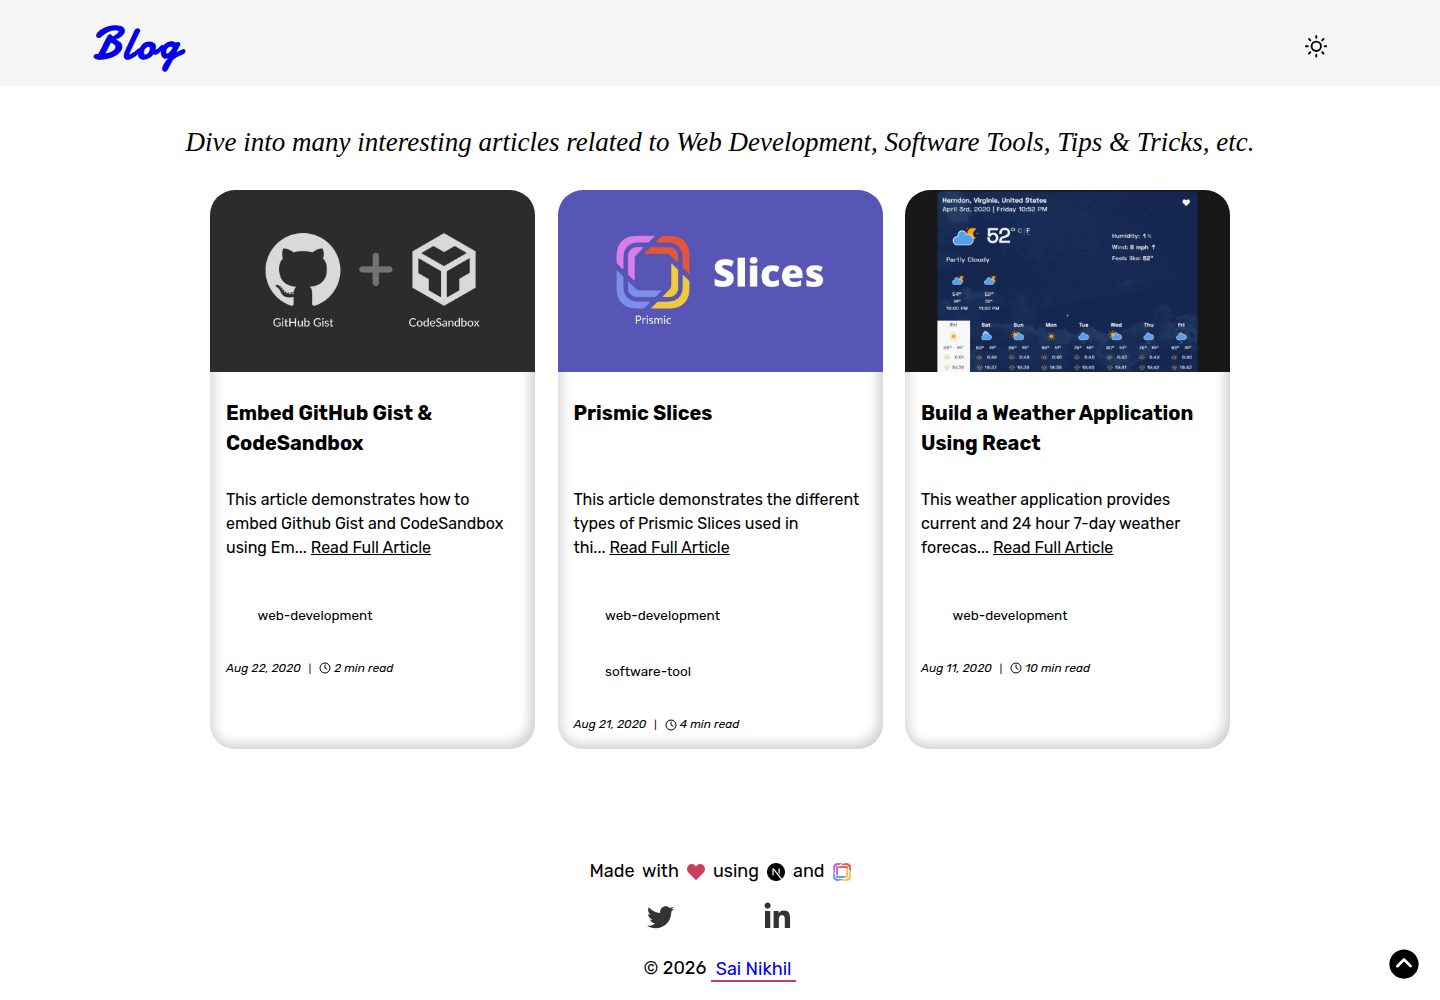
Uses Prismic as a headless CMS, with articles, authors, and categories managed through custom types
Next.jsReactBlogStarter
nextjs-prismic-blog-starter — Next.js Blog Template
By iamsainikhil
A blog starter based on Next.js and Prismic CMS, using Prismic Slices to organize article content, with built-in preview, SEO, and responsive image configurations.
Explore the design
Compare the page layouts and mobile experience. Open any screenshot for a closer look.
Desktop homepage1 / 3
Desktop captureTop of page
Actual screenshot captured by the server browser.
All pages & views 3
Screenshots show visual appearance; interactive behavior may differ.
Recorded 2026-10-03View source
What stands out
A quick read of the recorded project description.
Article bodies are composed of Prismic Slices, supporting rich text, quotes, callouts, images, embeds, link metadata, and code blocks
Built-in Prismic preview functionality to check article pages before publishing
Styling customization with Theme UI, with the theme adjustable via theme.js
Images processed through next/image and Prismic Imgix, supporting responsive sizes and WebP
Includes SEO tags, OpenGraph, Twitter cards, offline support, and WebApp Manifest configuration
Template Details
This is a blog starter based on Next.js, with content driven by the Prismic headless CMS. Data such as articles, authors, and categories are managed through Prismic custom types. Article bodies use Slices to combine blocks such as rich text, quotes, callouts, images, embeds, link metadata, and code blocks, and their order can be adjusted in the Prismic backend. The project includes Prismic preview functionality to check article page rendering before publishing; styling uses Theme UI, code highlighting uses PrismJS, images are processed through next/image and Prismic Imgix, and SEO-related tags are output by next/head. Before use, you need to create a Prismic account and project, set up Article, Author, and Category custom types according to the JSON schema provided in the repository, and configure the repository name, API address, and access token in environment variables; the comment feature depends on a DISQUS project shortname. The repository uses the MIT license, but third-party assets such as demo images, fonts, and icons need separate license verification, and external services such as Prismic and DISQUS may incur costs.
Next.jsBlogStarter
Is it right for your project?
Use Cases
- Building a personal or team blog using Prismic as the content source
- Editing scenarios that require mixing rich text, code blocks, images, and embedded content within articles
- Wanting to check article page rendering via Prismic preview before publishing
- Needing a Next.js-based blog starter for secondary development and theme customization
Suitable For
- Developers familiar with Next.js who want to manage content with Prismic
- Blog projects that need structured article blocks and a preview workflow
- Frontend projects that accept using external CMS and comment services
Getting started & customization
Use these recorded setup notes alongside the repository instructions for your chosen version.
- 1
You need to create a Prismic account and project, and set up Article, Author, and Category custom types according to the JSON schema in the repository
- 2
Configure variables such as NEXT_PUBLIC_PRISMIC_REPO, PRISMIC_API_URL, and PRISMIC_ACCESS_TOKEN in .env; the comment feature also requires configuring a DISQUS project shortname
- 3
After cloning the repository, run npm install, then start the development environment with npm run dev
- 4
External services such as Prismic and DISQUS may incur costs, and third-party assets such as demo images, fonts, and icons need separate license verification
License & source material
Usage conditions & limitations
Free to use · keep license noticeThis entry covers the free version under the MIT license in the public repository; the free scope is the code of this version and does not mean that external services or third-party assets are free.
Must comply with when using
- You are allowed to use, modify, commercially use, and distribute the code of this version for free.
- When distributing copies or substantial portions of the code, retain the original author's copyright notice and the complete MIT license notice.
- The code is provided as is; warranties and limitations of liability are governed by the original license and applicable law.
Additional costs & items to verify
- This template uses Prismic as a headless CMS. Before use, you must first create a Prismic account and project and prepare content data; it cannot run independently without Prismic.
- You need to register a Prismic account and create a project, which is an external service dependency and may be subject to its terms of service and paid plans.
- You must obtain a permanent access token from Prismic and configure it in environment variables; otherwise, content cannot be read.
- The comment feature depends on the external DISQUS service, requires a DISQUS project shortname, and is subject to its terms of service.
- Required environment variables such as the Prismic repository name must be configured; otherwise, it cannot start normally.
- The Prismic permanent access token must be configured and is a required item.
- The DISQUS project shortname is a required environment variable, and the comment feature depends on this external service.
- Demo images, fonts, icons, and other third-party assets need to be checked against their respective licenses and cannot be judged solely by the code's MIT license.
- External services such as domains, hosting, databases, payments, or AI may incur additional charges.
View Original Text Basis
Permission is hereby granted, free of charge
Original License Text
This blog starter uses [Prismic](https://prismic.io/) as the Content Management System. Hence, you need to have the required data first before start using this starter.
Original README
Create your Prismic account [here](https://prismic.io/signup)
Original README
grab the Permanent Access Token with _Access to master/README_images_.
Original README
This project has the support for [DISQUS](https://disqus.com/) comments section which need your DISQUS project name
Original README
NEXT_PUBLIC_PRISMIC_REPO=<your prismic repository name (Required)>
Original README
PRISMIC_ACCESS_TOKEN=<your prismic permanent access token> (Required)
Original README
https://github.com/iamsainikhil/nextjs-prismic-blog-starter/blob/master/LICENSEhttps://github.com/iamsainikhil/nextjs-prismic-blog-starter/blob/master/README.mdNEXT_PUBLIC_DISQUS_NAME=<your disqus project shortname> (Required)
Original README
Compiled by DeepSeek based on repository license and README ·2026-10-03. Results only cover the materials read; dependencies, images, fonts, and subsequent term changes are subject to their respective original texts.
Project checks & description sources
Template Information
- Source platforms
- GitHub
- Documentation and maintenance reference score
- More documented · 92 / 100
- Technologies
- Next.js · React
- Website type
- Blog · Starter
How this score is calculated
Our heuristic uses license records (up to 30), a demo link (12), a preview (10), stars (15), recorded maintenance (15), description completeness (8), feature records (5) and classification data (5). It is not a code, security or performance test, or a Google score. A link does not establish tested functionality.
What to verify for this project
- Repository update recorded
- 2026-09-06
- Screenshot last checked
- 2026-10-03
A demo link is listed. Check it with your own content and viewport sizes; its presence does not confirm that forms, authentication or payments work.
The catalog identifies Next.js as the primary stack. Check the actual dependency manifest and lockfile for versions and hosting requirements. These notes use recorded metadata, not a code audit or a deployment test.
Use a selection guide →How this description was prepared
AI-assisted description based on catalog records and repository material. Repository authors are not automatically the reviewers of this description.
Automatically checked against source and license rules; no manual editorial review.
Inspect the recorded source material
SHA-256: f354a7f9229876d550910986b57206ce082ba04e99f74799ef6c75d49de8d032
2026-10-03T05:52:45.142Z
Source file / repository<p align="center">
<a href="https://nextjs-prismic-blog-starter.vercel.app/">
<img alt="NextJS" src="https://github.com/iamsainikhil/nextjs-prismic-blog-starter/raw/master/README_images/nextjs_prismic.png" width="300" />
</a>
</p>
<h1 align="center">
Blog | NextJS Prismic Blog Starter
</h1>
<p align="center">
<a href="https://www.npmjs.com/package/nextjs-prismic-blog-starter" target="_blank" rel="noreferrer noopener">
<img alt="npm" src="https://img.shields.io/npm/v/nextjs-prismic-blog-starter?style=flat-square">
</a>
<a href="https://www.npmjs.com/package/nextjs-prismic-blog-starter" target="_blank" rel="noreferrer noopener" style="margin: 0 0.25rem;">
<img alt="npm downloads" src="https://img.shields.io/npm/dt/nextjs-prismic-blog-starter?style=flat-square">
</a>
<a href="https://github.com/iamsainikhil/nextjs-prismic-blog-starter/blob/master/LICENSE" target="_blank" rel="noreferrer noopener">
<img alt="GitHub" src="https://img.shields.io/github/license/iamsainikhil/nextjs-prismic-blog-starter?style=flat-square">
</a>
</p>
This is a [Next.js](https://nextjs.org/) project bootstrapped with [`create-next-app`](https://github.com/vercel/next.js/tree/canary/packages/create-next-app).
# 👀 Demo
- [https://nextjs-prismic-blog-starter.vercel.app/](https://nextjs-prismic-blog-starter.vercel.app/)
- [https://blog.iamsainikhil.com](https://blog.iamsainikhil.com/)
- Prismic Slices available with the starter can be seen in action [here](https://nextjs-prismic-blog-starter.vercel.app/article/prismic-slices).
# 🎉 **Features**
Multiple features of Prismic are used in this starter:
- **Slices**: Enrich your blogposts with custom quotes, images or codeblocks. You can order them how you like. When you used the *Image-Slice* the image will get inserted and optimized by **nextjs-image**
- **Relationship fields**: Categorize your blog articles in Categories via a relationship field. You can change categories on the fly
- **Both custom types (Single / Repeatable)**: Articles, Tags, Categories, Author sections of the website are managed with Prismic. The social media links or the header & footer sections are hardcoded content which can be customized easily!
- **Prismic Preview**: Prismic allows preview of any document which comes handy before publishing a document. This starter has got preview setup for article page. For more info, check [here](https://prismic.io/docs/technologies/previews-nextjs) and [here](https://user-guides.prismic.io/en/articles/768819-preview-a-document)
Therefore the starter has following features:
- Prismic as Headless CMS
- Prismic Previews
- [Theme UI](https://theme-ui.com/home) for styling
- Prism React Renderer plugin using PrismJS highlighting
- Responsive images (nextjs-image)
- The right image size for every screen size
- Traced SVG Loading (Lazy-Loading)
- WebP Support
- Prismic Imgix transformations
- SEO (nextjs-head)
- OpenGraph Tags
- Twitter Tags
- Favicons
- Offline Support
- WebApp Manifest Support
- NextJS dynamic code-splitting of components
- NextJS optimized google fonts (nextjs-google-fonts)
- Configurable
- Use the `next-config.js`, `Head.jsx`, and `Layout.jsx` to easily change the most important information
- Themeable with `theme.js`
**⚠️ Note: This blog starter uses [Prismic](https://prismic.io/) as the Content Management System. Hence, you need to have the required data first before start using this starter.**
# 🛠️ **Prismic Setup**
## Account
- Create your Prismic account [here](https://prismic.io/signup)
- Create a project
## API Token
- After creating an account, head over to settings of the project you created earlier.
- Go to _API & Security_ section, grab the Permanent Access Token with _Access to master/README_images_.
## Custom Types
### Article
- Create a _Repeatable_ custom type with name _Article._
- Simply paste the JSON schema in `_src/schemas/article.json_` file in the _JSON editor_ of the `_Article_` type in _Prismic_. This will create all the below fields in the _Article_ type on the fly for you.
- Beauty of Prismic Slices is that they are optional data sections which can be customized very easily in the Prismic UI.
- **`Primary`** content of the article:
- **uid** → ID of the article which you will find in the URL
- **created** → Created date of the article
- **modified** → Modified date of the article
- **title** → Title of the article
- **excerpt** → Short description of the article
- **read_time** → Total time to read the article
- **article_image** → Image of the article (ex- Thumbnail)

- **`Slices`**(Optional):
- **Content**: This slice has 2 types (Rich Text and Quote) based on which the `content` is rendered in the UI. Support for `inline code` using `codespan` label which appear in the HTML with a class `codespan`.
- **Text** (Rich Text Section) **→** Rich WYSIWYG editor content which is consumed in the UI as the HTML.
- **Quote** (Blockquote Section) → Select this type to have any blockquote content in the article.

- **Alert**: This slice has 4 types (Info, Success, Warning, and Danger) based on which the `alert` UI will have different background color as well as border color. Support for `inline code` using `codespan` label which appear in the HTML with a class `codespan`.

- **Image** (banner or gallery) → Use this slice to show a `banner` (single image with caption) or a `gallery` (group of images)

- **Embed** → Use this slice to embed any platform content like YouTube, Vimeo, GitHub Gist, CodeSandbox, CodePen, etc.
- **type** → Type of the embed like `GitHub Gist` or `Default` (YouTube, Vimeo, CodeSandbox, etc).
- **embed_title** → Title of the embed.
- **embed_url →** URL of the embed which will be consumed in an iframe in the UI

- **Meta Information** (Website URL meta info Section) → Use this slice to show a meta info of any URL. You can obtain all the below information using [https://www.heymeta.com/](https://www.heymeta.com/)
- **website_title →** Title of the website
- **website_description →** Description of the website
- **website_image** → Image of the website
- **website_url →** URL of the website

- **Code →** Use this slice to show any code block in the article
- **type →** Mention the type of scenario where this code block is used. For ex- type of "List" will add some padding to the code block.
- **lang →** Language of the code to have appropriate syntax highlighting using PrismJS
- **code →** Actual code content

- **`Meta`** (meta information of the article)
- **Categories** (repeatable section) with fields like:
- category → Category of the article
- slug → Category name in the URL
_Category_ custom type is discussed later.
- **Author** (non-repeatable section) → relationship field with _Author_ custom type discussed later.
- **`Tags` →** This is not defined in the Article type but can be set when you create any article like below:

### Author
- Create a _Repeatable_ custom type with name _Author._
- Simply paste the JSON schema in `_src/schemas/author.json_` file in the _JSON editor_ of the `_Author_` type in _Prismic_. This will create all the below fields in the _Author_ type on the fly for you.
- Contents:
- **uid →** URL slug of the author
- **name →** Name of the author
- **bio →** About the author
- **avatar →** Image of the author
- **social_links** (repeatble section) **→** Social links of the author
- **platform_name →** Name of the platform (Facebook, Twitter, LinkedIn, Medium, GitHub, CodePen, Portfolio (website). However, you can customize the icons which is discussed later.
- **platform_url →** URL of the platform


### Category
- Create a _Repeatable_ custom type with name _Category._
- Simply paste the JSON schema in `_src/schemas/category.json_` file in the _JSON editor_ of the `_Category_` type in _Prismic_. This will create all the below fields in the _Category_ type on the fly for you.
- Contents:
- **name →** Name of the category
# 💻 Quick start
1. **Create a NextJS site.**
```bash
npx create-next-app
# create a new NextJS site using this starter
git clone https://github.com/iamsainikhil/nextjs-prismic-blog-starter
```
2. **Install the packages**
Install the packages using the command `npm install`
3. **Environment File**
- Go to _API & Security_ section of your _Prismic_ project, grab the Permanent Access Token with _Access to master_.
- The Repository Name is the name you have entered at the creation of the repository (you’ll also find it as the subdomain in the URL)
- This project has the support for [DISQUS](https://disqus.com/) comments section which need your DISQUS project name which can be found at _https://<your-project-shortname>.disqus.com/admin/settings/general/_
- Create an `.env` file in the root directory of the project. Add the following properties in it:
```json
NEXT_PUBLIC_GA_ID=<your Google Analytics tracking ID> (Optional)
NEXT_PUBLIC_SITE_URL=<URL of the deployed app (Optional)>
NEXT_PUBLIC_PRISMIC_REPO=<your prismic repository name (Required)>
PRISMIC_API_URL=<your prismic repository API URL> (Required)
PRISMIC_ACCESS_TOKEN=<your prismic permanent access token> (Required)
NEXT_PUBLIC_DISQUS_NAME=<your disqus project shortname> (Required)
```
4. **Start developing.**
Navigate into your new site’s directory and start it up.
```bash
# Go to project directory
cd <name>
# start the application
npm run dev
```
5. **Open the source code and start editing!**
Your site is now running at `http://localhost:3000`!
Open the `<name>` directory in your code editor of choice and edit the contents. Save your changes and the browser will update in real time!
# ⚙️ Available Scripts
---
In the project directory, you can run:
`npm run dev`
Runs the app in the development mode.Open `[http://localhost:3000](http://localhost:3000/)` to view it in the browser. The page will reload if you make edits. You will also see any lint or nextjs develop errors in the console.
`npm run start`
Runs the app in the production mode.Open `[http://localhost:3000](http://localhost:3000/)` to view it in the browser. The page will reload if you make edits. You will also see any lint or nextjs develop errors in the console.
`npm run build`
Builds the app for production to the `build` folder.It correctly bundles React in production mode and optimizes the build for the best performance.
The build is minified and the filenames include the hashes. Your app is ready to be deployed!
See the section about **[deployment](https://nextjs.org/docs/deployment)** for more information.
`npm format`
Formats the app files like _js, jsx, json, and md_ using Prettier. You can learn more about the format **[here](https://prettier.io/docs/en/install.html)**.
# **🧐 What's inside?**
A quick look at the top-level files and directories you'll see in a NextJS project.
```
.
├── node_modules
├── src
├── .gitignore
├── nextjs-config.js
├── LICENSE
├── package-lock.json
├── package.json
└── README.md
```
1. **`/node_modules`**: This directory contains all of the modules of code that your project depends on (npm packages) are automatically installed.
2. **`/src`**: This directory will contain all of the code related to what you will see on the front-end of your site (what you see in the browser) such as your site header or a page template. `src` is a convention for “source code”.
3. **`.gitignore`**: This file tells git which files it should not track / not maintain a version history for.
4. **`nextjs-config.js`**: This is the main configuration file for a NextJS site. This is where you can specify information about your plugins config you’d like to include, etc.
5. **`LICENSE`**: NextJS Prismic Blog Starter is licensed under the MIT license.
6. **`package-lock.json`** (See `package.json` below, first). This is an automatically generated file based on the exact versions of your npm dependencies that were installed for your project. **(You won’t change this file directly).**
7. **`package.json`**: A manifest file for Node.js projects, which includes things like metadata (the project’s name, author, etc). This manifest is how npm knows which packages to install for your project.
8. **`README.md`**: A text file containing useful reference information about your project.
# 🔬 **What's inside?**
A quick look at the top-level files and directories you'll see in the application.
```
/
├── components
├── public/fonts
├── public/images
├── pages
├── schemas
├── slices
├── styles
├── utils
```
1. **`components`:** This directory contain all of the reusable React components like Chip, Icon, Image, Listing, Layout, SEO, SliceMachine, etc.
2. **`public/fonts`:** This directory contain any custom font files which are imported in `styles/_fonts.scss` and later consumed in `theme.js`.
3. **`public/images`:** This directory contain images which are used in the components and later be optimized during NextJS build.
4. **`pages`:** This directory contain files which represent web pages like 404, index.js (homepage), \_app.js, etc. Moreover, you can generate dynamic pages using the `getStaticPaths` and `getStaticProps` methods based on the structure `pages/[sub-page]/[param].js`.
5. **`schemas`:** This directory contain JSON schema files which represent each custom type defined in Prismic.
6. **`slices`:** This directory is the ❤️ of the article page with files representing the slices discussed earlier in Prismic setup section.
7. **`styles`:** This directory contain scss files which include further styling of the HTML using old school process. PS: New process is to just use `Emotion` based `CSS-in-JS` styling which is also used extensively across the project.
8. **`utils`:** This directory contain general utility JS functions to reuse the functionality across the components.
# 🧰 3rd Party Packages
A list of packages used in this starter project.
1. **`dayjs`:** A 2KB immutable date library alternative to Moment.js with the same modern API. For more info, check [here](https://github.com/iamkun/dayjs).
2. **`theme-ui`:** Build consistent, themeable React apps based on constraint-based design principles. For more info, check [here](https://github.com/system-ui/theme-ui).
3. **`prism-react-renderer`:** Renders highlighted Prism output to React (+ theming & vendored Prism). This package is used to syntax highlight the code blocks in article. For more info, check [here](https://github.com/FormidableLabs/prism-react-renderer).
4. **`react-copy-to-clipboard`:** Copy-to-clipboard React component used in Code slice `src/slices/Code.jsx`. For more info, check [here](https://github.com/nkbt/react-copy-to-clipboard).
5. **`react-gist`:** Github Gist React component used in Embed slice `src/slices/Embed.jsx`. For more info, check [here](https://github.com/tleunen/react-gist).
6. **`react-headroom`:** A handy react component to hide the site header until you need it. For more info, check [here](https://github.com/KyleAMathews/react-headroom).
7. **`react-icons`:** Absolutely useful package to get svg react icons of popular icon packs. For more info, check [here](https://github.com/react-icons/react-icons).
8. **`react-images`:** A mobile-friendly, highly customizable, carousel component for displaying media in ReactJS. For more info, check [here](https://github.com/jossmac/react-images).
9. **`react-snakke`:** Reading position indicator for React used to display the progress of the article as you scroll down the page. For more info, check [here](https://github.com/diogomoretti/react-snakke). This is one of the package which can be completely avoidable if you don't want it 😄.
10. **`react-toastify`:** React notification made easy. This is used to notify users of which code block they copied to clipboard used in Code slice `src/slices/Code.jsx`. For more info, check [here](https://github.com/fkhadra/react-toastify).
11. **`disqus-react`:** A React component for Disqus. For more info, check [here](https://github.com/disqus/disqus-react).
12. **`next-google-fonts`:** A simple plugin for loading Google Fonts fast and asynchronously. For more info, check [here](https://github.com/joe-bell/next-google-fonts)
13. **`next-pwa`:** A simple plugin to add PWA support for NextJS app. For more info, check [here](https://github.com/shadowwalker/next-pwa)
14. **`prismic-javascript`:** JavaScript development for prismic.io API v2. For more info, check [here](https://github.com/prismicio/prismic-javascript)
15. **`prismic-reactjs`:** A simple utility to render Rich Text with Prismic API V2. For more info, check [here](https://github.com/prismicio/prismic-reactjs)
# ⛏️ Customization
List of files where you can customize stuff to make this starter your own!!
1. **`Head.jsx`:** This file is where meta tags and other tags get injected to the document `head`.
2. **`next-config.js`:** As the name suggests, bulk of the customization resides in this file. I left so many comments which help you customize the options for several plugins.
3. **`theme.js`:** This is the 👁️ of the project with all the theme options declared in this file. Take some time understanding the theme-ui configuration [here](https://theme-ui.com/theme-spec).
4. **`Listing.jsx` & `Footer.jsx`:** Sample tracking logic is setup in the code which can be used as an example to customize the GA tracking events. You can remove this code logic entirely or customize to your needs.
5. **`public/site_image.png`:** Replace this image to update website meta image.
# 🚀 Deploy
[](https://app.netlify.com/start/deploy?repository=https://github.com/iamsainikhil/nextjs-prismic-blog-starter)
[](https://vercel.com/import/project?template=https://github.com/iamsainikhil/nextjs-prismic-blog-starter)
# ⚓ Prismic Webhook
Prismic Webhook allows you to automatically or manually trigger a deployment process in Netlify or Vercel if any post is published or unpublished OR for other events in Prismic. I use Vercel as the example and I guess it might be quite similar for Netlify or any other cloud service.
## Steps:
- Create a Deploy Hook in Vercel [here](https://vercel.com/iamsainikhil/nextjs-prismic-blog-starter/settings/git-integration). For more info, check [here](https://vercel.com/docs/v2/more/deploy-hooks)

- Copy the hook link and past in the URL section of the prismic Webhook
- Create a Prismic Webhook [here](https://iamsainikhil-blog.prismic.io/settings/webhooks/). For more info, check [here](https://user-guides.prismic.io/en/articles/790505-webhooks). -

- The `Secret` field is _optional_ in the Prismic Webhook. If you set it, Prismic will send the content to your server, so that you can verify that the request is coming from prismic.io.
- After successful creation of the Webhook, you can manually trigger it and can also see the logs.

> You can create any number of Webhooks for a prismic project!
# 🏎 Roadmap
- [x] Publish this starter as a template
- [x] Analytics support (Google Analytics)
- [x] Prismic Preview Setup
- [ ] Pagination Feature
- [ ] Search Feature
- [ ] Testing
# **🙌 Contribution**
- Open pull request with improvements.
- If you have any new idea, check the **[feature request](https://github.com/iamsainikhil/nextjs-prismic-blog-starter/raw/master/README_images/.github/ISSUE_TEMPLATE/feature_request.md)** template to create a request.
- If you found any issue or a bug, check the **[bug report](https://github.com/iamsainikhil/nextjs-prismic-blog-starter/raw/master/README_images/.github/ISSUE_TEMPLATE/bug_report.md)** template to create a report.
# **📃 License**
Have a look at the **[license file](https://github.com/iamsainikhil/nextjs-prismic-blog-starter/raw/master/README_images/LICENSE)** for details
# **📧 Contact**
Whether you’d like to discuss about this starter template or simply say “hello”, I’d love to hear from you.
Email: **[[email protected]](mailto:[email protected])**
# **🎓 Learning NextJS**
Looking for more guidance? Full documentation for NextJS lives [on the website](https://nextjs.org/docs/getting-started). Here are some places to start:
- **For most developers, I recommend starting with the [in-depth tutorial for creating a site with NextJS](https://nextjs.org/learn/basics/create-nextjs-app).** It starts with zero assumptions about your level of ability and walks through every step of the process.
- **To dive straight into code samples, head [to the documentation](https://nextjs.org/docs/getting-started).** In particular, check out the *Basic Features*, *API Reference*, and *Advanced Features* sections in the sidebar.
# **🎓 Learning Prsimic**
Looking for more guidance? Full documentation for Prismic lives [on the website](https://prismic.io/docs). Here are some places to start:
- **For most developers, I recommend starting with our [in-depth tutorial for creating a site with NextJS & Prismic](https://user-guides.prismic.io/en/collections/22783-examples#next-js-samples).** It starts with zero assumptions about your level of ability and walks through every step of the process.
- **To dive straight into code samples, check the** [How To Guides](https://prismic.io/docs/technologies/prismic-and-nextjs)**.**
Explore similar templates
Compare previews and descriptions within the same stack and category.

Next.js SaaS Starter
The official Next.js SaaS starter template, integrating email/password authentication, Stripe Checkout subscriptions, a dashboard with user/team CRUD, basic Owner/Member RBAC, and activity logging.
Next.js · SaaS

Next.js Commerce
Vercel's officially maintained Next.js App Router ecommerce starter with deep Shopify integration, offering a complete product catalog, cart, and checkout flow. Core logic is modular for swapping backends, and community provider versions exist for BigCommerce, Medusa, and Saleor.
Next.js · E-commerce

Next-js-Boilerplate
A developer-first Next.js 16 starter with Tailwind CSS 4 and TypeScript, supporting both App Router and Page Router.
Next.js · Starter

tailwind-nextjs-starter-blog
A Next.js and Tailwind CSS blog starter template using Contentlayer for Markdown/MDX, with built-in SEO, code highlighting, and tags. It targets personal technical blogs and migration from Jekyll/Hugo to React, and supports one-click Vercel deployment.
Next.js · Blog

next-forge
next-forge is a Turborepo-based Next.js template maintained by Vercel, positioned as a starting point for SaaS products.
Next.js · Starter
SaaS-Boilerplate
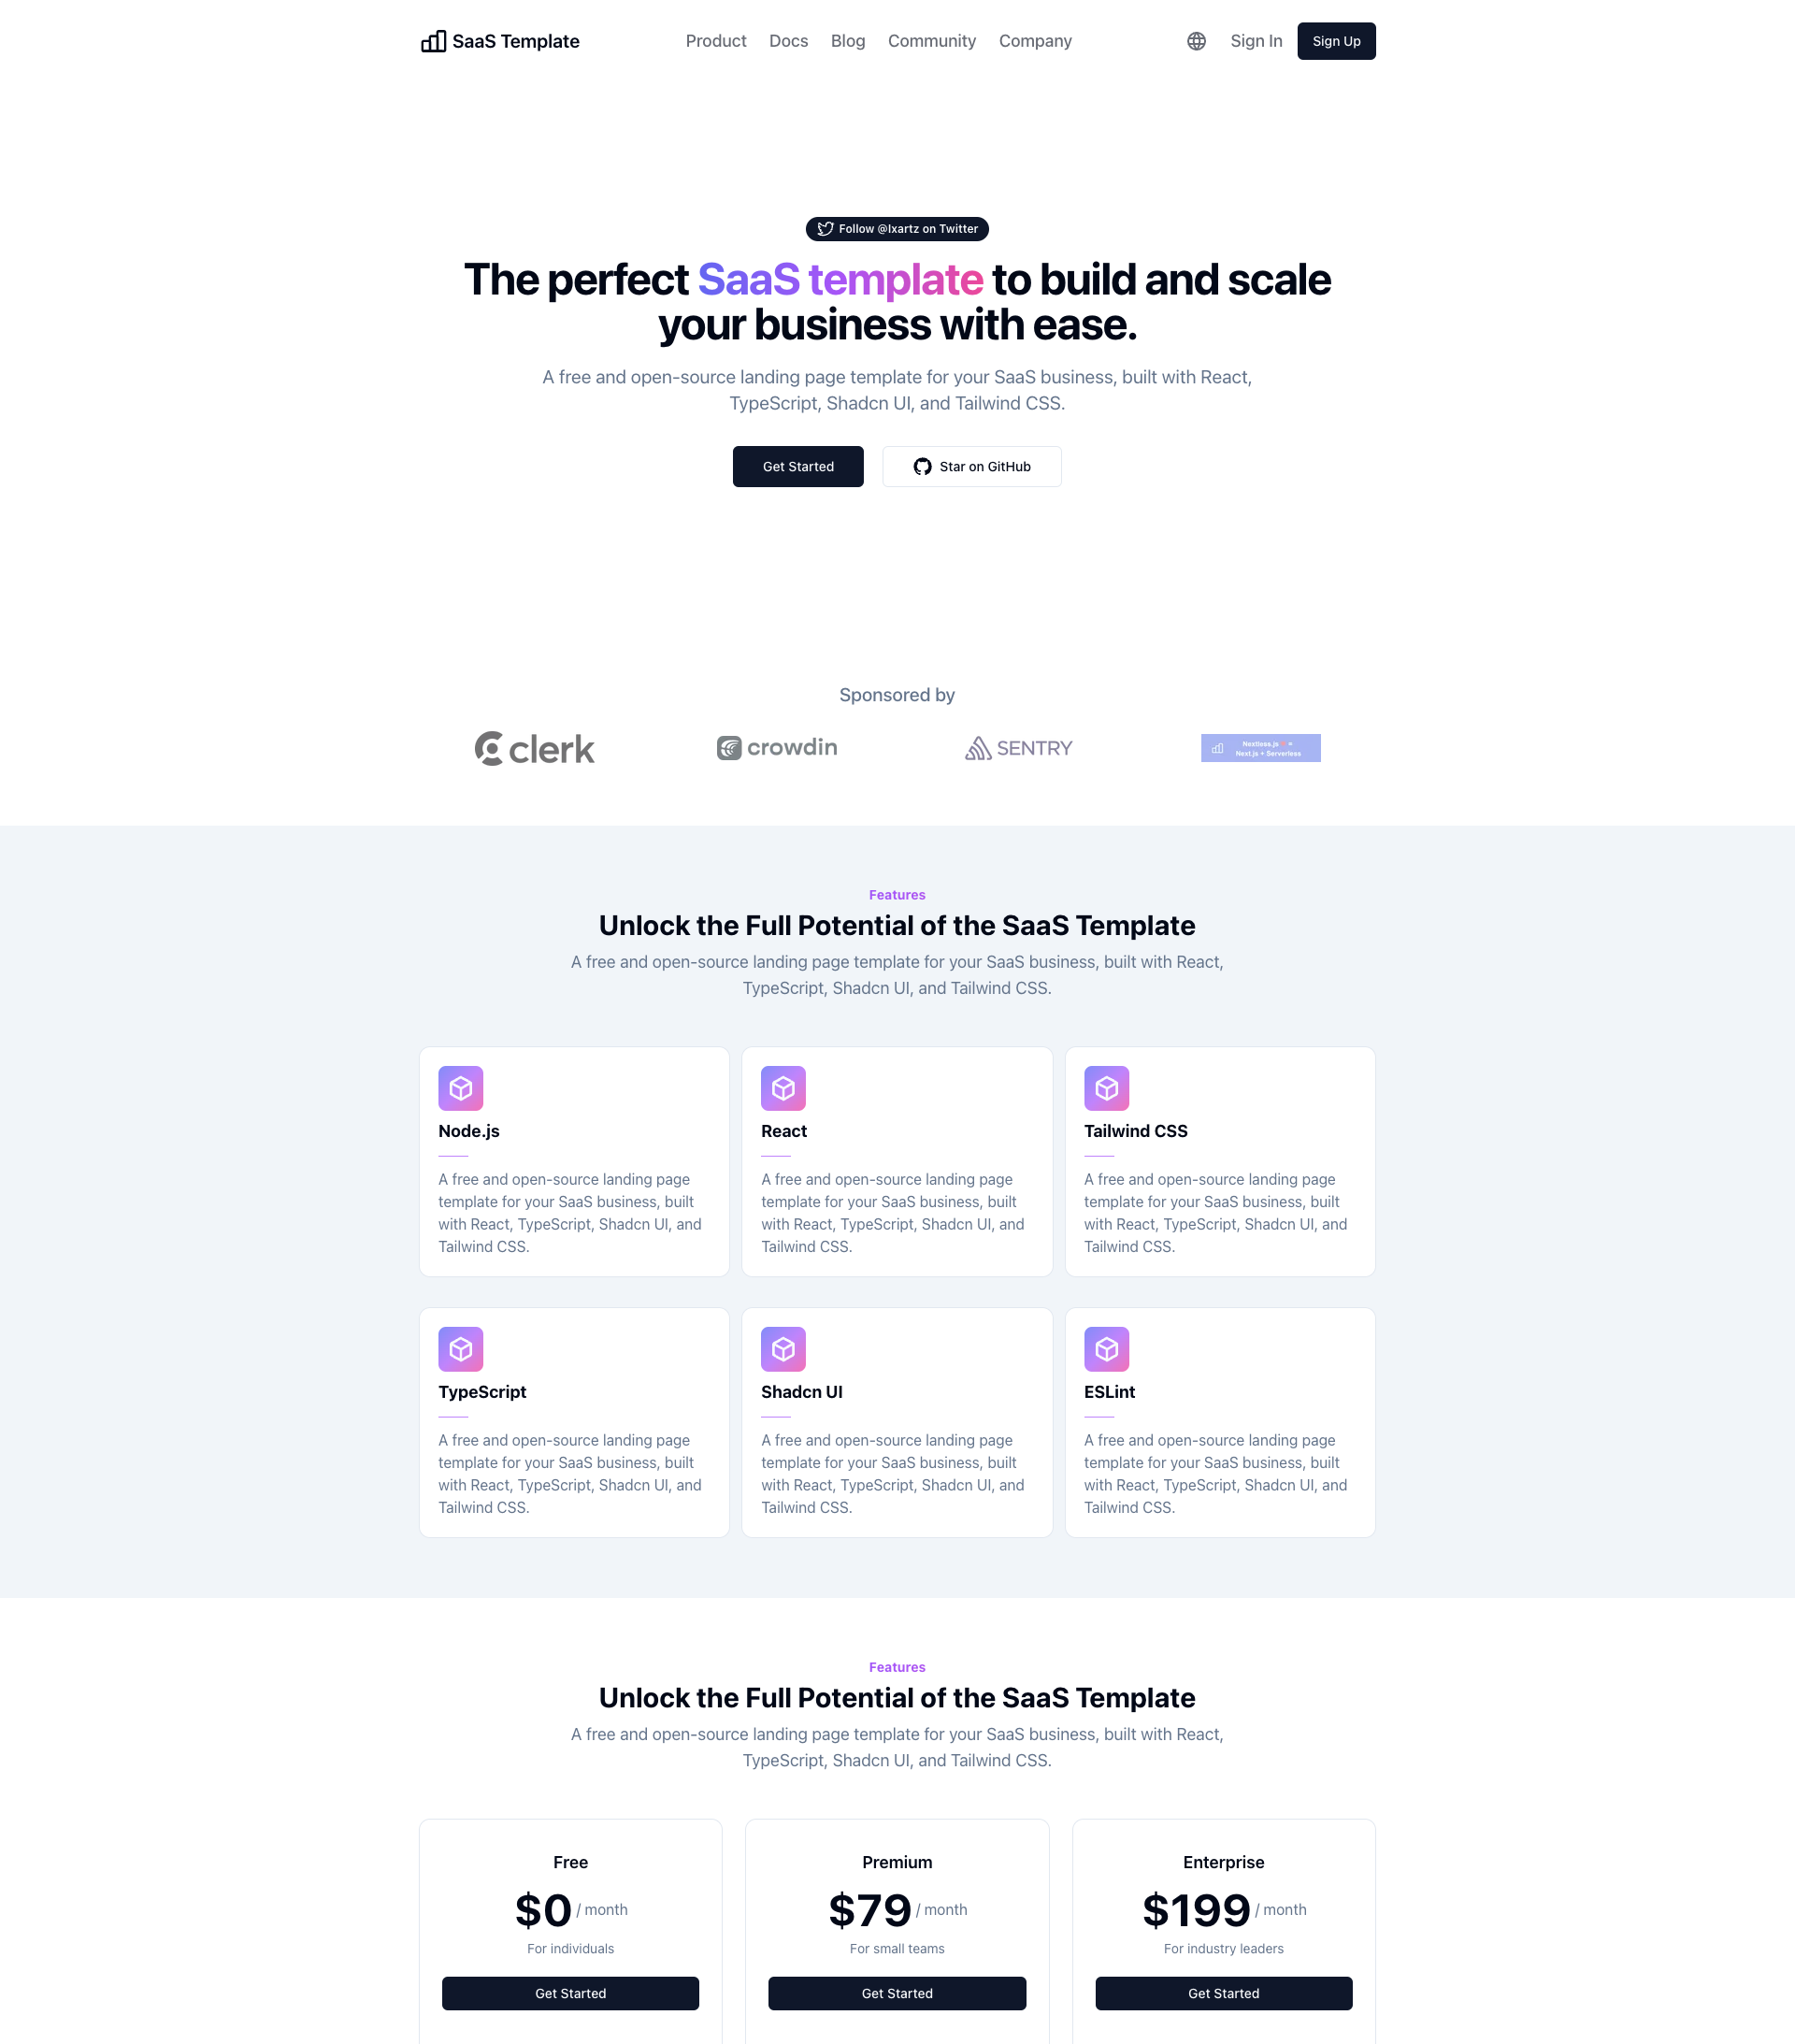
SaaS-Boilerplate is an open-source SaaS starter template built with Next.js App Router, React 19, TypeScript, Tailwind CSS, and Shadcn UI.
Next.js · SaaS