以分步文档形式覆盖从 rails new 到部署的完整搭建流程
VueRails启动器
vuejs-rails-starterkit — Vue 启动器模板
作者 jetthoughts
基于 Rails 6 与 Vue.js 2 的启动器模板,通过分步说明演示如何搭建包含 Webpacker、Turbolinks、PWA、AdminLTE 与 Jest 的混合应用基础工程。
看看你的网站会是什么样
浏览真实页面截图,比较内容排版与手机效果。点击下方缩略图切换,放大查看整页细节。
目前有 1 张原始预览,可打开完整图片查看设计细节。
截图用于了解视觉与布局,交互效果请以实际项目为准。
采集于 2026-10-01查看来源
值得关注的模板亮点
从已有项目资料中,快速了解它的特点。
集成 Rails 6、Vue.js 2、Webpacker 5 与 Webpack 4 的前后端组合
内置 Webpacker 分包(SplitChunks)与懒加载相关配置示例
提供 Jest + Vue Test Utils 的组件单元测试与覆盖率配置
预置 GitHub、Heroku、CircleCI、Codecov、Dependabot 及 Rubocop、ESLint 等工具配置
包含 PWA、Turbolinks 与 AdminLTE 主题的接入步骤
模板详细介绍
这是一个 GitHub 模板仓库,用于从零搭建 Rails 6 + Vue.js 2 项目。README 以步骤形式记录完整搭建过程:先用 rails new 生成带 Vue 的 Rails 项目,再依次配置开发环境、添加承载 Vue 组件的示例页面、启用 Webpacker 的分包(SplitChunks)资源、接入 Jest 做组件单元测试、部署到 Heroku、配置基础 PWA、启用 Turbolinks、安装 AdminLTE 界面主题,最后配置持续集成与静态代码分析。
模板覆盖的技术组合包括:Rails 6、Vue.js 2(含 Vue Test Utils)、Webpacker 5 与 Webpack 4、Bootstrap 4 与 AdminLTE 主题、Babel 7。系统依赖为 Ruby 3.0、Node.js 14、Yarn、PostgreSQL 12 与 Heroku CLI。仓库同时预置了 GitHub、Heroku(含 Review Apps)、CircleCI、Codecov/Simplecov、Dependabot 等服务的配置,以及 Pronto、Rubocop、ESLint、EditorConfig 等静态分析工具。
README 明确说明 Rails 5.2 版本位于 rails-5-latest 分支,当前主分支面向 Rails 6。仓库描述将其定位为开发混合移动应用的起始套件,但 README 正文主要围绕 Web 端搭建步骤展开。代码采用 MIT 许可,可免费使用、修改、商用和分发,分发时需保留版权与许可声明;演示图片、字体、图标等第三方素材以及域名、托管、数据库等外部服务需另行核对许可或费用。
VueRails启动器
适合你的项目吗?
适用场景
- 需要从零搭建 Rails 与 Vue 结合的新项目
- 希望参考 Webpacker 分包与资源标签写法的工程配置
- 需要为 Vue 组件补充 Jest 单元测试与覆盖率
- 计划将 Rails + Vue 应用部署到 Heroku 并接入 CI
适合人群
- 熟悉 Ruby on Rails 并准备引入 Vue 的开发团队
- 需要可复用的 Rails + Vue 工程脚手架作为起点
- 希望参考 PWA、Turbolinks、AdminLTE 接入步骤的开发者
上手与定制指南
结合仓库当前版本的说明,按下面的资料检查内容、配置与运行要求。
- 1
系统依赖为 Ruby 3.0、Node.js 14、Yarn、PostgreSQL 12 与 Heroku CLI
- 2
按 README 顺序执行各步骤,Rails 5.2 用户需切换到 rails-5-latest 分支
- 3
部署 Heroku 前需先完成生产环境资源预编译验证
- 4
第三方素材与外部服务(域名、托管、数据库等)的许可和费用需单独确认
授权与来源资料
使用条件与限制
免费使用 · 保留许可声明本次收录的是公开仓库中采用 MIT 许可的免费版本;免费范围为该版本代码,不代表外部服务或第三方素材免费。
使用时需要遵守
- 允许免费使用、修改、商用和分发该版本代码。
- 分发代码副本或实质性部分时,保留原作者版权声明和完整 MIT 许可声明。
- 代码按现状提供;担保与责任限制以原许可证及适用法律为准。
额外费用与待核对事项
- 主分支面向 Rails 6;若需 Rails 5.2 版本,须改用 rails-5-latest 分支,不能直接使用当前主分支代码。
- 部署步骤依赖 Heroku CLI 及 Heroku 账号,创建应用、添加 Postgres 插件等操作需在 Heroku 平台完成,可能产生外部服务费用。
- 部署示例使用 Heroku Postgres 插件(hobby-dev 档),需在 Heroku 上开通该附加服务,属于外部托管/数据库依赖。
- PWA 步骤依赖从 GitHub 直接引入的 serviceworker-rails gem,需能访问该外部仓库,其自身许可与维护状态需另行确认。
- AdminLTE 主题、Bootstrap、jQuery、Font Awesome 等前端依赖为第三方包,各自许可与商用条件需单独核对,不随本项目 MIT 许可一并授予。
- 布局代码需从 AdminLTE 官网获取,该主题及其素材的许可与使用条件由 AdminLTE 项目决定,需单独确认。
- 演示图片、字体、图标及其他第三方素材需按各自许可核对,不能仅凭代码的 MIT 许可判断。
- 域名、托管、数据库、支付或 AI 等外部服务可能另外收费。
查看原文依据
Permission is hereby granted, free of charge
许可证原文
For Rails 5.2, please check https://github.com/jetthoughts/vuejs-rails-starterkit/tree/rails-5-latest
README 原文
Requirements: [Heroku CLI](https://devcenter.heroku.com/articles/heroku-cli#download-and-install).
README 原文
heroku addons:create heroku-postgresql:hobby-dev
README 原文
gem 'serviceworker-rails', github: 'rossta/serviceworker-rails'
README 原文
yarn add admin-lte bootstrap jquery popover @fortawesome/fontawesome-free
README 原文
https://github.com/jetthoughts/vuejs-rails-starterkit/blob/master/LICENSEhttps://github.com/jetthoughts/vuejs-rails-starterkit/blob/master/README.mdCode for layout you can find [here](https://adminlte.io/themes/v3/starter.html).
README 原文
DeepSeek 根据仓库许可证和 README 整理 ·2026-10-01。结果仅覆盖已读取资料,依赖、图片、字体及后续条款变更以各自原文为准。
项目核对记录与介绍依据
模板资料
- 来源平台
- GitHub
- 资料与维护参考分
- 资料较完整 · 81 / 100
- 技术栈
- Vue · Rails
- 网站类型
- 启动器
这个分数如何计算
本站按许可资料(最高30分)、演示链接(12分)、预览图(10分)、Star数(15分)、记录的维护时间(15分)、描述完整度(8分)、功能记录(5分)和分类资料(5分)计算。它不是代码、安全或性能测试,也不是 Google 评分;有链接不代表已实测可用。
这个项目需要核对什么
- 记录的仓库更新时间
- 2023-01-19
- 截图检查日期
- 2026-10-01
已收录演示链接。请用你的内容与屏幕尺寸检查;有演示不代表表单、认证或支付已经可用。
目录记录的主要技术栈是 Vue。请通过依赖清单和锁文件核对实际版本与托管要求。这些说明基于收录资料,不代表代码审计或部署实测。
查看具体选型方法 →介绍的制作与核对状态
介绍由 AI 辅助整理目录与仓库资料。仓库作者不等于这篇介绍的审核者。
已完成服务器许可规则与 AI 来源核对;未经过人工编辑审核。
查看当时使用的来源资料
SHA-256: 93530faeedfda922a571c6d48eb41e9eeef724eaf08b48e0a5e67b2d7f7250f1
2026-10-01T02:54:35.720Z
来源文件 / 仓库# Rails 6 + Vue.js 2 Starter Kit GitHub Template.
**NOTE:** For Rails 5.2, please check
https://github.com/jetthoughts/vuejs-rails-starterkit/tree/rails-5-latest
[](https://heroku.com/deploy)

[](https://circleci.com/gh/jetthoughts/vuejs-rails-starterkit)
[](https://codecov.io/gh/jetthoughts/vuejs-rails-starterkit)
A quick and easy way to setup Rails + PWA + Turbolinks + Webpacker + Bootstrap with AdminLTE theme + Vue + Jest.
If your team is considering or has already decided to use Vue, this is the right for you.
As an additional review of how to setup PWA, Turbolinks, CSS frameworks, Storybook.
### Preview of all steps
[](https://asciinema.org/a/ArqvGrc6JK6pKzlRTMV3Jotwr)
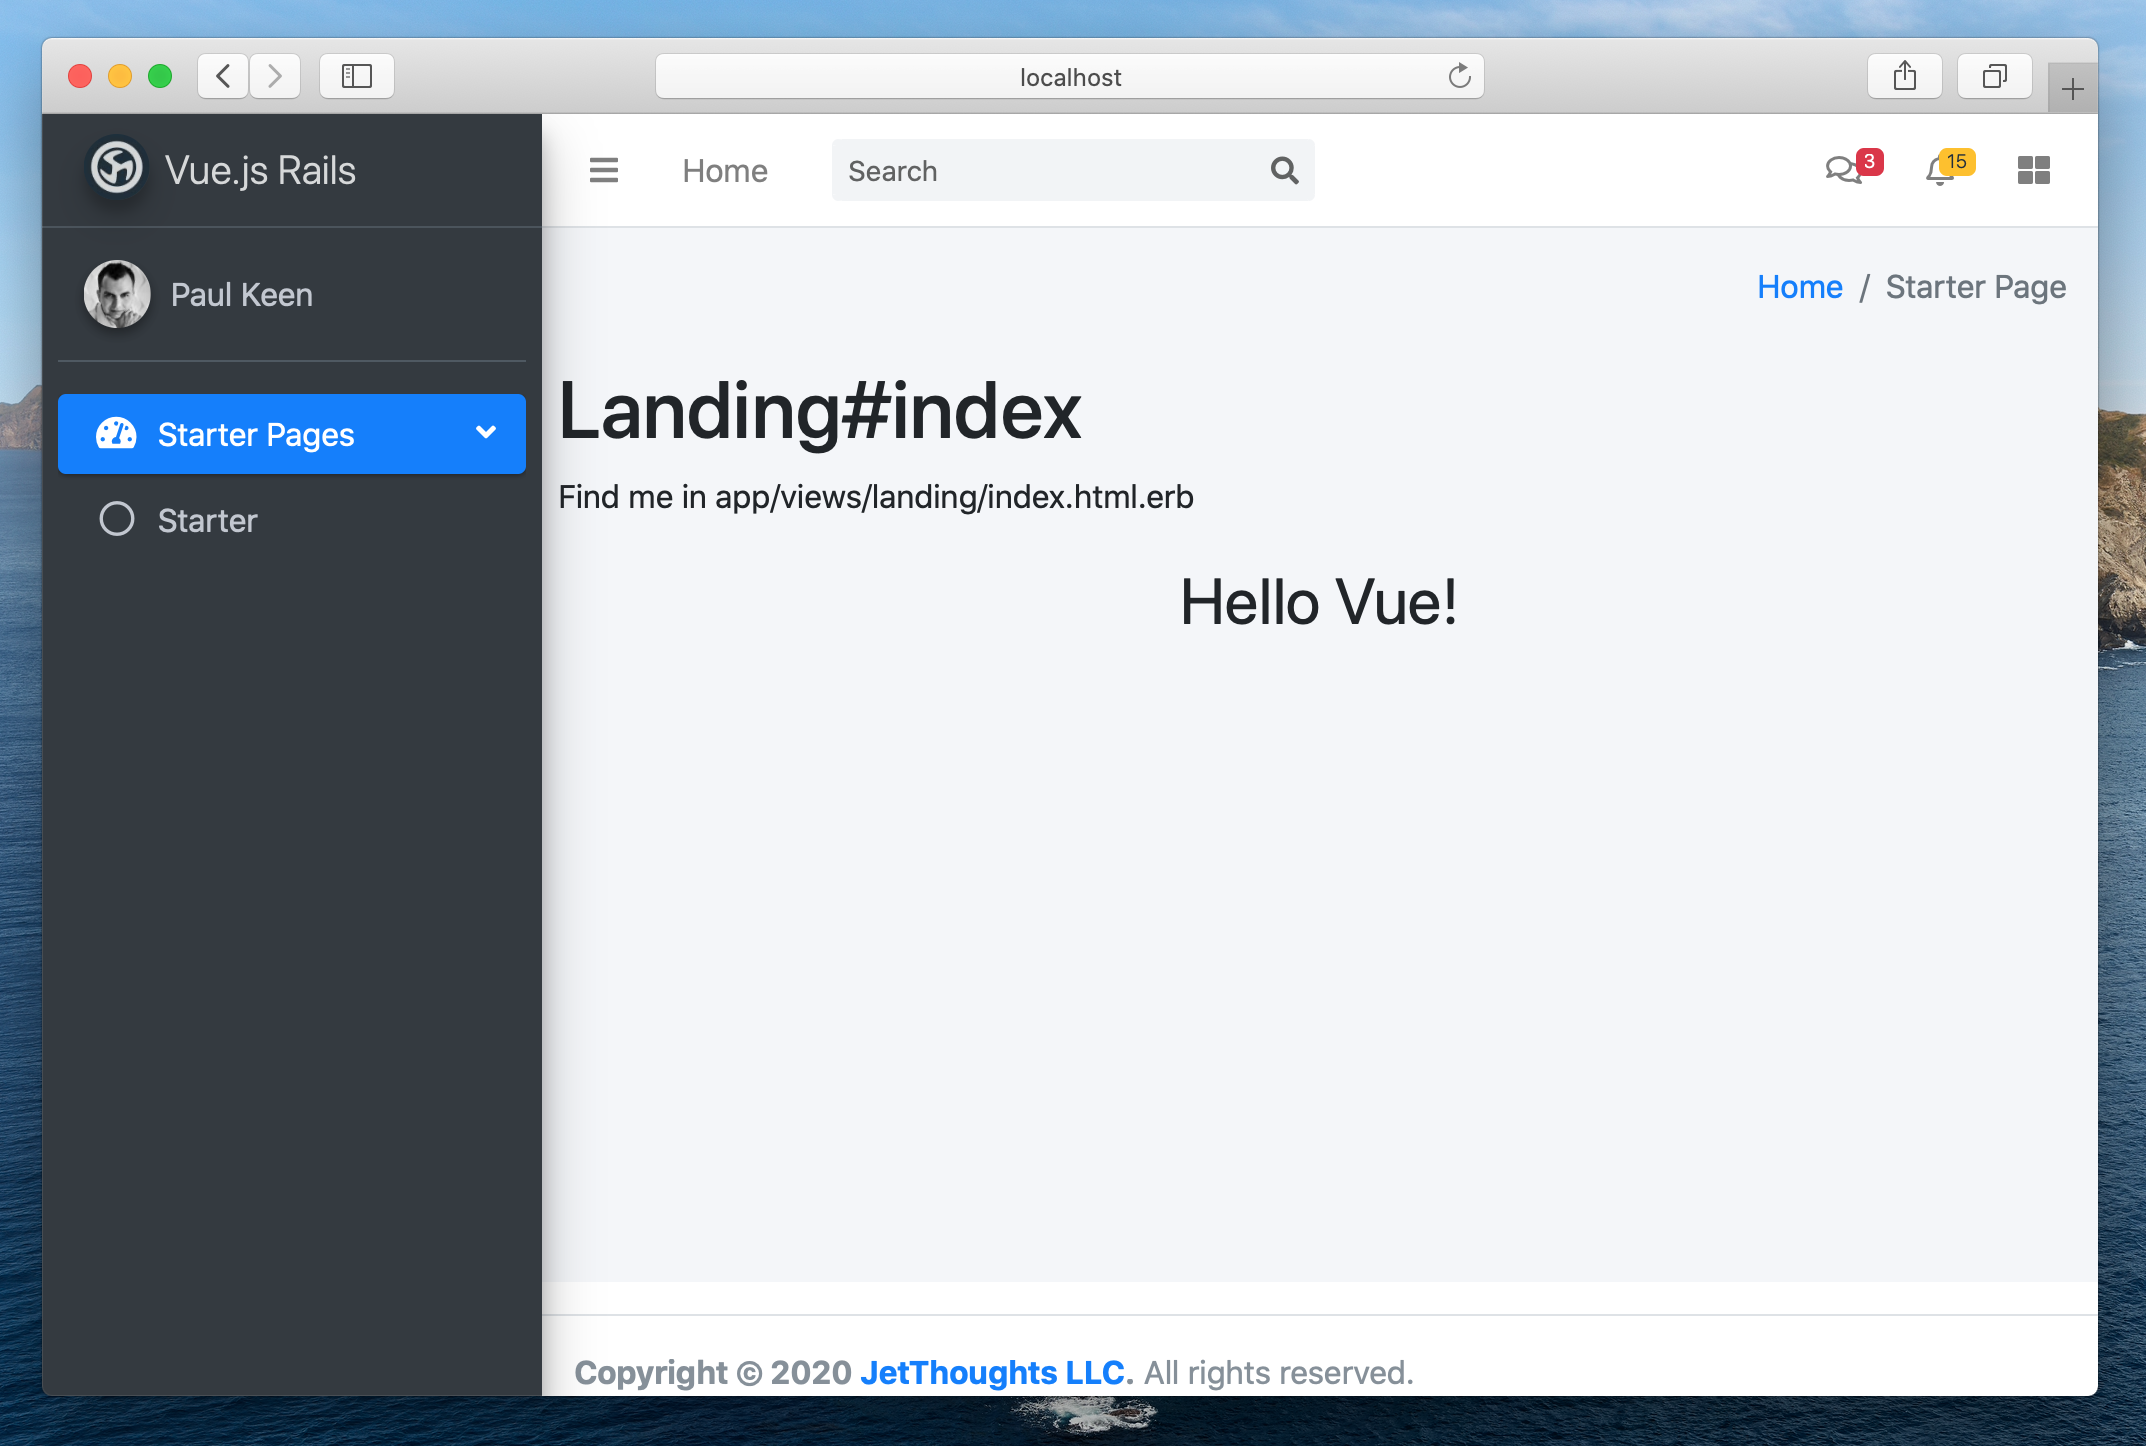
### Expected Final Screen
## Table of Contents
- [Step 1. Generate Ruby on Rails Project with Vue.js](#generate-ruby-on-rails-project-with-vuejs-no-turbolinks-included-on-this-stage)
- [Step 2. Setup development environment](#setup-development-environment)
- [Step 3. Add sample page to host Vue.js component](#add-sample-page-to-host-vuejs-component)
- [Step 4. Use Webpacker assets in the application](#use-webpacker-assets-in-the-application)
- [Step 5. Install Jest for Component Unit Tests](#install-jest-for-component-unit-tests)
- [Step 6. Setup Heroku and Deploy](#setup-heroku-and-deploy)
- [Step 7. Setup basic PWA](#setup-basic-pwa)
- [Step 8. Setup Turbolinks](#setup-turbolinks)
- [Step 9. Installs UI Kit - AdminLTE](#setup-adminlte)
- [Step 10. Configure continuous integration and other services for static code
analysis](#configure-continuous-integration-and-other-services-for-static-code-analysis)
#### Things you may want to cover:
#### Features:
* Optimized for peformance Webpacker with Vue.js: Lazy Load, Split Chunks
* Turbolinks
* PWA
* Backend Unit and System Tests with coverage
* Vue.js Unit Tests with coverage
* Deployable to Heroku
* Pre-setup for services:
- GitHub
- Heroku (Heroku Reviews Apps)
- CircleCI
- Codecov and Simplecov
- Dependabot
* Static Code Analyzers:
- Pronto
- Rubocop
- ESLint
- EditorConfig
#### Dependencies:
* [Ruby on Rails](https://rubyonrails.org/) version 6
* [Vue.js](https://vuejs.org) version 2 with [Vue Test Utils](https://vue-test-utils.vuejs.org/)
* [Webpacker](https://github.com/rails/webpacker) 5 with [Webpack](https://webpack.js.org/) 4
* [Bootstrap](https://getbootstrap.com/) 4 with [AdminLTE Template](https://adminlte.io/)
* [Babel](https://babeljs.io/) 7
#### System Dependencies:
* [Ruby](https://www.ruby-lang.org/en/) 3.0
* [Node.js](https://nodejs.org/en/) 14
* [Yarn](https://yarnpkg.com/en/)
* [PostgreSQL](https://www.postgresql.org/) 12
* [Heroku CLI](https://devcenter.heroku.com/articles/heroku-cli)
## Generate Ruby on Rails Project with Vue.js (No Turbolinks included on this stage)
```bash
gem install rails
rails new vuejs-rails-starterkit --force --database=postgresql \
--skip-action-mailer --skip-action-cable --skip-sprockets --skip-turbolinks \
--webpack=vue
cd ./vuejs-rails-starterkit
bin/rails db:create db:migrate
```
This generates Rails project with:
- Vue component in `app/javascript/app.vue`
- Example entry file `app/javascript/packs/hello_vue.js`
### Setup development environment:
1. Uncomment `system('bin/yarn')` in `bin/setup` and `bin/update` to
install new node modules.
2. Install dependencies:
```bash
bin/setup
```
3. Enable *content_security_policy* in the `config/initializers/content_security_policy.rb`
with the following configuration:
```ruby
Rails.application.config.content_security_policy do |policy|
policy.script_src :self, :https
if Rails.env.development? || Rails.env.test?
policy.connect_src :self, :https, 'http://localhost:3035', 'ws://localhost:3035'
end
end
```
4. Verify that we have not broken anything
```bash
bin/webpack
bin/rails runner "exit"
```
### Add sample page to host Vue.js component
1. Generate controller and view:
```bash
bin/rails generate controller Landing index --no-javascripts --no-stylesheets --no-helper --no-assets --no-fixture
```
2. Update `app/views/landing/index.html.erb` to:
```erb
<h1>Landing#index</h1>
<p>Find me in app/views/landing/index.html.erb</p>
<div id='hello_vue_app'></div>
```
3. Change `app/javascript/packs/hello_vue.js` to:
```javascript
import Vue from 'vue'
import App from '../app.vue'
document.addEventListener('DOMContentLoaded', () => {
const app = new Vue({
render: h => h(App),
el: '#hello_vue_app'
}).$mount()
})
```
4. Setup a sample page as a home page by updating `config/routes.rb`:
```ruby
root 'landing#index'
```
### Use Webpacker assets in the application
1. Enable Webpacker with `SplitChunks`:
* Enable `SplitChunks` with default config by adding to `config/webpack/environment.js`:
```js
environment.splitChunks()
```
* Enable Webpacker by updating `app/views/layouts/application.html.erb`:
Change:
```erb
<%= stylesheet_link_tag 'application', media: 'all' %>
<%= javascript_pack_tag 'application' %>
```
to:
```erb
<%= stylesheet_packs_with_chunks_tag 'application', 'hello_vue', media: 'all' %>
<%= javascript_packs_with_chunks_tag 'application', 'hello_vue' %>
```
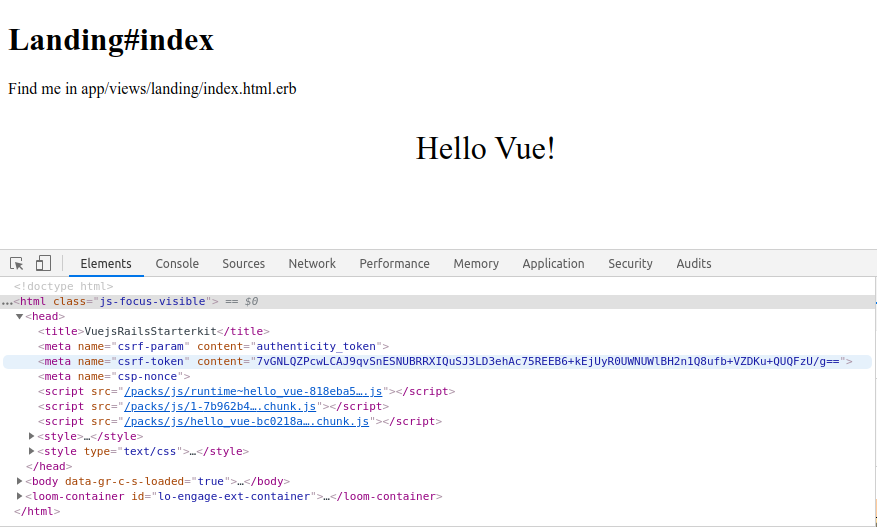
2. Verify locally that vue.js is working and `SplitChunks` is enabled
```bash
bin/rails s
open "http://localhost:3000/"
```
Expect to see

The `javascript_packs_with_chunks_tag` and `stylesheet_packs_with_chunks_tag` helpers split assets
into small size chunks and create html tags for them:
```html
<script src="/packs/js/runtime~hello_vue-818eba5af0151079cb6c.js"></script>
<script src="/packs/js/1-7b962b4481d6abff6c2b.chunk.js"></script>
<script src="/packs/js/hello_vue-bc0218ac204eff3ff742.chunk.js"></script>
```
## Install Jest for Component Unit Tests
1. Add Jest with required dependencies
```bash
yarn add --dev jest @vue/test-utils vue-jest babel-core@^7.0.0-bridge.0 babel-jest jest-serializer-vue
```
2. Configure Jest in `package.json` (including the Coverage enabling):
```json
"scripts": {
"test": "jest"
},
"jest": {
"verbose": true,
"testURL": "http://localhost/",
"roots": [
"test/javascript"
],
"moduleDirectories": [
"node_modules",
"app/javascript"
],
"moduleNameMapper": {
"^@/(.*)$": "<rootDir>/app/javascript/$1"
},
"moduleFileExtensions": [
"js",
"json",
"vue"
],
"transform": {
".+\\.js$": "babel-jest",
".+\\.vue$": "vue-jest"
},
"testPathIgnorePatterns": [
"<rootDir>/config/webpack/"
],
"snapshotSerializers": [
"jest-serializer-vue"
],
"collectCoverage": true,
"collectCoverageFrom": [
"**/*.{js,vue}",
"!**/node_modules/**"
]
},
```
3. Add `test/javascript/test.test.js`:
```js
test('there is no I in team', () => {
expect('team').not.toMatch(/I/);
});
```
4. Verify installation
```bash
yarn test
```
Expect to see 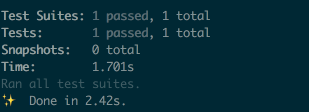
6. Add component test for App in `test/javascript/app.test.js`:
```js
import { mount, shallowMount } from '@vue/test-utils'
import App from 'app';
describe('App', () => {
test('is a Vue instance', () => {
const wrapper = mount(App)
expect(wrapper.vm).toBeTruthy()
})
test('matches snapshot', () => {
const wrapper = shallowMount(App)
expect(wrapper.html()).toMatchSnapshot()
})
});
```
7. Verify by
```bash
yarn test
```
You should see all tests passed
## Setup Heroku and Deploy
1. Confirm compilation is working:
```bash
RAILS_ENV=production \
NODE_ENV=production \
RAILS_SERVE_STATIC_FILES=true \
SECRET_KEY_BASE="7aa51097e982f34be02abe83528c3308768dff3837b405e0907028c750d22d067367fb79e2b223e3f223fea50ddf2d5dc9b3c933cf5bc8c7f2a3d3d75f73c4a7" \
bin/rails assets:precompile
```
2. Create a Heroku App and provision it
Requirements: [Heroku CLI](https://devcenter.heroku.com/articles/heroku-cli#download-and-install).
**NOTE:** Do not forget to commit all your changes: `git add . && git
commit -m "Generates Ruby on Rails application with Vue.js onboard"`
```bash
heroku create
heroku addons:create heroku-postgresql:hobby-dev
heroku buildpacks:add heroku/ruby
heroku config:set RAILS_ENV=production NODE_ENV=production YARN_PRODUCTION=true MALLOC_ARENA_MAX=2
```
3. Setup Node.js for Heroku
```bash
heroku buildpacks:add --index 1 heroku/nodejs
```
Use the `engines` section of the `package.json` to specify the version of Node.js to use on Heroku.
Drop the ‘v’ to save only the version number:
```json
{
"engines": {
"node": ">= 12.x"
}
}
```
4. Deploy and verify that vue.js is working on Heroku
```bash
git push heroku master
heroku apps:open
```
## Setup basic PWA
1. Install `serviceworker-rails` by adding into `Gemfile`:
```ruby
gem 'serviceworker-rails', github: 'rossta/serviceworker-rails'
```
2. Following the guide: https://github.com/rossta/serviceworker-rails
you should get something like: https://gist.github.com/pftg/786b147eff85a6fc98bd8dc1c3c9778e
3. There'll be an issue with service worker registration on the page saying:
`Uncaught ReferenceError: window is not defined` and
`Failed to register a ServiceWorker...`.
To fix that add following line to `config/webpack/environment.js`
as suggested [here](https://github.com/webpack/webpack/issues/6642#issuecomment-371087342):
```javascript
environment.config.set('output.globalObject', 'this')
```
## Setup Turbolinks
1. Add node dependencies
```bash
yarn add vue-turbolinks turbolinks
```
2. Load Turbolinks by adding to
`app/javascript/initializers/turbolinks.js`:
```javascript
import Turbolinks from 'turbolinks'
Turbolinks.start()
```
3. Add to `app/javascript/packs/application.js`:
```javascript
import 'initializers/turbolinks.js'
```
4. Change `app/javascript/packs/hello_vue.js` to:
```javascript
import TurbolinksAdapter from 'vue-turbolinks'
import Vue from 'vue'
import App from '../app.vue'
Vue.use(TurbolinksAdapter)
document.addEventListener('turbolinks:load', () => {
const app = new Vue({
render: h => h(App),
el: '#hello_vue_app'
}).$mount()
})
```
5. Update layout `app/views/layouts/application.html.erb`:
```erb
<%= javascript_packs_with_chunks_tag 'hello_vue', 'application', 'data-turbolinks-track': 'reload' %>
```
6. Run tests and server to verify:
```bash
bin/rails t
bin/rails s
```
## Setup AdminLTE
1. Add node dependencies
```bash
yarn add admin-lte bootstrap jquery popover @fortawesome/fontawesome-free
```
2. Add `app/javascript/initializers/adminlte.js` initializer:
```javascript
import '../assets/adminlte.scss'
import('./plugins') // () needed for async loading
```
3. Add `app/javascript/initializers/plugins.js` file with plugin importing:
```javascript
import '@fortawesome/fontawesome-free'
import 'jquery/src/jquery.js'
import 'popper.js'
import 'bootstrap'
import 'admin-lte/build/js/AdminLTE'
```
4. Import admin lte initializer in `app/javascript/packs/application.js` pack:
```javascript
import 'initializers/adminlte'
```
5. Next step is updating main layout `app/views/layouts/application.html.erb`. Code for layout you can find [here](https://adminlte.io/themes/v3/starter.html).
Also don't forget to add `yield` in div with `content` class:
```html
<div class="content">
<%= yield %>
</div>
```
6. Add styles to `app/javascript/assets/adminlte.scss`:
```css
$fa-font-path: '~@fortawesome/fontawesome-free/webfonts';
@import '~@fortawesome/fontawesome-free/scss/fontawesome';
@import '~@fortawesome/fontawesome-free/scss/solid';
@import '~@fortawesome/fontawesome-free/scss/regular';
@import '~@fortawesome/fontawesome-free/scss/brands';
@import "~admin-lte/build/scss/adminlte";
```
7. Run tests and server to verify:
```bash
yarn test
bin/rails test
bin/rails test:system
bin/rails s
```
Expect to see:

## Configure continuous integration and other services for static code analysis.
To be able to automatically analyze the quality of the code, let's install the [jt_tools](https://github.com/jetthoughts/jt_tools) gem.
1. Add this line to your application's Gemfile:
```ruby
gem 'jt_tools', groups: [:development]
```
2. Next step is running bundle install and generator:
```bash
bin/bundle
bin/rails jt_tools:install
```
3. Run linters to verify
```bash
bin/lint-pr
```
You should see a list of the linters that were running.
看看同类模板
对比同技术栈与用途的模板,找到更适合的视觉与内容结构。
vitesse
🏕 Opinionated Vite + Vue Starter Template
Vue · 启动器
vitesse-webext
⚡️ WebExtension Vite Starter Template
Vue · 启动器
laravel-vue-spa
A Laravel-Vue SPA starter kit.
Vue · 启动器
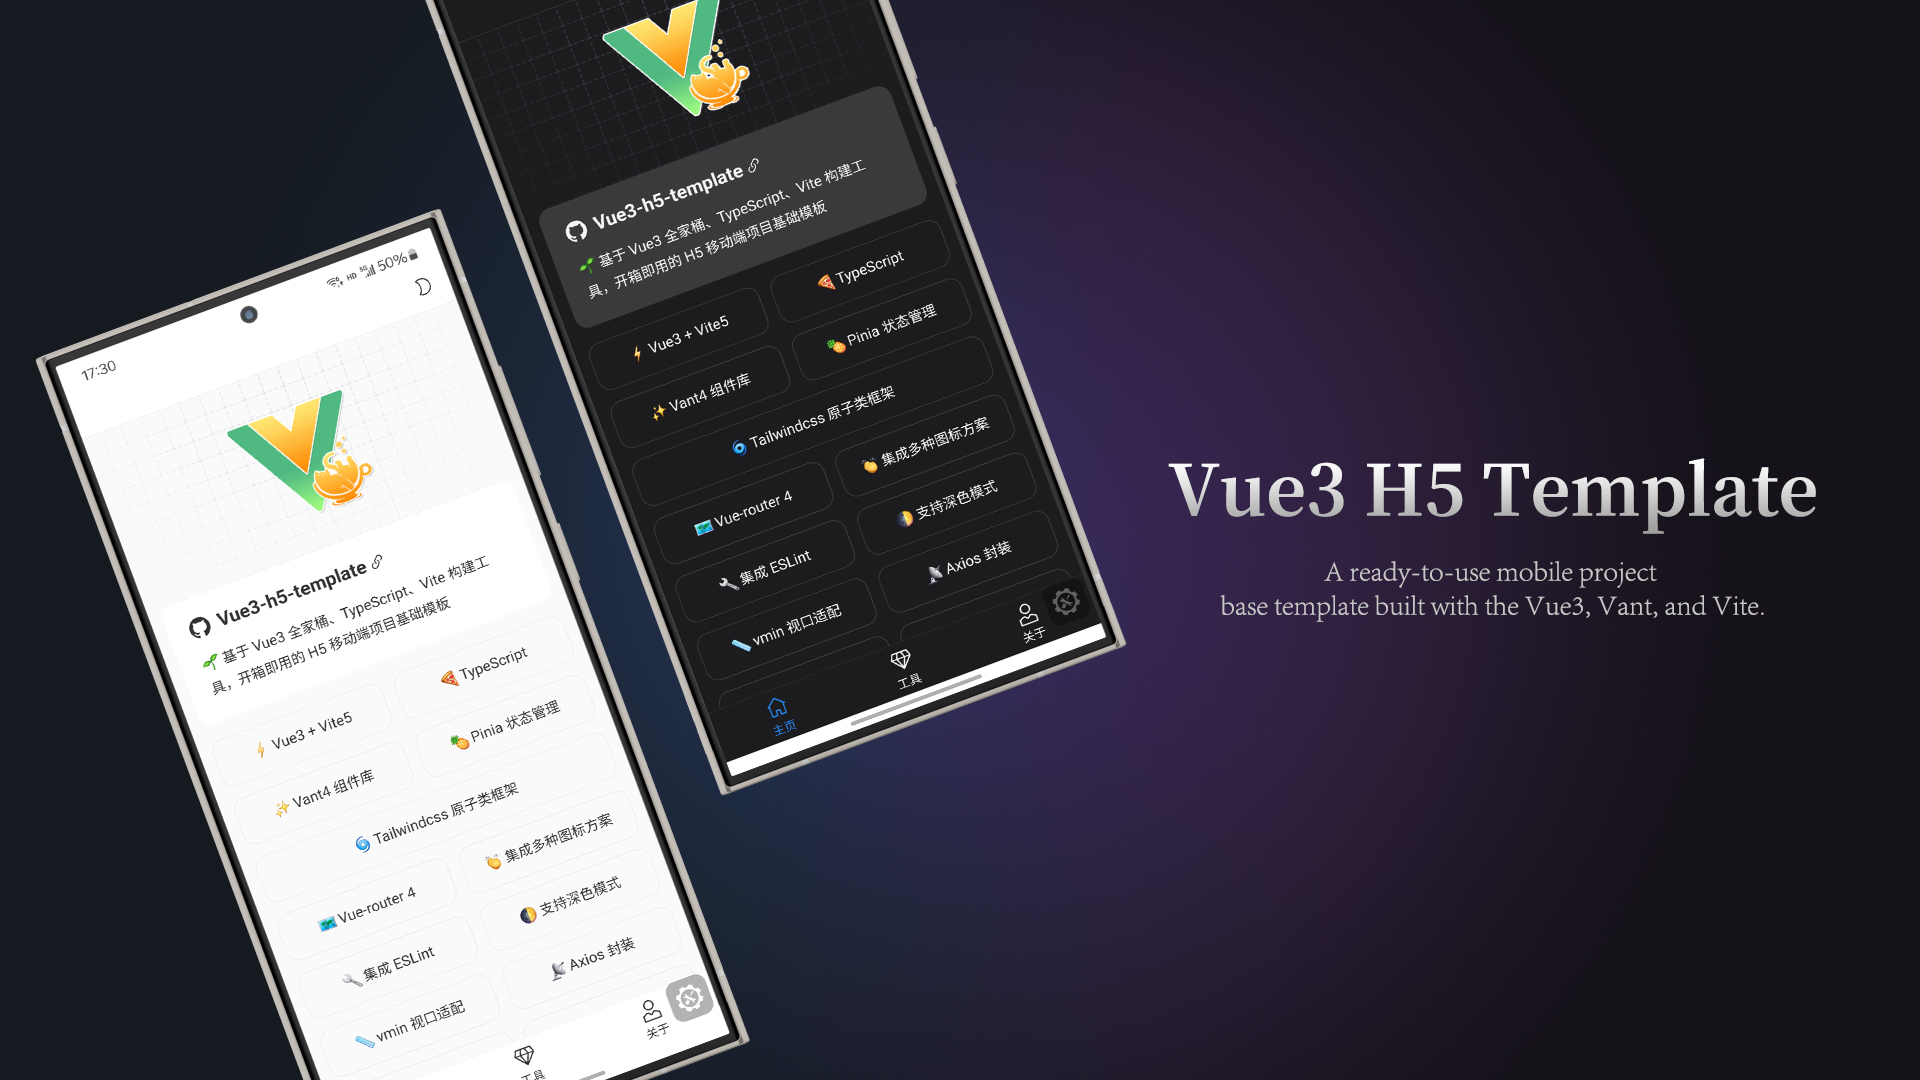
vue3-h5-template
vue3-h5-template 是一个面向移动端 H5 项目的启动模板,基于 Vue3、Vite 和 Vant4 构建,同时集成了 TypeScript、Tailwindcss、Pinia、Vue-router 等常用…
Vue · 启动器
tov-template
vite + vue3 + ts 开箱即用现代开发模板 | vite + vue3 + ts out-of-the-box modern development template
Vue · 启动器
shadcn-vue-landing-page
New design 🎉 Vue + Shadcn-vue + TypeScript + Tailwind. Landing page template ease-to-use
Vue · 企业官网