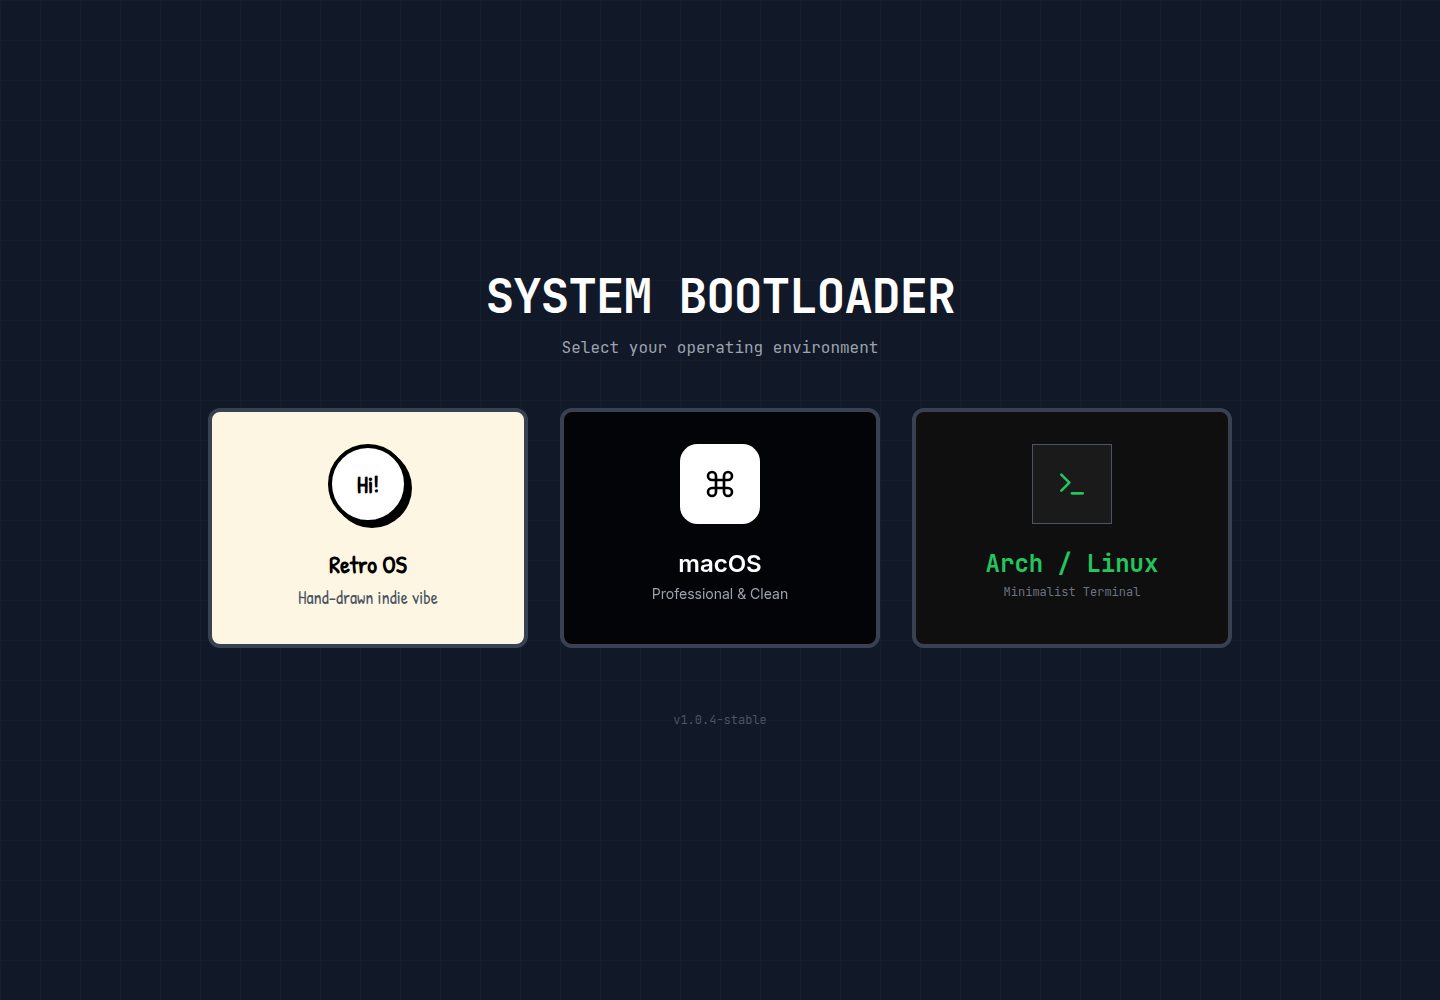
内置 Retro、MacOS、Linux 三套主题,访问者可自行切换
ViteReact作品集
Open-Bio-Template — Vite 作品集模板
作者 chenyibai9527
Open-Bio-Template 是一个基于 React + Vite 的个人主页模板,内置复古、MacOS、Linux 三套主题,通过编辑 config.ts 即可替换个人信息,并支持部署到 Vercel、Cloudflare Pages、Netlify 或 GitHub Pages。
看看你的网站会是什么样
浏览真实页面截图,比较内容排版与手机效果。点击下方缩略图切换,放大查看整页细节。
全部页面与视图 2
截图用于了解视觉与布局,交互效果请以实际项目为准。
采集于 2026-10-13查看来源
值得关注的模板亮点
从已有项目资料中,快速了解它的特点。
个人信息集中在 config.ts 中维护,无需改动组件代码
使用 React、Vite、TypeScript、Tailwind CSS 与 Framer Motion 构建
README 提供 Vercel、Cloudflare Pages、Netlify、GitHub Pages 四种部署路径
采用 MIT 许可,允许免费使用、修改、商用和分发代码副本
模板详细介绍
Open-Bio-Template 是一个面向个人简介与作品展示场景的前端模板,使用 React 与 Vite 构建,并采用 TypeScript、Tailwind CSS 与 Framer Motion。模板提供 Retro、MacOS、Linux 三种视觉主题,访问者可以在页面加载时选择自己喜欢的风格。内容维护集中在 config.ts 文件中,用户可修改姓名、职位、简介、头像链接、社交链接与项目列表等字段,无需改动组件代码。
部署方面,README 给出了 Vercel、Cloudflare Pages、Netlify 和 GitHub Pages 四种方式,其中 Vercel、Netlify 提供一键部署按钮,Cloudflare Pages 需要设置构建命令 npm run build 与输出目录 dist,GitHub Pages 则需要配置 GitHub Actions 工作流并开启相应权限。模板采用 MIT 许可,允许免费使用、修改、商用和分发代码副本,但演示图片、字体、图标等第三方素材需按各自许可单独核对,域名、托管等外部服务也可能产生费用。
ViteReact作品集
适合你的项目吗?
适用场景
- 搭建个人简介页,集中展示姓名、职位、简介与头像
- 整理社交链接与项目列表,作为作品集入口
- 希望用一套代码切换复古、MacOS 或 Linux 视觉风格的个人站点
- 将静态站点部署到 Vercel、Cloudflare Pages、Netlify 或 GitHub Pages
适合人群
- 需要快速上线个人主页、且不想深入前端开发的用户
- 偏好通过编辑单个配置文件来更新内容的维护者
- 希望站点具备多主题切换能力的个人站点作者
- 使用 React 与 Vite 技术栈、需要可自由修改代码的开发者
上手与定制指南
结合仓库当前版本的说明,按下面的资料检查内容、配置与运行要求。
- 1
点击仓库的 Use this template 生成自己的副本,或直接克隆仓库
- 2
编辑 config.ts 中的 userProfile、socials、projects 等字段替换示例数据
- 3
本地开发运行 npm install 后执行 npm run dev,构建生产版本使用 npm run build,输出目录为 dist
- 4
部署到 Cloudflare Pages 时需设置构建命令 npm run build、输出目录 dist
- 5
部署到 GitHub Pages 需配置 GitHub Actions 工作流,并在仓库设置中开启 Read and write permissions
授权与来源资料
使用条件与限制
免费使用 · 保留许可声明本次收录的是公开仓库中采用 MIT 许可的免费版本;免费范围为该版本代码,不代表外部服务或第三方素材免费。
使用时需要遵守
- 允许免费使用、修改、商用和分发该版本代码。
- 分发代码副本或实质性部分时,保留原作者版权声明和完整 MIT 许可声明。
- 代码按现状提供;担保与责任限制以原许可证及适用法律为准。
额外费用与待核对事项
- 演示图片、字体、图标及其他第三方素材需按各自许可核对,不能仅凭代码的 MIT 许可判断。
- 域名、托管、数据库、支付或 AI 等外部服务可能另外收费。
- 托管依赖第三方平台:Vercel 与 Netlify 仅免费套餐,Netlify 免费额度为每月 100GB 流量,超出或升级可能产生费用;GitHub Pages 与 Cloudflare Pages 免费。
- 使用 Vercel 一键部署需登录 GitHub 账号,属于外部服务账号要求。
- 部署到 Cloudflare Pages 需登录 GitHub 账号并授权第三方平台。
- GitHub Pages 部署需在仓库设置中开启 Actions 的读写权限,属于平台配置要求。
- 头像需自行上传到 Imgur、GitHub 等外部图床并获取直链,依赖第三方图片托管服务。
查看原文依据
Permission is hereby granted, free of charge
许可证原文
**100% FREE!** - GitHub hosting: Free - Vercel: Free tier (perfect for personal sites) - Cloudflare Pages: Free unlimited - Netlify: Free tier (100GB bandwidth/month)
README 原文
1. Click here: [](https://vercel.com/new/clone?repository-url=https://github.com/chenyibai9527/Open-Bio-Template) 2. Sign in with GitHub
README 原文
1. Go to [Cloudflare Pages](https://pages.cloudflare.com/) 2. Sign in with GitHub
README 原文
4. **Important:** Go to your repository **Settings** → **Actions** → **General** → **Workflow permissions** and select **Read and write permissions**
README 原文
https://github.com/chenyibai9527/Open-Bio-Template/blob/main/LICENSEhttps://github.com/chenyibai9527/Open-Bio-Template/blob/main/README.mdUpload your photo to: - [Imgur](https://imgur.com/) (Free, no account needed) - [GitHub](https://github.com/) (Use your GitHub profile picture) - Any image hosting service
README 原文
DeepSeek 根据仓库许可证和 README 整理 ·2026-10-13。结果仅覆盖已读取资料,依赖、图片、字体及后续条款变更以各自原文为准。
项目核对记录与介绍依据
模板资料
- 来源平台
- GitHub
- 资料与维护参考分
- 资料较完整 · 85 / 100
- 技术栈
- Vite · React
- 网站类型
- 作品集
这个分数如何计算
本站按许可资料(最高30分)、演示链接(12分)、预览图(10分)、Star数(15分)、记录的维护时间(15分)、描述完整度(8分)、功能记录(5分)和分类资料(5分)计算。它不是代码、安全或性能测试,也不是 Google 评分;有链接不代表已实测可用。
这个项目需要核对什么
- 记录的仓库更新时间
- 2025-11-28
- 截图检查日期
- 2026-10-13
已收录演示链接。请用你的内容与屏幕尺寸检查;有演示不代表表单、认证或支付已经可用。
目录记录的主要技术栈是 Vite。请通过依赖清单和锁文件核对实际版本与托管要求。这些说明基于收录资料,不代表代码审计或部署实测。
查看具体选型方法 →介绍的制作与核对状态
介绍由 AI 辅助整理目录与仓库资料。仓库作者不等于这篇介绍的审核者。
审核声明: [email protected] · 2026-10-13
查看当时使用的来源资料
SHA-256: 310448ebfe38a6897c178818dab87e044cc107ace87116574a87a53419cde651
2026-10-13T06:59:10.474Z
来源文件 / 仓库<div align="center">
# Open Bio Template
### *A Stunning Multi-Theme Personal Website Template*
[](https://opensource.org/licenses/MIT)
[](https://reactjs.org/)
[](https://vitejs.dev/)
[](http://makeapullrequest.com)
[English](#english) | [中文](#中文)
---
### Choose Your Style
<table>
<tr>
<td align="center"><b>Retro Theme</b><br/>Hand-drawn indie vibe</td>
<td align="center"><b>MacOS Theme</b><br/>Clean & Professional</td>
<td align="center"><b>Linux Theme</b><br/>Hacker Terminal</td>
</tr>
</table>
### Deploy in 30 Seconds
<table>
<tr>
<td align="center" width="33%">
<a href="https://vercel.com/new/clone?repository-url=https://github.com/chenyibai9527/Open-Bio-Template">
<img src="https://vercel.com/button" alt="Deploy with Vercel"/>
</a>
<br/>
<b>Vercel</b>
<br/>
<sub>Recommended</sub>
</td>
<td align="center" width="33%">
<a href="https://pages.cloudflare.com/">
<img src="https://img.shields.io/badge/Deploy%20to-Cloudflare%20Pages-F38020?style=for-the-badge&logo=cloudflare&logoColor=white" alt="Deploy to Cloudflare Pages"/>
</a>
<br/>
<b>Cloudflare Pages</b>
<br/>
<sub>Super Fast</sub>
</td>
<td align="center" width="33%">
<a href="https://app.netlify.com/start/deploy?repository=https://github.com/chenyibai9527/Open-Bio-Template">
<img src="https://www.netlify.com/img/deploy/button.svg" alt="Deploy to Netlify"/>
</a>
<br/>
<b>Netlify</b>
<br/>
<sub>Easy Setup</sub>
</td>
<td align="center" width="33%">
<a href="https://pages.github.com/">
<img src="https://img.shields.io/badge/Deploy%20to-GitHub%20Pages-24292e?style=for-the-badge&logo=github&logoColor=white" alt="Deploy to GitHub Pages"/>
</a>
<br/>
<b>GitHub Pages</b>
<br/>
<sub>Direct Integration</sub>
</td>
</tr>
</table>
</div>
---
## English
### Why Choose This Template?
- **3 Unique Themes** - Switch between Retro, MacOS, and Linux styles
- **Zero Coding Required** - Just edit one config file
- **Mobile Optimized** - Looks perfect on all devices
- **Lightning Fast** - Built with Vite for instant loading
- **100% Free Hosting** - Deploy to Vercel, Cloudflare, or Netlify
- **Animated & Interactive** - Smooth transitions with Framer Motion
---
### Quick Start (For Everyone!)
> **No coding experience needed!** Follow these 3 simple steps:
#### Step 1: Get Your Copy
Click the button below to create your own copy:
[](https://github.com/chenyibai9527/Open-Bio-Template/generate)
Or click the green **"Use this template"** button at the top of this page.
#### Step 2: Customize Your Info
1. Open the `config.ts` file in your repository
2. Click the **pencil icon** to edit
3. Replace the example data with your own information:
```typescript
export const userProfile = {
name: "Your Name", // Your name
role: "Your Title", // Your job title
bio: "Your bio here...", // Short bio
avatar_url: "https://...", // Your photo URL
// ... more fields
};
```
4. Scroll down and click **"Commit changes"**
#### Step 3: Deploy (FREE!)
Choose your favorite platform:
<details>
<summary><b>Option A: Vercel (Recommended - Easiest)</b></summary>
1. Click here: [](https://vercel.com/new/clone?repository-url=https://github.com/chenyibai9527/Open-Bio-Template)
2. Sign in with GitHub
3. Click **"Deploy"**
4. Wait 2 minutes
5. **Done!** Your site is live at `https://your-project.vercel.app`
**Bonus:** Every time you edit `config.ts`, Vercel automatically updates your site!
</details>
<details>
<summary><b>Option B: Cloudflare Pages (Super Fast)</b></summary>
1. Go to [Cloudflare Pages](https://pages.cloudflare.com/)
2. Sign in with GitHub
3. Click **"Create a project"**
4. Select your repository
5. Set build settings:
- **Build command:** `npm run build`
- **Build output directory:** `dist`
6. Click **"Save and Deploy"**
7. **Done!** Your site is live at `https://your-project.pages.dev`
</details>
<details>
<summary><b>Option C: Netlify (Also Great)</b></summary>
1. Click here: [](https://app.netlify.com/start/deploy?repository=https://github.com/chenyibai9527/Open-Bio-Template)
2. Sign in with GitHub
3. Click **"Connect to GitHub"**
4. Click **"Deploy site"**
5. **Done!** Your site is live!
</details>
<details>
<summary><b>Option D: GitHub Pages (Direct Integration)</b></summary>
1. Go to your repository **Settings** → **Pages**
2. Under **Source**, select **GitHub Actions**
3. Create `.github/workflows/deploy.yml` file in your repository:
```yaml
name: Deploy to GitHub Pages
on:
push:
branches: [ main ]
pull_request:
branches: [ main ]
# Sets permissions of the GITHUB_TOKEN to allow deployment to GitHub Pages
permissions:
contents: read
pages: write
id-token: write
# Allow only one concurrent deployment
concurrency:
group: "pages"
cancel-in-progress: false
jobs:
build-and-deploy:
runs-on: ubuntu-latest
steps:
- name: Checkout
uses: actions/checkout@v4
with:
fetch-depth: 0
- name: Setup Node.js
uses: actions/setup-node@v4
with:
node-version: '18'
cache: 'npm'
- name: Install dependencies
run: npm ci
- name: Build
run: npm run build
- name: Deploy to GitHub Pages
uses: peaceiris/actions-gh-pages@v4
if: github.ref == 'refs/heads/main'
with:
github_token: ${{ secrets.GITHUB_TOKEN }}
publish_dir: ./dist
publish_branch: gh-pages
force_orphan: true
```
4. **Important:** Go to your repository **Settings** → **Actions** → **General** → **Workflow permissions** and select **Read and write permissions**
5. Commit the workflow file
6. Go to **Actions** tab and wait for the workflow to complete
7. **Done!** Your site will be live at `https://yourusername.github.io/your-repo-name`
**Pro tip:** GitHub Pages automatically rebuilds whenever you push changes to the main branch!
**Troubleshooting:** If you still get permission errors, make sure:
1. Go to repository **Settings** → **Actions** → **General** → **Workflow permissions**
2. Select **Read and write permissions** and **Allow GitHub Actions to create and approve pull requests**
3. **Important:** Also check **Settings** → **Pages** → **Build and deployment** → **Source** is set to **GitHub Actions**
4. If problems persist, the workflow now uses GitHub's official deployment actions which should resolve most permission issues
5. For detailed troubleshooting, see [GitHub Pages Troubleshooting Guide](GITHUB_PAGES_TROUBLESHOOTING.md)
6. **Images not showing?** See [GitHub Pages Assets Guide](GITHUB_PAGES_ASSETS_GUIDE.md) for picture resource path fixes
</details>
---
### Pro Tips
| Tip | How To |
|-----|--------|
| **Change your avatar** | Update `avatar_url` in `config.ts` with your image URL |
| **Add social links** | Edit the `socials` array in `config.ts` |
| **Add projects** | Add items to the `projects` array |
| **Custom domain** | Add your domain in Vercel/Cloudflare settings |
| **Change theme** | Visitors can choose their favorite theme on load |
| **GitHub Pages** | Use the new GitHub Actions workflow for automatic deployment |
---
### FAQ
<details>
<summary><b>Where do I get an avatar URL?</b></summary>
Upload your photo to:
- [Imgur](https://imgur.com/) (Free, no account needed)
- [GitHub](https://github.com/) (Use your GitHub profile picture)
- Any image hosting service
Then copy the direct image link.
</details>
<details>
<summary><b>My changes aren't showing up!</b></summary>
1. Make sure you clicked **"Commit changes"** after editing
2. Wait 1-2 minutes for the deployment to complete
3. Hard refresh your browser (Ctrl+Shift+R or Cmd+Shift+R)
</details>
<details>
<summary><b>Can I use my own domain?</b></summary>
Yes! All platforms support custom domains:
- **Vercel:** Settings → Domains → Add
- **Cloudflare:** Custom Domains → Set up
- **Netlify:** Domain Settings → Add custom domain
</details>
<details>
<summary><b>Is this really free?</b></summary>
**100% FREE!**
- GitHub hosting: Free
- Vercel: Free tier (perfect for personal sites)
- Cloudflare Pages: Free unlimited
- Netlify: Free tier (100GB bandwidth/month)
</details>
---
### For Developers
```bash
# Clone and install
git clone https://github.com/chenyibai9527/Open-Bio-Template.git
cd open-bio-template
npm install
# Start dev server
npm run dev
# Build for production
npm run build
```
**Tech Stack:** React 18 + TypeScript + Vite + Tailwind CSS + Framer Motion
---
## 中文
### 为什么选择这个模板?
- **3 种独特主题** - 复古、MacOS、Linux 风格随心切换
- **零代码要求** - 只需编辑一个配置文件
- **移动端优化** - 在所有设备上完美显示
- **闪电般快速** - 使用 Vite 构建,瞬间加载
- **100% 免费托管** - 部署到 Vercel、Cloudflare 或 Netlify
- **动画交互** - 使用 Framer Motion 实现流畅过渡
---
### 快速开始(人人都会!)
> **不需要任何编程经验!** 只需 3 步:
#### 第 1 步:获取你的副本
点击下方按钮创建你自己的副本:
[](https://github.com/chenyibai9527/Open-Bio-Template/generate)
或点击页面顶部的绿色 **"Use this template"** 按钮。
#### 第 2 步:修改你的信息
1. 在你的仓库中打开 `config.ts` 文件
2. 点击 **铅笔图标** 开始编辑
3. 把示例数据替换成你自己的信息:
```typescript
export const userProfile = {
name: "你的名字", // 填写你的名字
role: "你的职位", // 填写你的职位
bio: "你的简介...", // 简短介绍
avatar_url: "https://...", // 你的头像链接
// ... 更多字段
};
```
4. 向下滚动并点击 **"Commit changes"**(提交更改)
#### 第 3 步:部署(完全免费!)
选择你喜欢的平台:
<details>
<summary><b>方案 A:Vercel(推荐 - 最简单)</b></summary>
1. 点击这里:[](https://vercel.com/new/clone?repository-url=https://github.com/chenyibai9527/Open-Bio-Template)
2. 使用 GitHub 账号登录
3. 点击 **"Deploy"**(部署)
4. 等待 2 分钟
5. **完成!** 你的网站已上线:`https://你的项目名.vercel.app`
**福利:** 每次你修改 `config.ts`,Vercel 会自动更新你的网站!
</details>
<details>
<summary><b>方案 B:Cloudflare Pages(超快速度)</b></summary>
1. 访问 [Cloudflare Pages](https://pages.cloudflare.com/)
2. 使用 GitHub 账号登录
3. 点击 **"Create a project"**(创建项目)
4. 选择你的仓库
5. 设置构建选项:
- **构建命令(Build command):** `npm run build`
- **构建输出目录(Build output directory):** `dist`
6. 点击 **"Save and Deploy"**(保存并部署)
7. **完成!** 你的网站已上线:`https://你的项目名.pages.dev`
</details>
<details>
<summary><b>方案 C:Netlify(也很棒)</b></summary>
1. 点击这里:[](https://app.netlify.com/start/deploy?repository=https://github.com/chenyibai9527/Open-Bio-Template)
2. 使用 GitHub 账号登录
3. 点击 **"Connect to GitHub"**(连接到 GitHub)
4. 点击 **"Deploy site"**(部署网站)
5. **完成!** 你的网站已上线!
</details>
<details>
<summary><b>方案 D:GitHub Pages(直接集成)</b></summary>
1. 进入你的仓库 **Settings(设置)** → **Pages(页面)**
2. 在 **Source(源)** 下,选择 **GitHub Actions**
3. 在你的仓库中创建 `.github/workflows/deploy.yml` 文件:
```yaml
name: Deploy to GitHub Pages
on:
push:
branches: [ main ]
pull_request:
branches: [ main ]
# 设置 GITHUB_TOKEN 权限,允许部署到 GitHub Pages
permissions:
contents: read
pages: write
id-token: write
# 允许并发部署
concurrency:
group: "pages"
cancel-in-progress: false
jobs:
build-and-deploy:
runs-on: ubuntu-latest
steps:
- name: Checkout
uses: actions/checkout@v4
with:
fetch-depth: 0
- name: Setup Node.js
uses: actions/setup-node@v4
with:
node-version: '18'
cache: 'npm'
- name: Install dependencies
run: npm ci
- name: Build
run: npm run build
- name: Deploy to GitHub Pages
uses: peaceiris/actions-gh-pages@v4
if: github.ref == 'refs/heads/main'
with:
github_token: ${{ secrets.GITHUB_TOKEN }}
publish_dir: ./dist
publish_branch: gh-pages
force_orphan: true
```
4. **重要:** 进入仓库 **Settings(设置)** → **Actions(操作)** → **General(常规)** → **Workflow permissions(工作流权限)** 并选择 **Read and write permissions(读写权限)**
5. 提交工作流文件
6. 进入 **Actions(操作)** 标签页,等待工作流完成
7. **完成!** 你的网站将在 `https://你的用户名.github.io/你的仓库名` 上线
**专业提示:** 每当你推送更改到主分支时,GitHub Pages 会自动重新构建!
**故障排除:** 如果你仍然遇到权限错误,请确保:
1. 进入仓库 **Settings(设置)** → **Actions(操作)** → **General(常规)** → **Workflow permissions(工作流权限)**
2. 选择 **Read and write permissions(读写权限)** 和 **Allow GitHub Actions to create和批准拉取请求)**
3. **重要:** 同时检查 **Settings(设置)** → **Pages(页面)** → **Build and deployment(构建和部署)** → **Source(源)** 设置为 **GitHub Actions**
4. 如果问题仍然存在,现在的工作流使用了 GitHub 的官方部署 actions,应该能解决大部分权限问题
5. 详细故障排除请参考 [GitHub Pages 故障排除指南](GITHUB_PAGES_TROUBLESHOOTING.md)
6. **图片不显示?** 请参考 [GitHub Pages 资源指南](GITHUB_PAGES_ASSETS_GUIDE.md) 获取图片路径修复方案
</details>
---
### 实用技巧
| 技巧 | 如何操作 |
|-----|---------|
| **更换头像** | 在 `config.ts` 中更新 `avatar_url` 为你的图片链接 |
| **添加社交链接** | 编辑 `config.ts` 中的 `socials` 数组 |
| **添加项目** | 在 `projects` 数组中添加项目 |
| **自定义域名** | 在 Vercel/Cloudflare 设置中添加你的域名 |
| **切换主题** | 访客可以在加载时选择他们喜欢的主题 |
| **GitHub Pages** | 使用新的 GitHub Actions 工作流实现自动部署 |
---
### 常见问题
<details>
<summary><b>如何获取头像链接?</b></summary>
上传你的照片到:
- [Imgur](https://imgur.com/)(免费,无需注册)
- [GitHub](https://github.com/)(使用你的 GitHub 头像)
- 任何图片托管服务
然后复制直接图片链接。
</details>
<details>
<summary><b>我的修改没有显示出来!</b></summary>
1. 确保编辑后点击了 **"Commit changes"**(提交更改)
2. 等待 1-2 分钟让部署完成
3. 强制刷新浏览器(Ctrl+Shift+R 或 Cmd+Shift+R)
</details>
<details>
<summary><b>可以使用自己的域名吗?</b></summary>
可以!所有平台都支持自定义域名:
- **Vercel:** 设置 → 域名 → 添加
- **Cloudflare:** 自定义域名 → 设置
- **Netlify:** 域名设置 → 添加自定义域名
</details>
<details>
<summary><b>这真的免费吗?</b></summary>
**100% 免费!**
- GitHub 托管:免费
- Vercel:免费套餐(非常适合个人网站)
- Cloudflare Pages:无限制免费
- Netlify:免费套餐(每月 100GB 流量)
</details>
---
### 开发者指南
```bash
# 克隆并安装
git clone https://github.com/chenyibai9527/Open-Bio-Template.git
cd open-bio-template
npm install
# 启动开发服务器
npm run dev
# 构建生产版本
npm run build
```
**技术栈:** React 18 + TypeScript + Vite + Tailwind CSS + Framer Motion
## 🔄 更新日志 (Changelog)
### v1.1.0 (2025-11-28)
- ✨ 新增 GitHub Pages 一键部署支持
- 📝 完善部署文档,新增 GitHub Actions 工作流配置
- 🛠️ 优化 Vite 配置,支持 GitHub Pages 路径
- 🎨 更新 README 文档结构
- 📦 版本号升级至 1.1.0
- 🐛 修复 Tailwind CSS 生产构建配置问题
- 🔧 修复资源路径和样式加载问题
- 🎯 **重要修复**: 降级 Tailwind CSS v4→v3,完全恢复自定义样式兼容性
- 📸 **新增**: 静态资源路径工具函数,完美解决 GitHub Pages 图片显示问题
- 🎯 **重要修复**: 降级 Tailwind CSS v4→v3,完全恢复自定义样式兼容性
- 🐛 修复 Tailwind CSS 生产构建配置问题
- 🔧 修复资源路径和样式加载问题
### v1.0.0 (2025-11-28)
- 🎉 初始版本发布
- 🎨 三种主题风格:复古、MacOS、Linux
- 📱 完全响应式设计
- ⚡ 基于 Vite 的快速构建
- 🎯 零代码配置,只需修改 config.ts
- 🚀 支持 Vercel、Cloudflare Pages、Netlify 部署
---
<div align="center">
### Star This Repo If You Like It!
Made with love by the Open Source Community
[](https://github.com/chenyibai9527/Open-Bio-Template)
[](https://github.com/chenyibai9527/Open-Bio-Template/fork)
[Report Bug](https://github.com/chenyibai9527/Open-Bio-Template/issues) · [Request Feature](https://github.com/chenyibai9527/Open-Bio-Template/issues)
</div>
看看同类模板
对比同技术栈与用途的模板,找到更适合的视觉与内容结构。
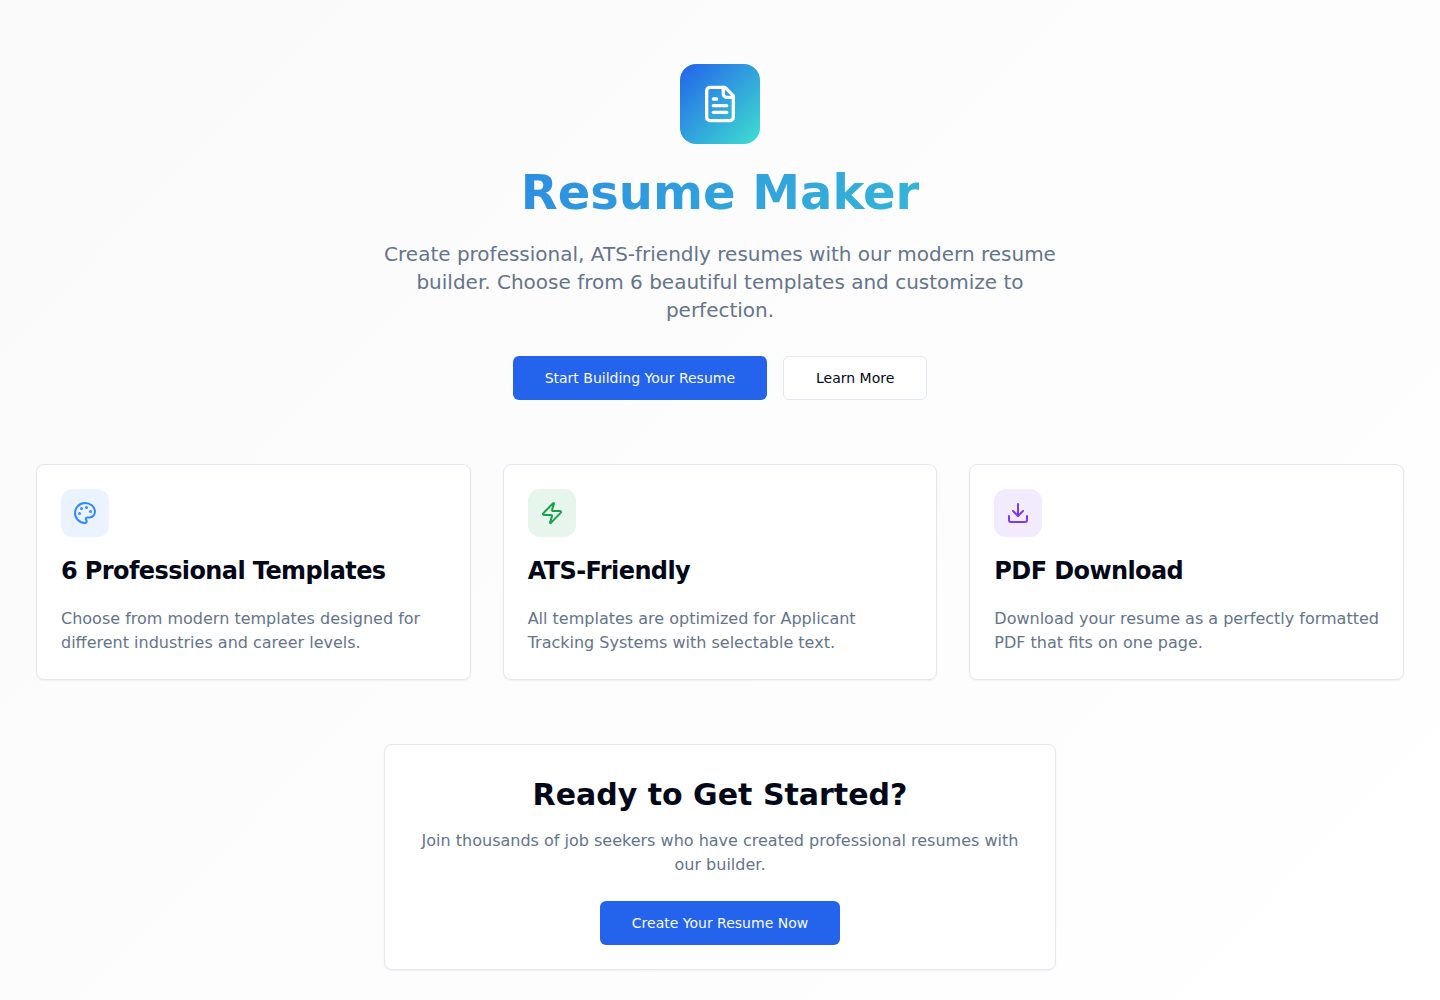
Resumify
Free, privacy-first resume builder — 6 ATS-friendly templates, full customization, JSON import/export. No sign…
Vite · 作品集

showlit
✨ Showlit - A modern and clean template for creating a personal website
Vite · 作品集

folium
Professional developer portfolio boilerplate (React • TypeScript • Tailwind • Vite) with simple content custom…
Vite · 作品集
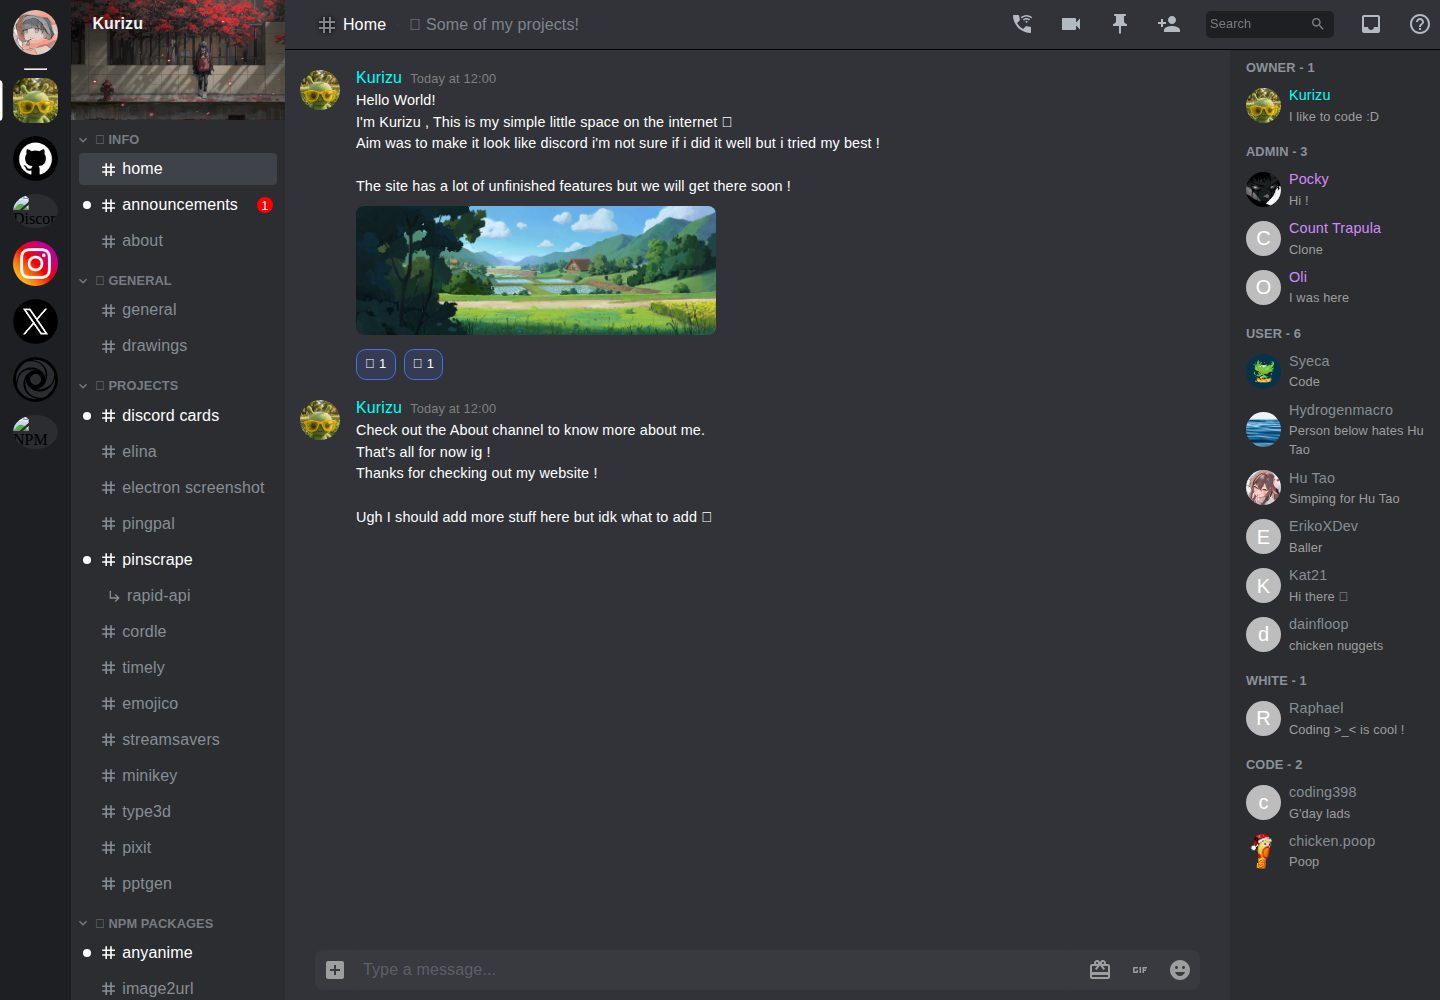
kurizu-discord
A Discord themed website built using React & Vite
Vite · 作品集
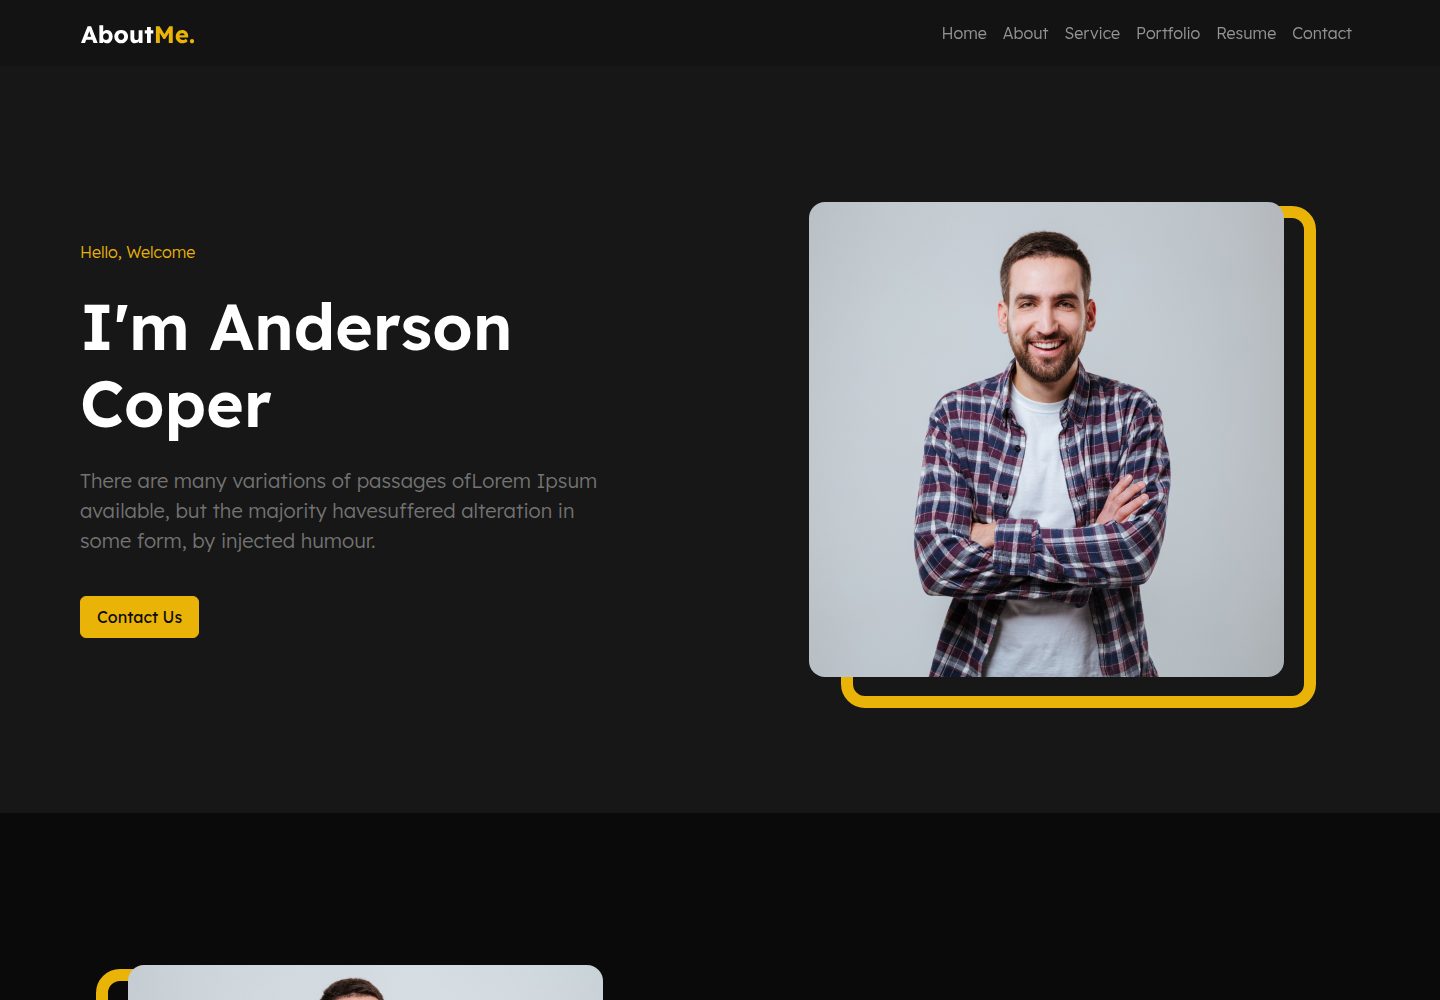
about-me-personal-portfolio-website-template
Simple Personal Website Template, built with bootstrap and vite js project.
Vite · 作品集

HackFolio
A high-performance, SEO-optimized hacker-themed portfolio website tailored for for ethical hackers, penetratio…
Vite · 作品集